8 minutes
Surveys in Xello help educators track student progress towards their goals, and can help educators to provide
Build your survey with a variety of different types of questions, choose between making the questions required or optional, include a due date, and even add images and videos.
Admin can create a survey and assign it to groups at the
Create the survey
Build your survey by adding title details, sections, instructions, and questions.
To create a new survey:
-
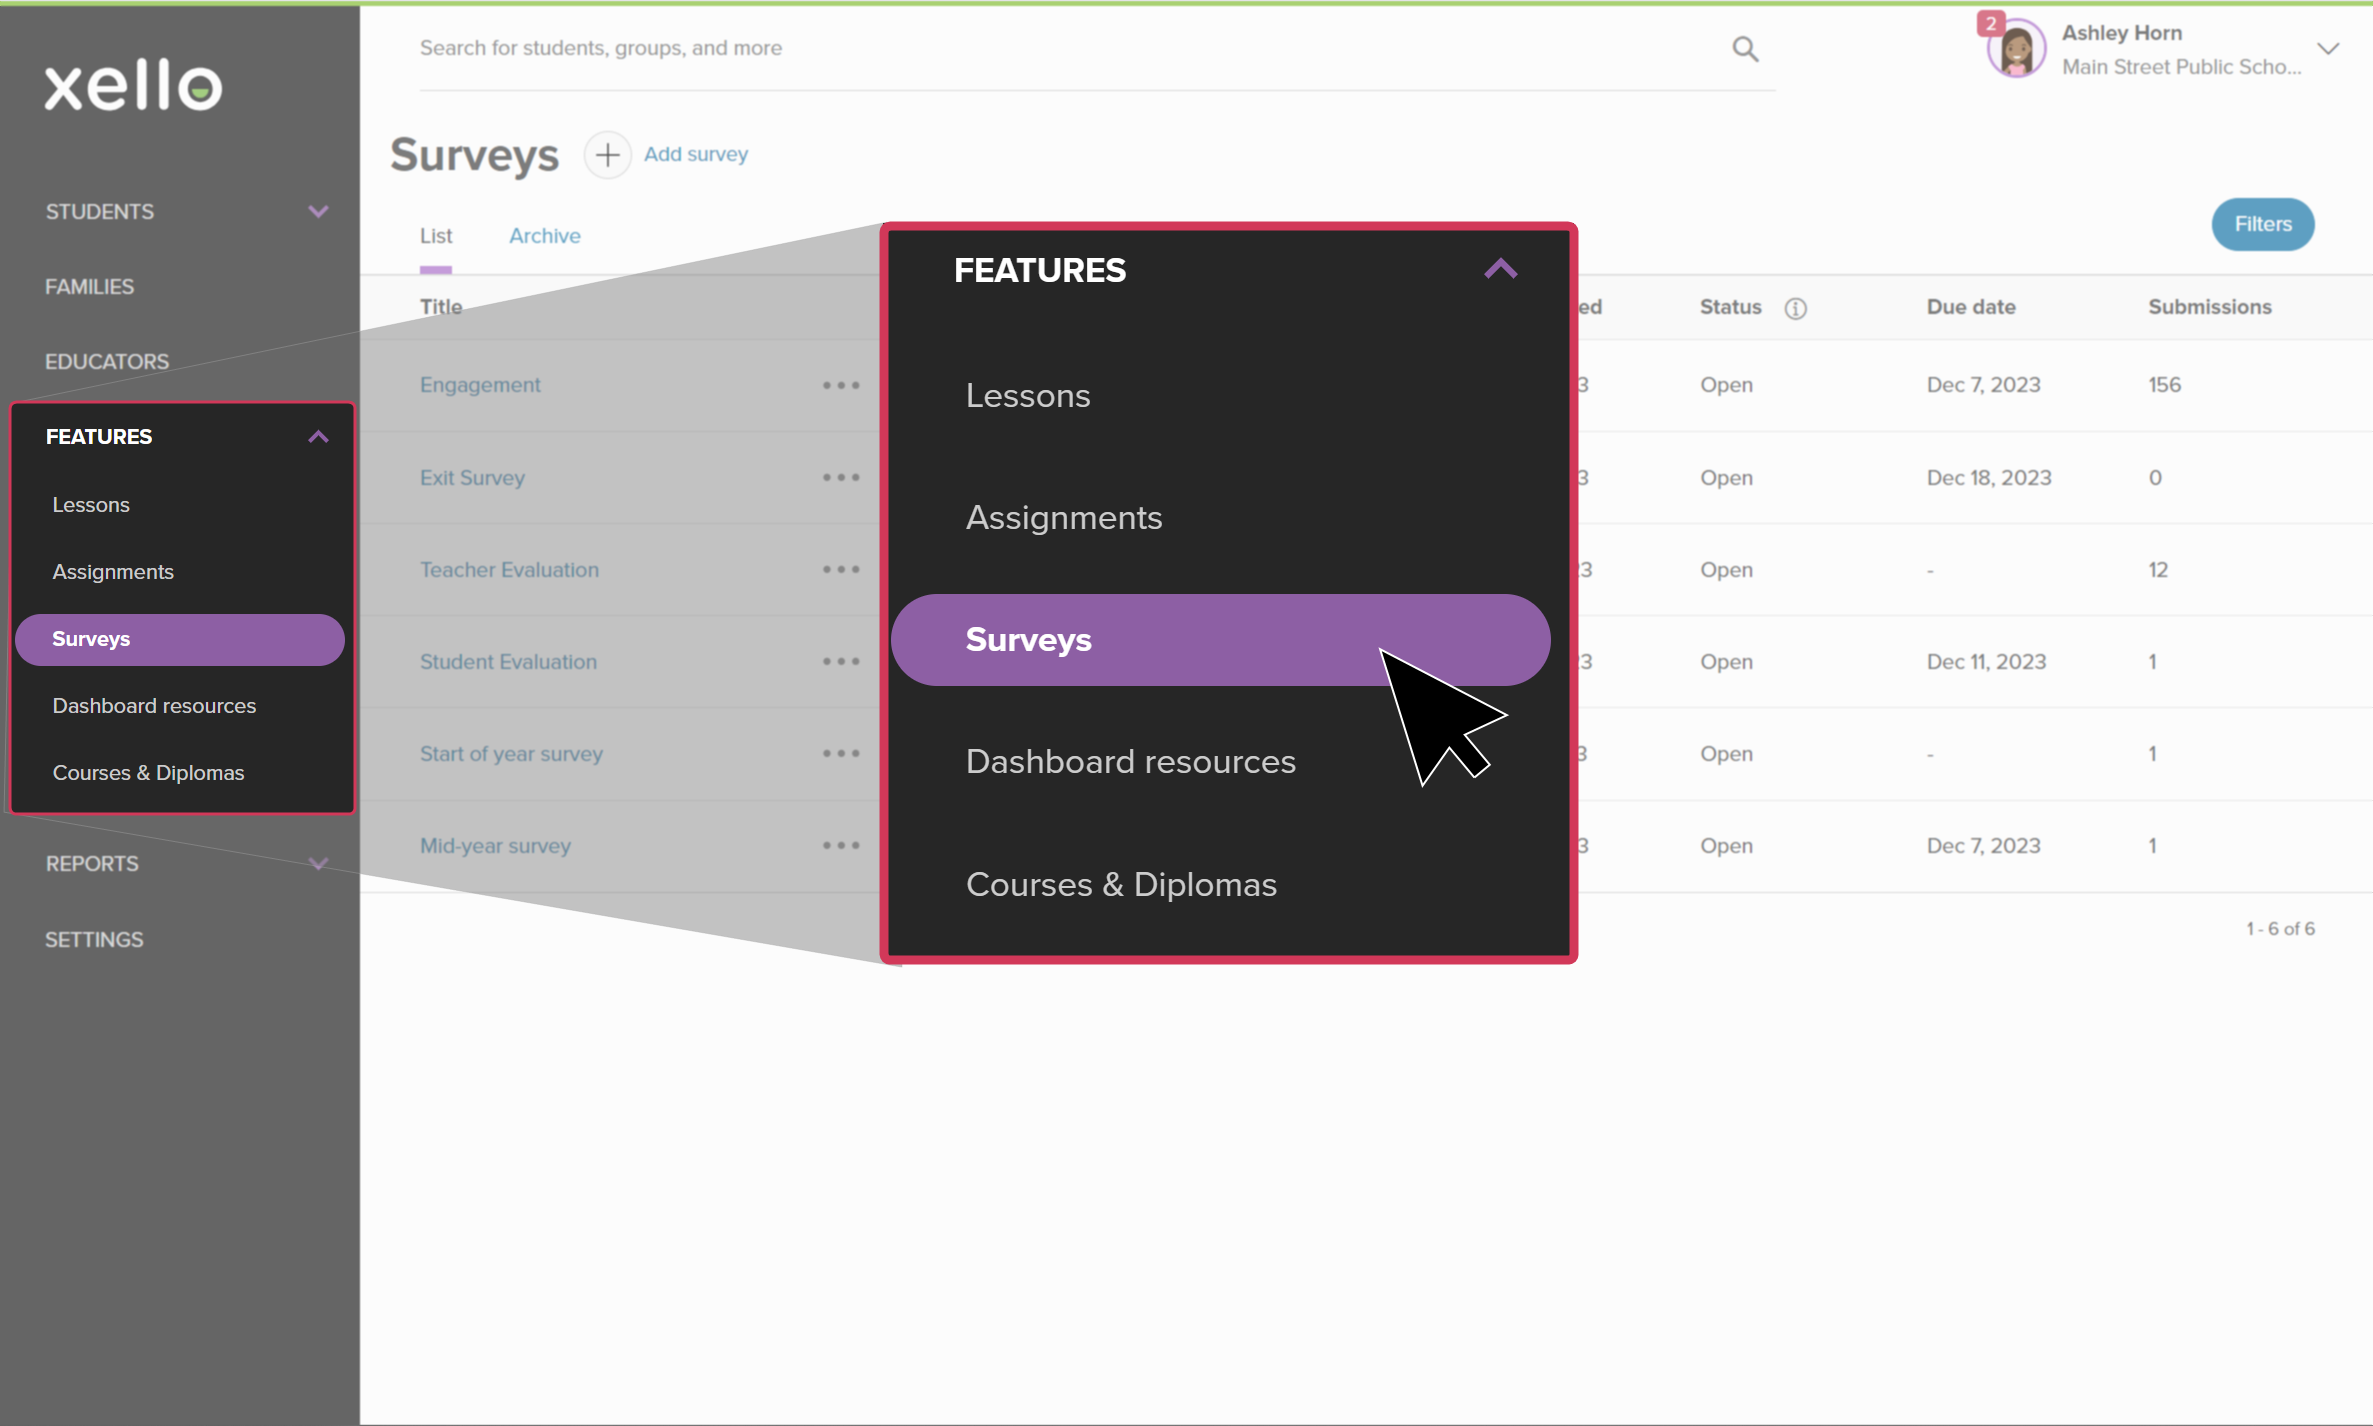
From your educator account, click Features and select Surveys.
 Click to enlarge
-
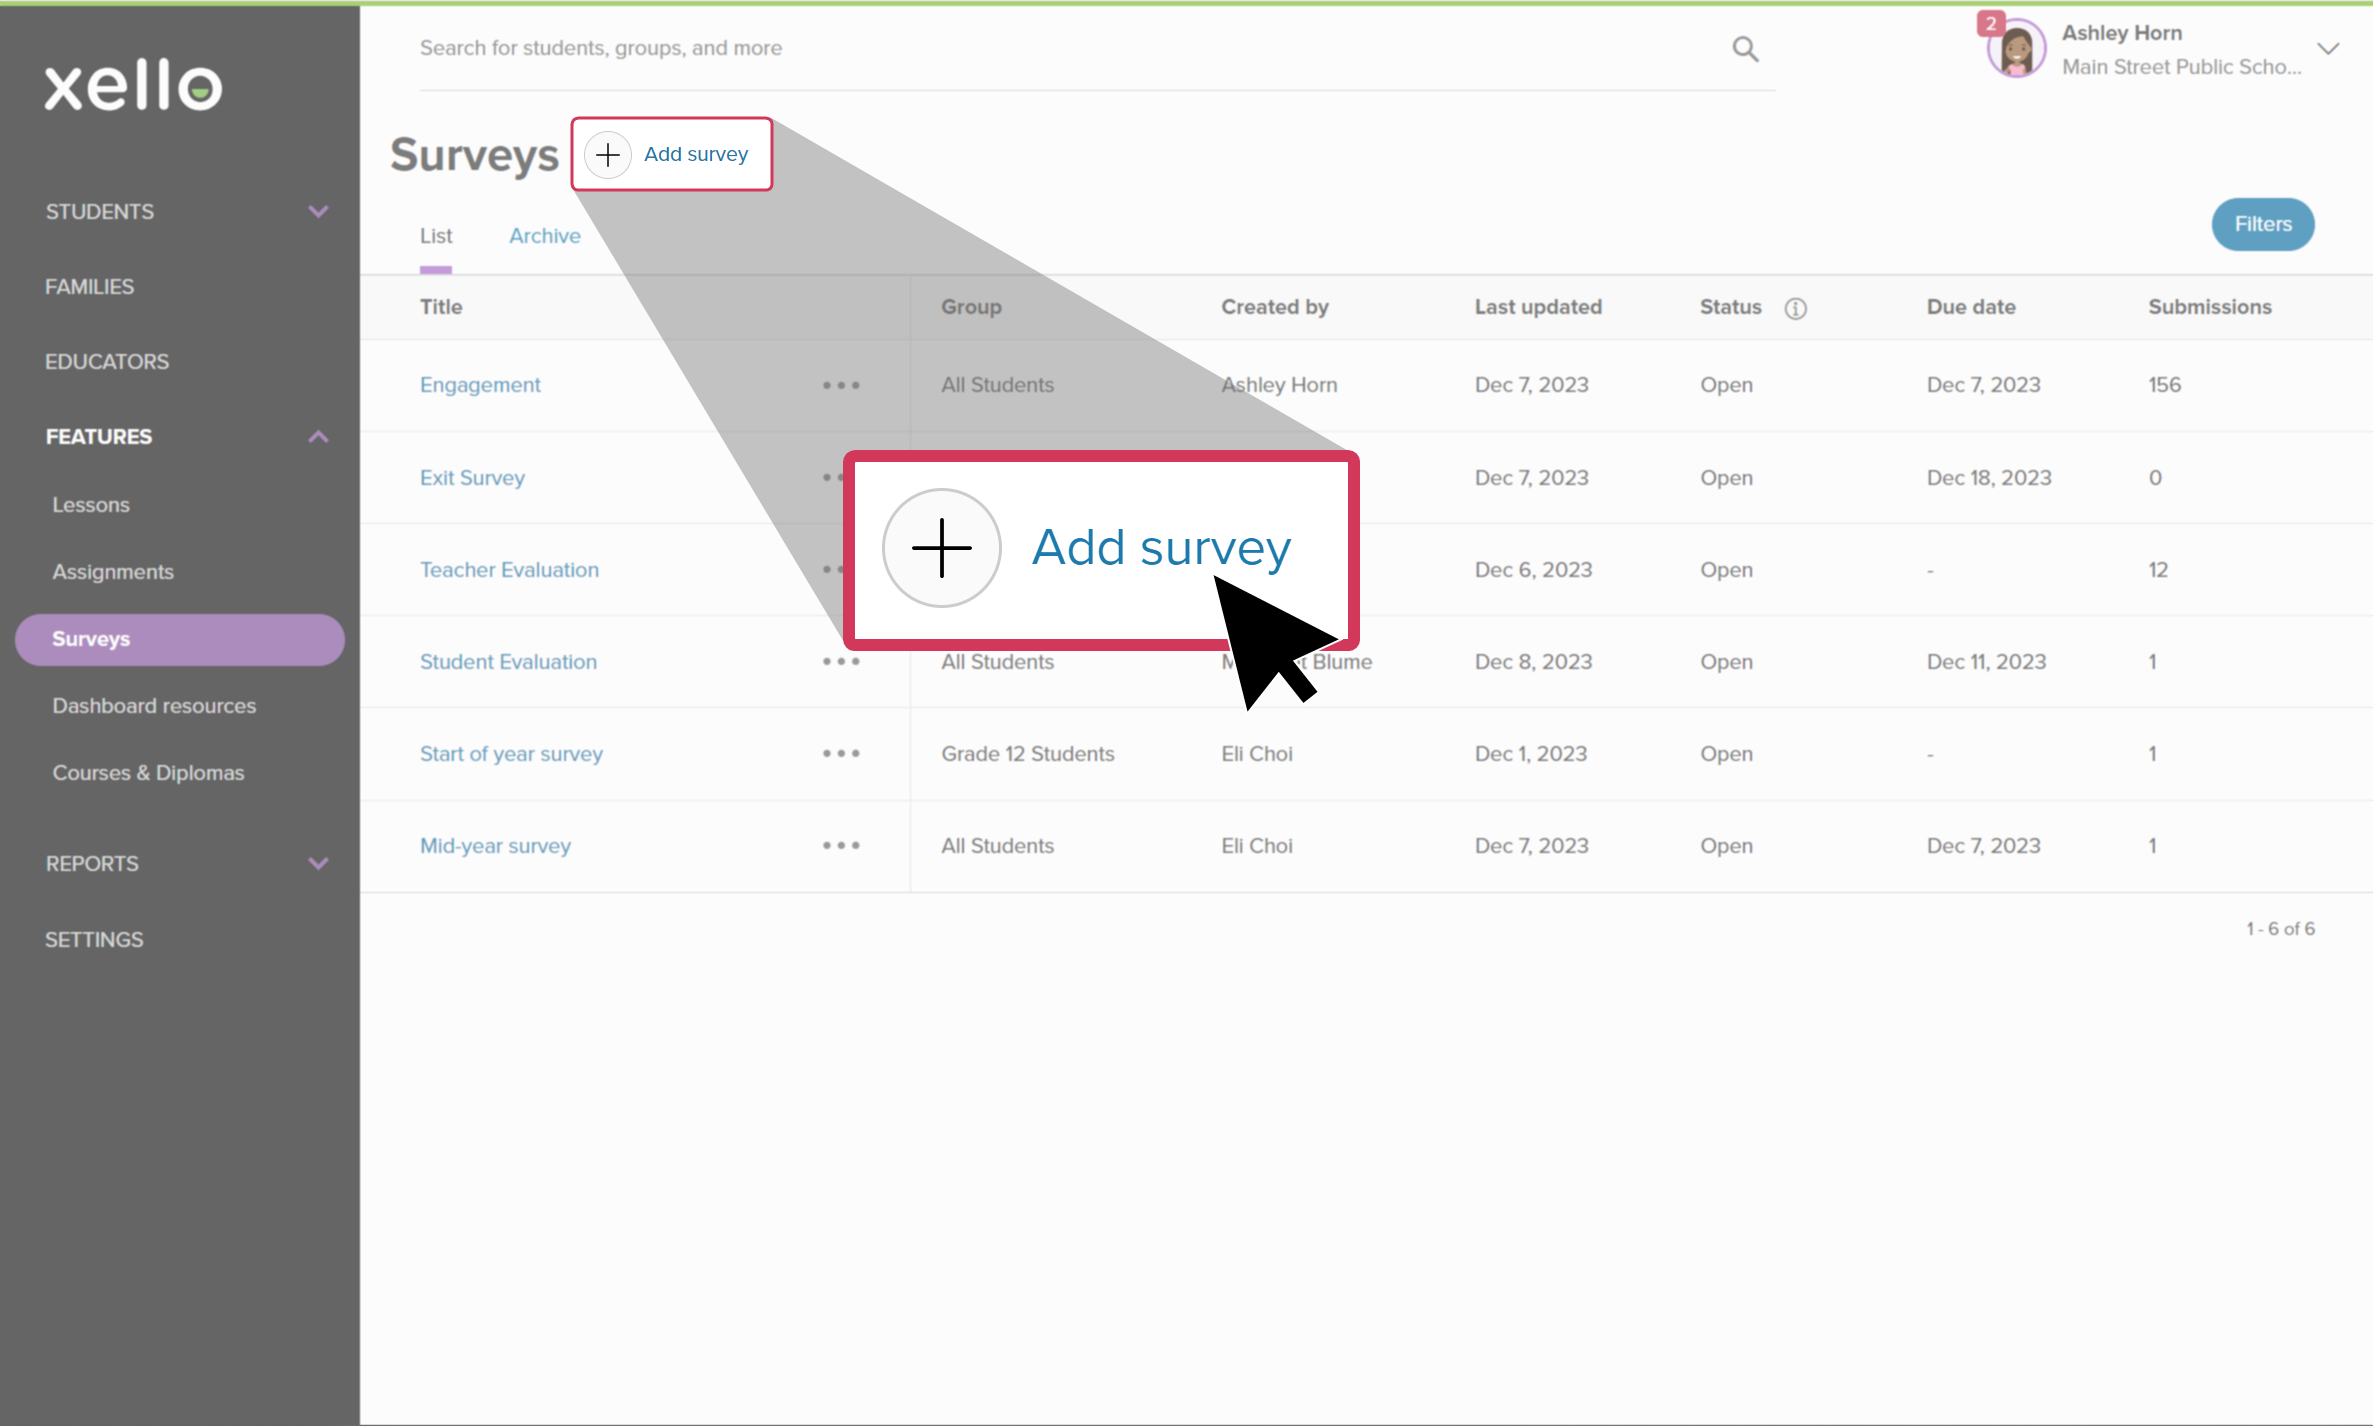
Click Add survey.
 Click to enlarge
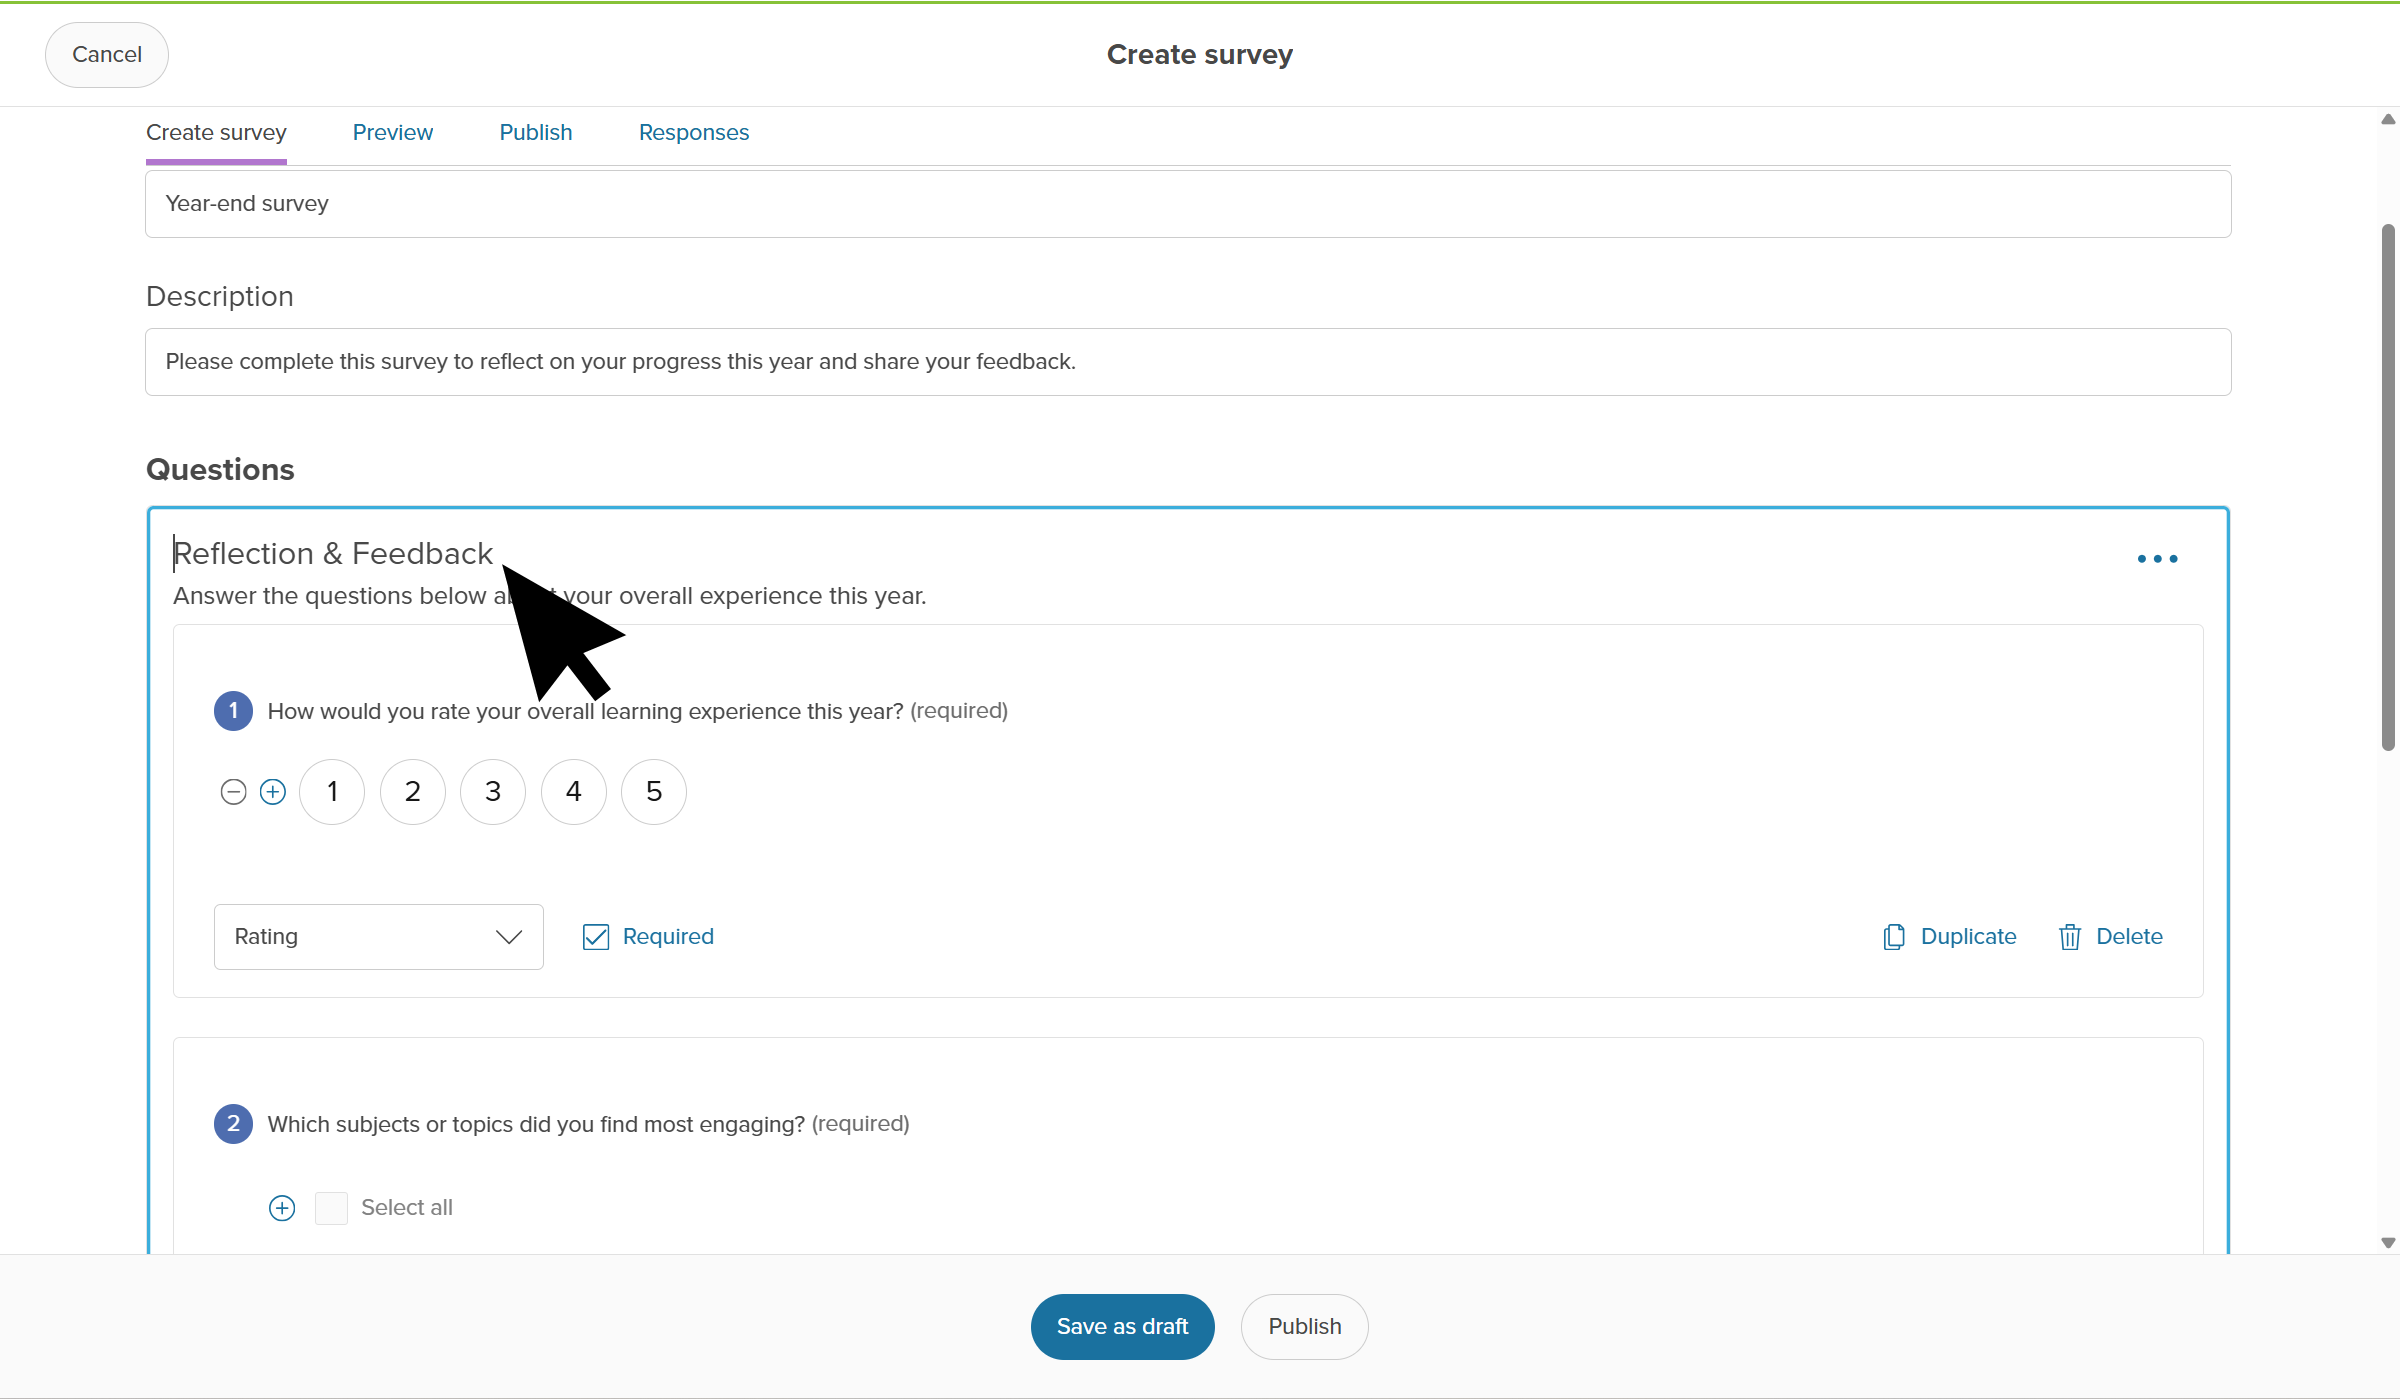
- Fill out the Create survey details. This includes a title, and a brief description of the survey.
- In the Questions section, you can break your survey into sections, each with their own set of questions, a title, and a description. This is optional.
 Click to enlarge
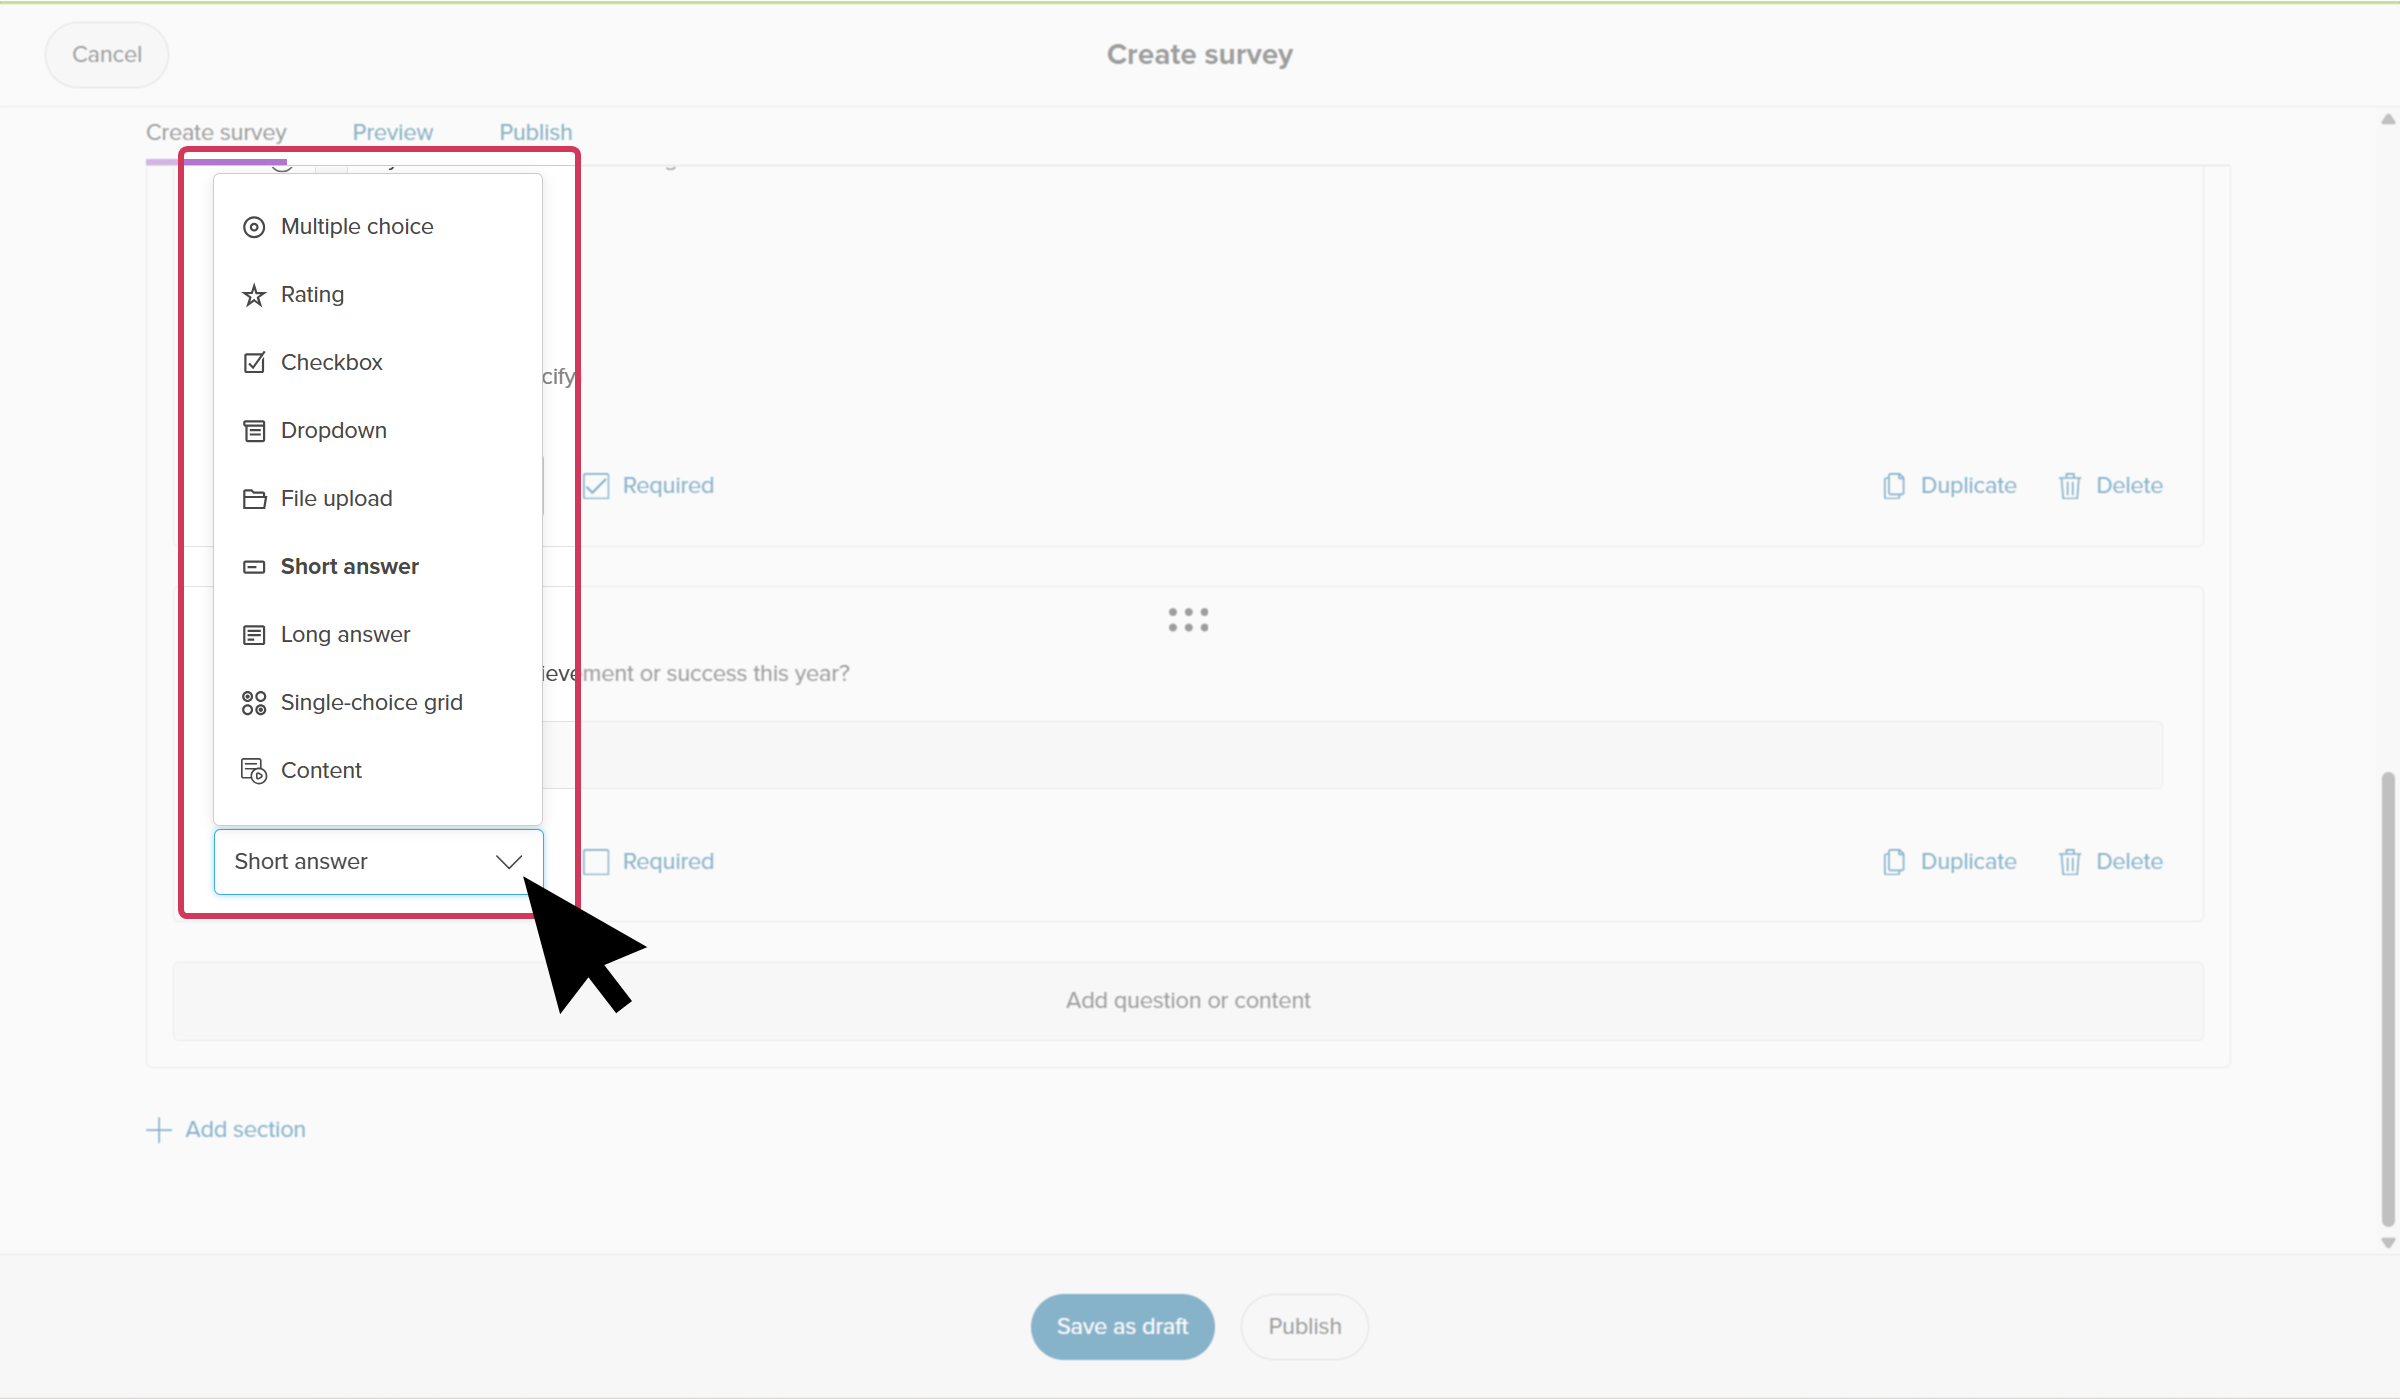
- To begin adding questions, write out your question, and use the dropdown to select a different type of question. Check out Types of questions below to learn about the different questions you can include, and rules you can create.
 Click to enlarge
 Note: No need to worry about adding standard student data (name, ID, grade, and school). These are automatically included in the survey results for you.
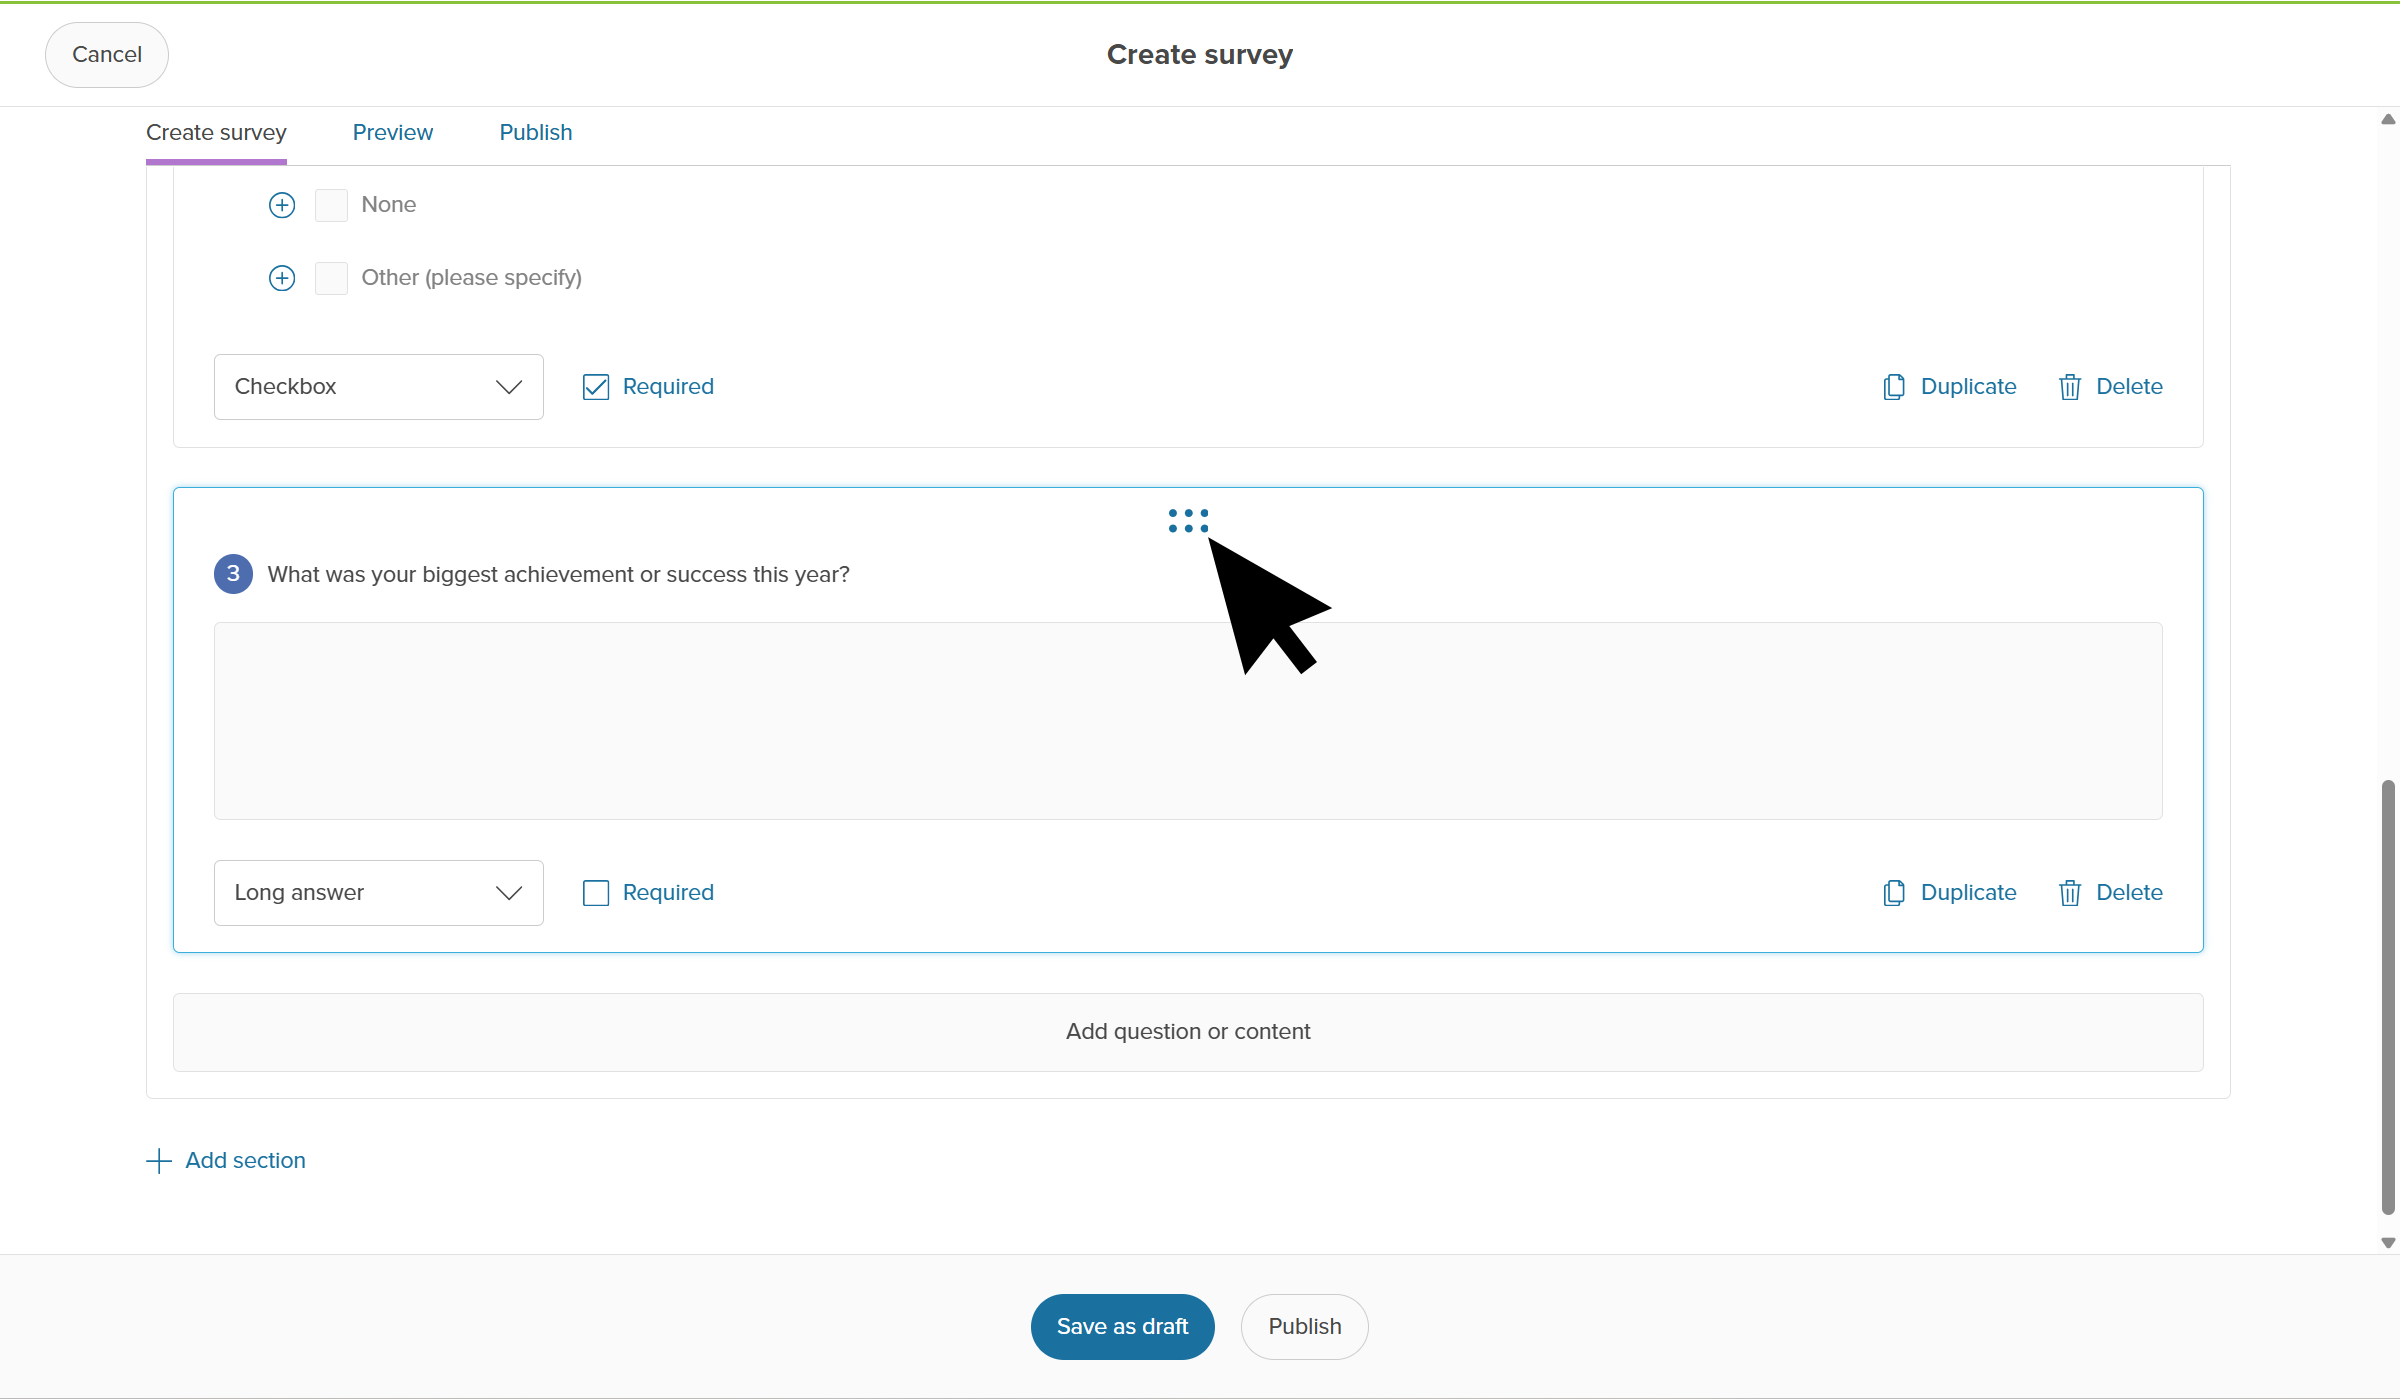
 - Click Add question or content to continue adding questions.
- Use the six dots to drag and drop to change the order of your questions.
 Click to enlarge
- Click Save as draft at any time to save your progress without publishing.
Types of questions
There are several different kinds of questions and content you can add.
| Question type | Action required of the student |
|---|---|
|
Multiple choice |
Students choose one from a selection of choices. You can Add rules to skip sections or guide students to different questions based on their answer. |
|
Rating |
Students give a rating. You can add ratings with a minimum of 2 and maximum of 20. |
|
Checkbox |
Students select up to multiple options. |
|
Dropdown |
Students click the dropdown to choose an option. You can add "Other (please specify)" as an option, which opens a textbox for them to type their answer. You can also Add rules to skip sections or guide students to different questions based on their answer. |
|
File upload |
Students are required to upload a file as their response. They can upload a file from their local drive, OneDrive, Google Drive, or Dropbox. |
|
Short answer |
Students type out an answer with a maximum of 250 characters. |
|
Long answer |
Students type out an answer with a maximum of 10,000 characters. |
|
Single-choice grid |
Students choose one answer for each statement from a grid of rows and columns. |
|
Content |
A place for you to add text, links, or images to share instructions or resources. |
Add rules
When adding a multiple choice or dropdown question, you can Add rules to the question. This allows you to further
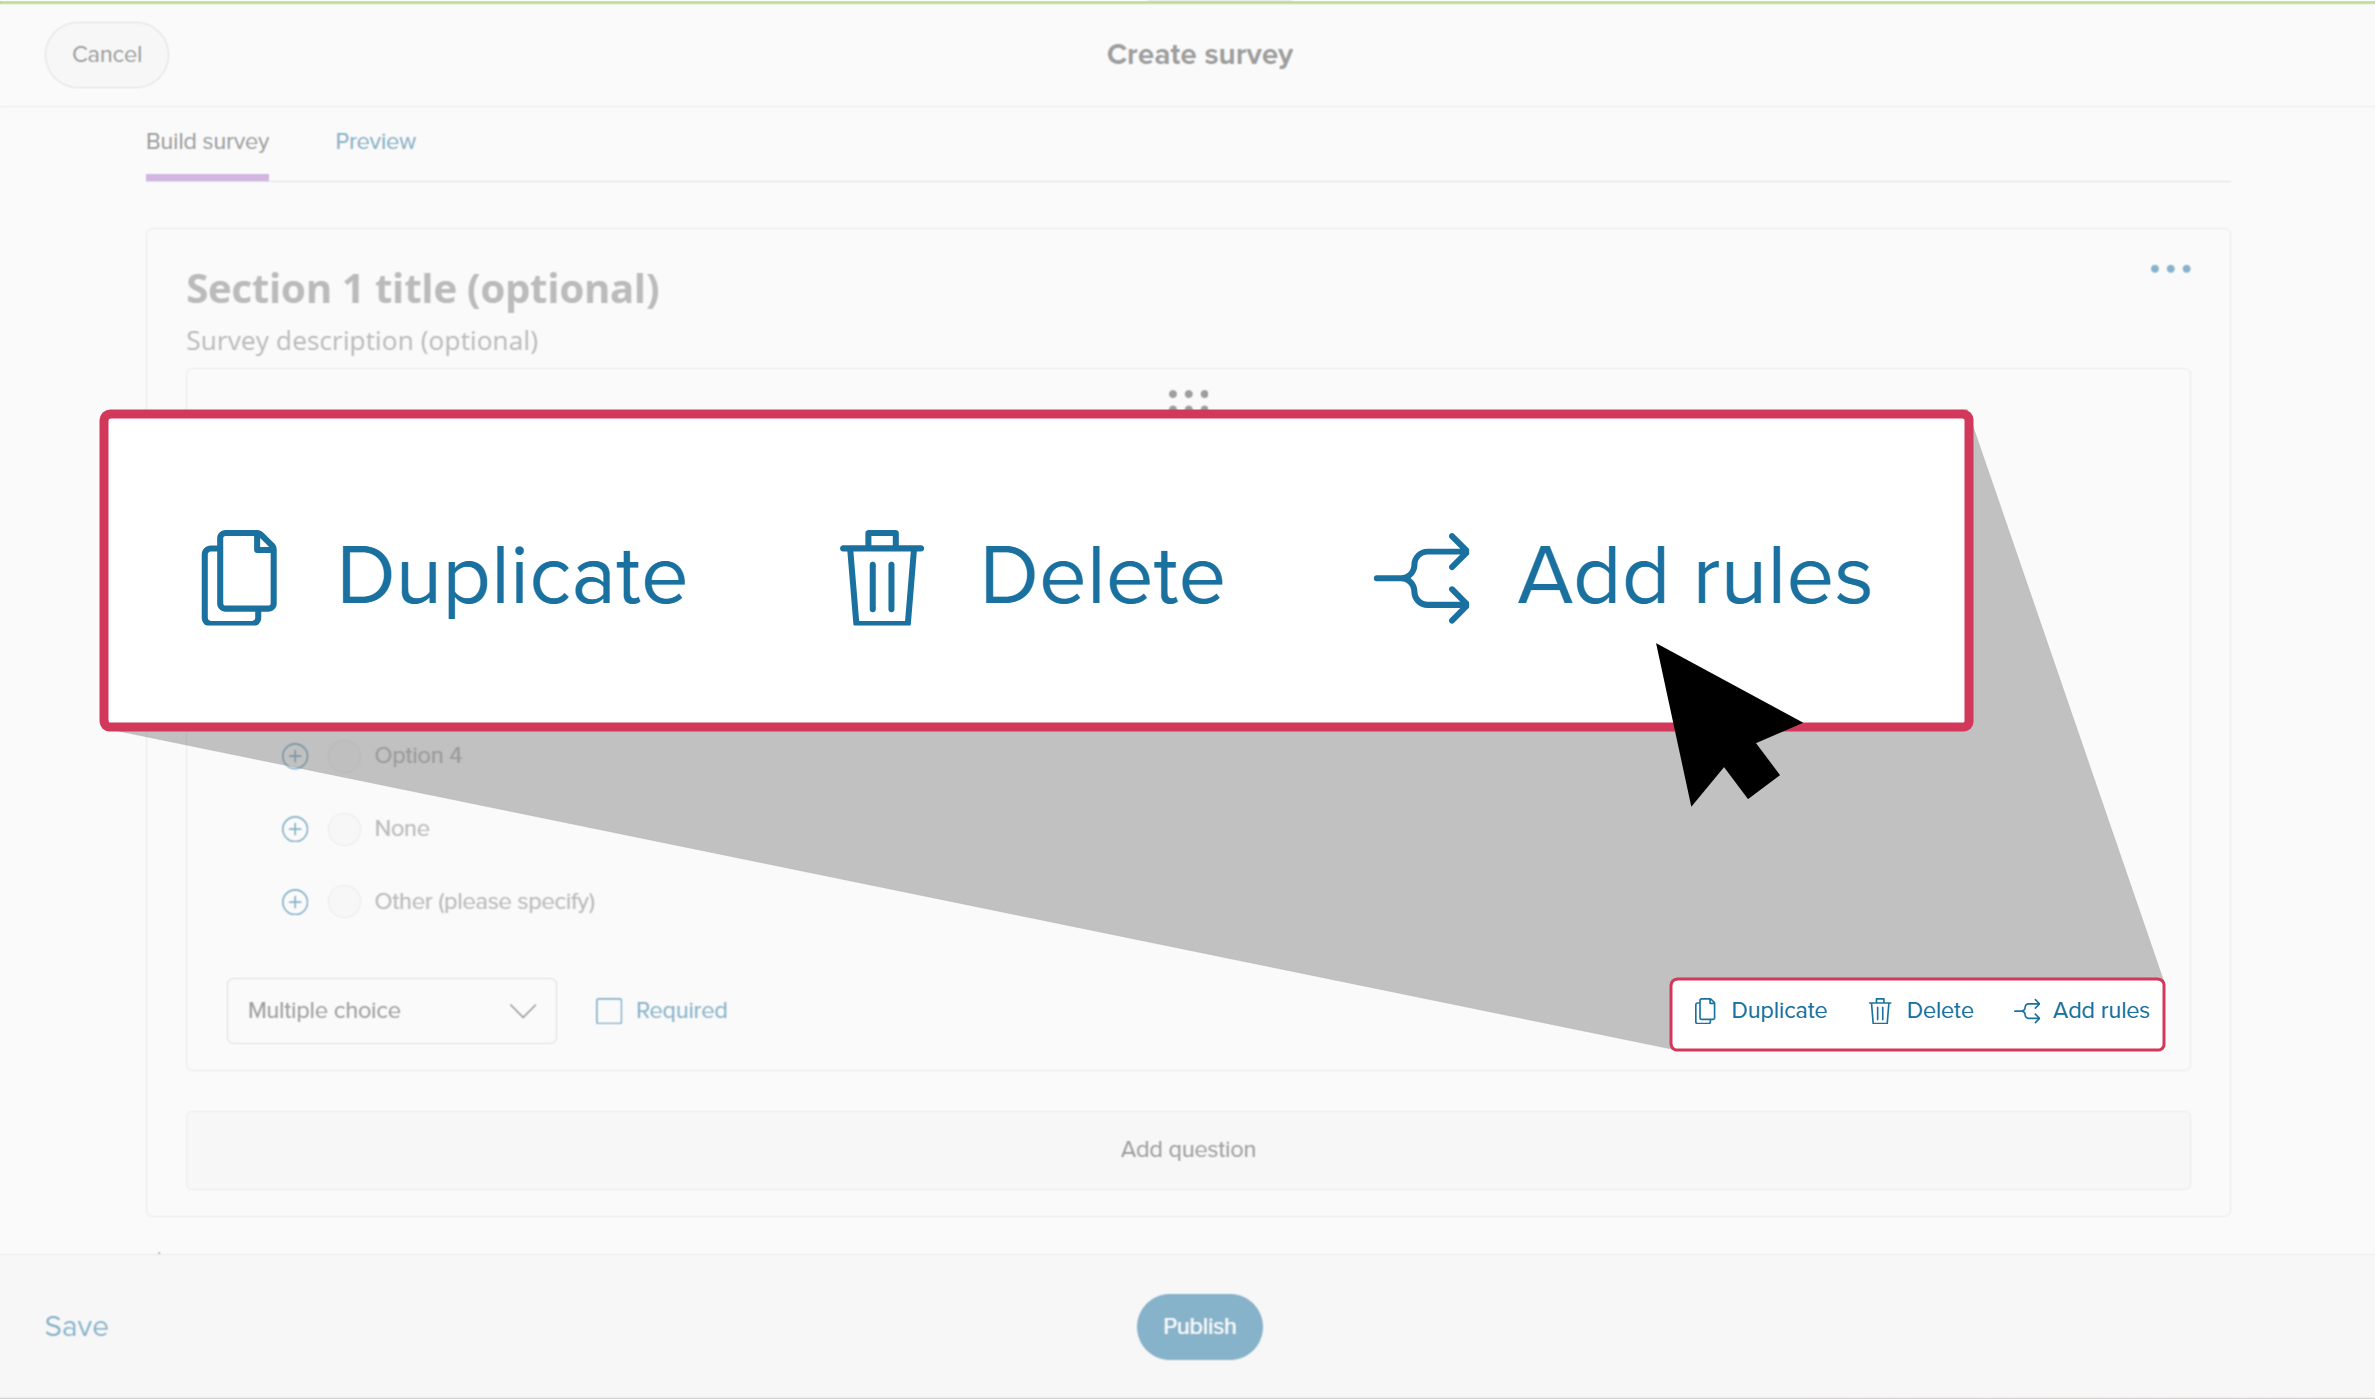
Adding rules will mean students can skip irrelevant questions and be guided to topics specific to their interests or needs.
For example, if you were to ask a student "Are you planning to go to
- Rule A: If the student answers Yes, the rule sends them to section 2 which includes questions about
- Rule B: If the student answers No, the rule skips section 2 entirely and sends them to section 3 which includes questions about apprenticeships or entering the workforce.
 Tip: It's generally easiest to create all of your survey sections and questions first, and then go back and add your rules to connect them together.
Preview the survey
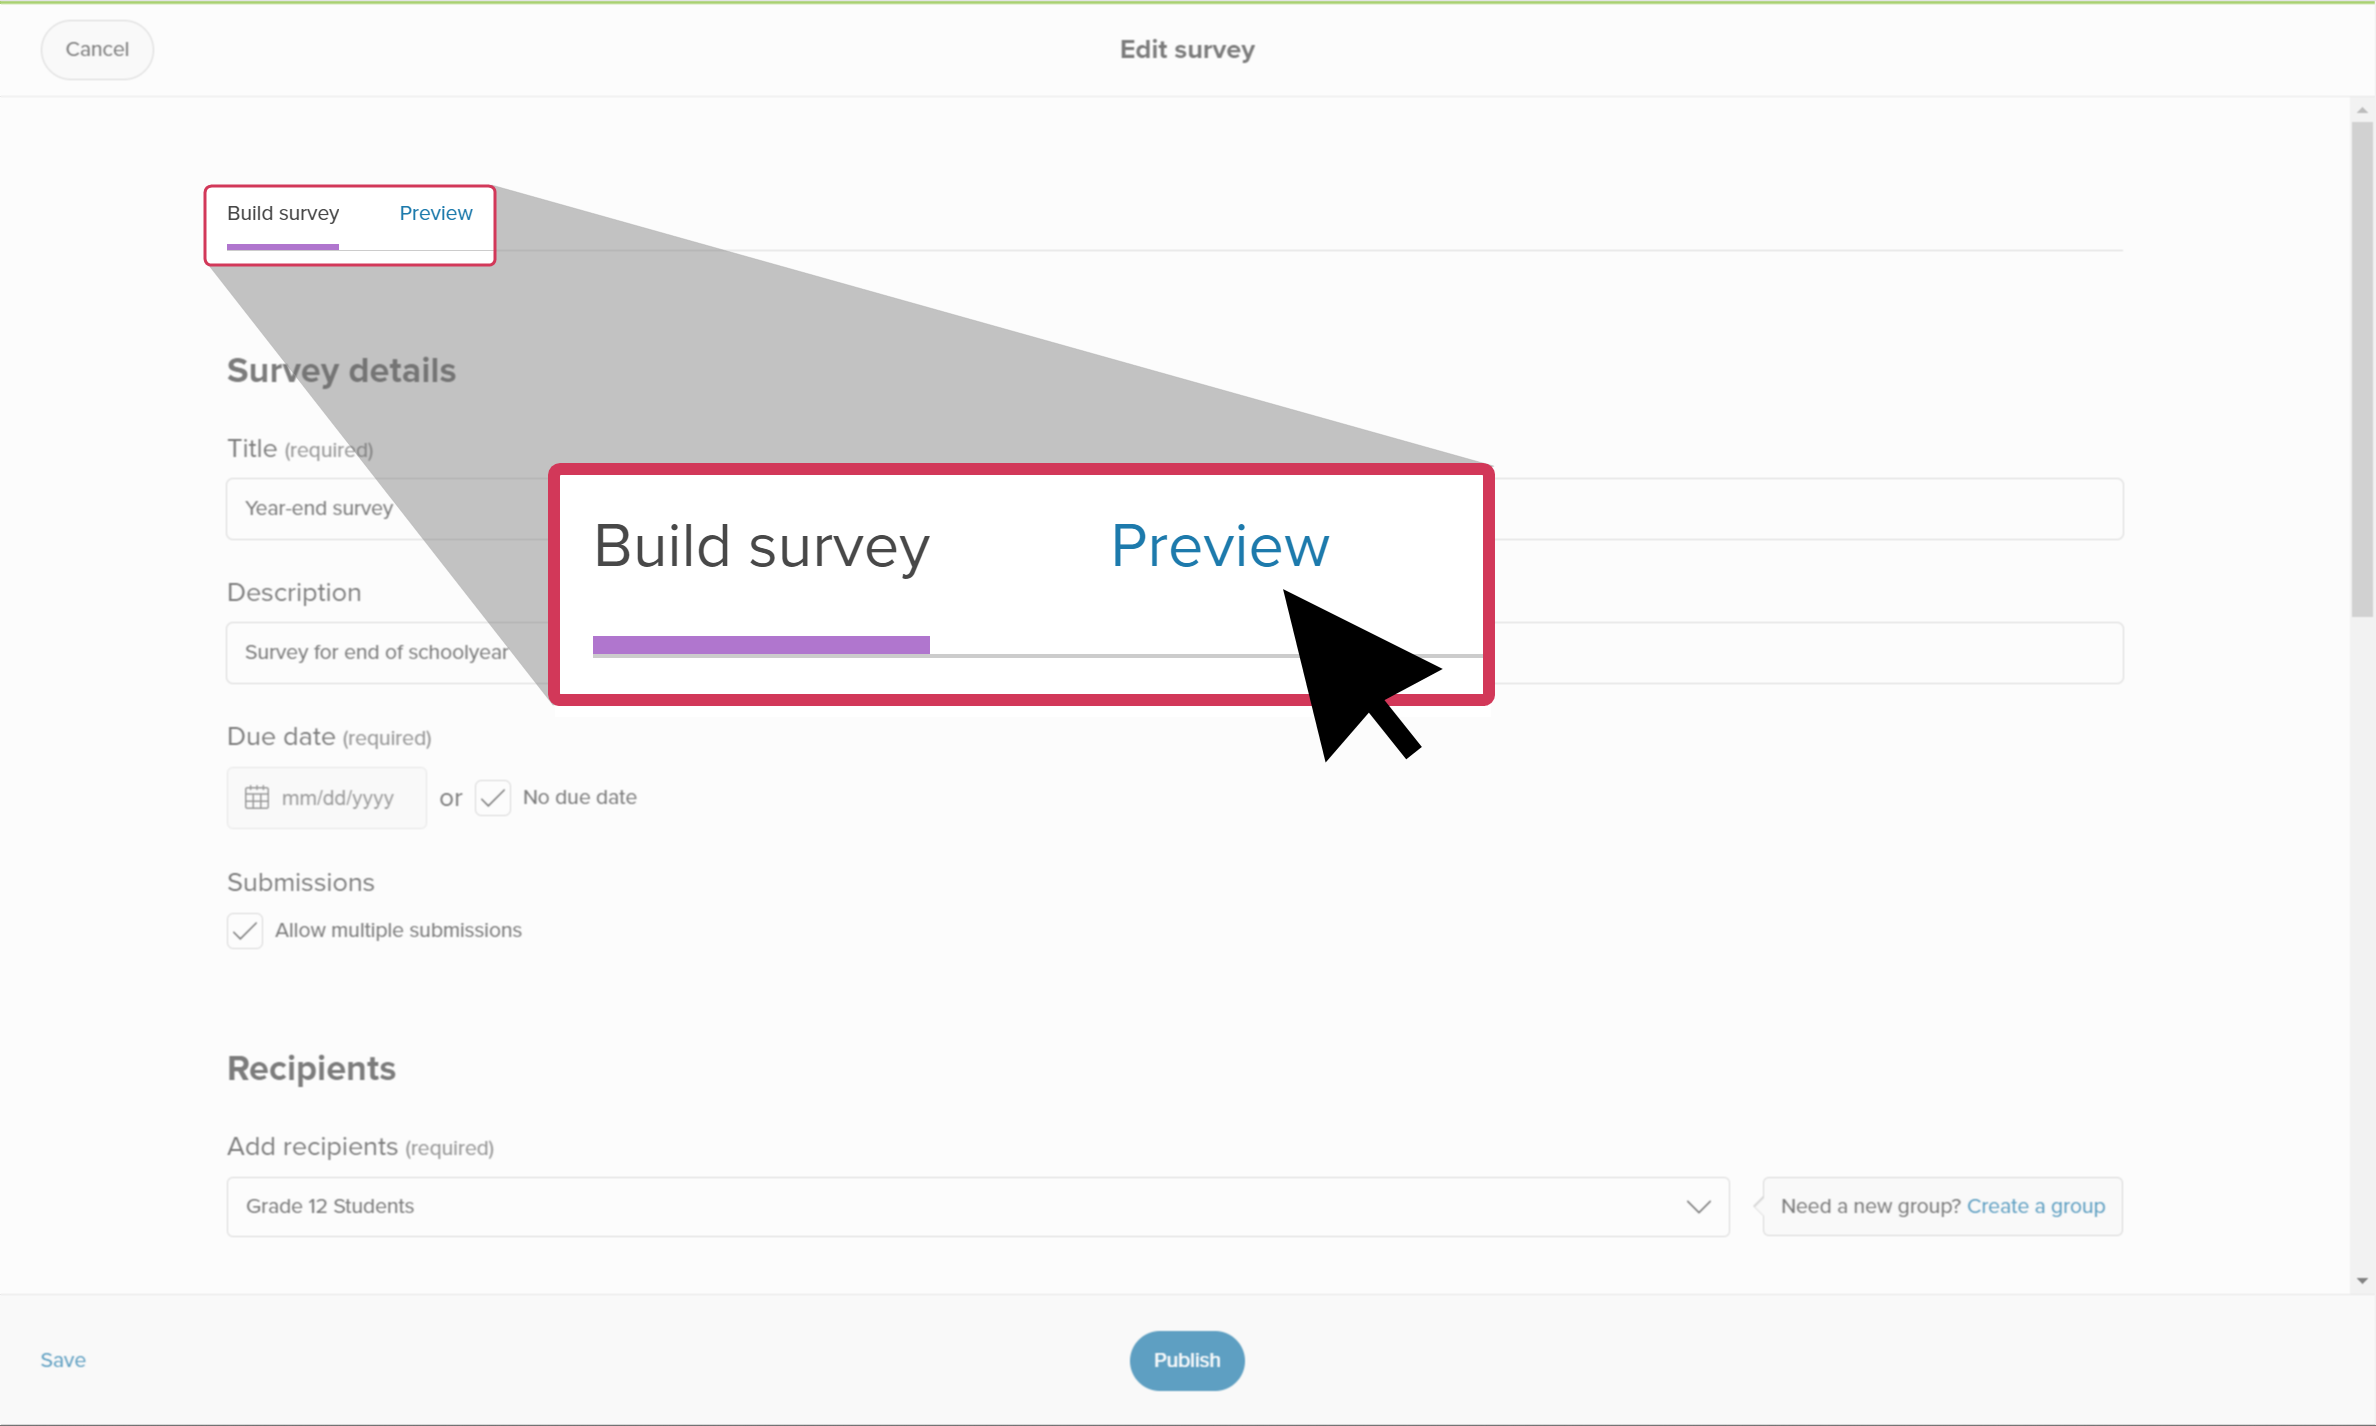
Test the survey to experience it exactly as a student will see and complete it. Submit test responses to verify your question flow, branching logic, and final thank-you message.
- While in your drafted survey, click the Preview tab.
 Click to enlarge
- Answer your questions and click Submit to test it out.
- Your answers are purely test responses. They won't be saved or recorded anywhere.
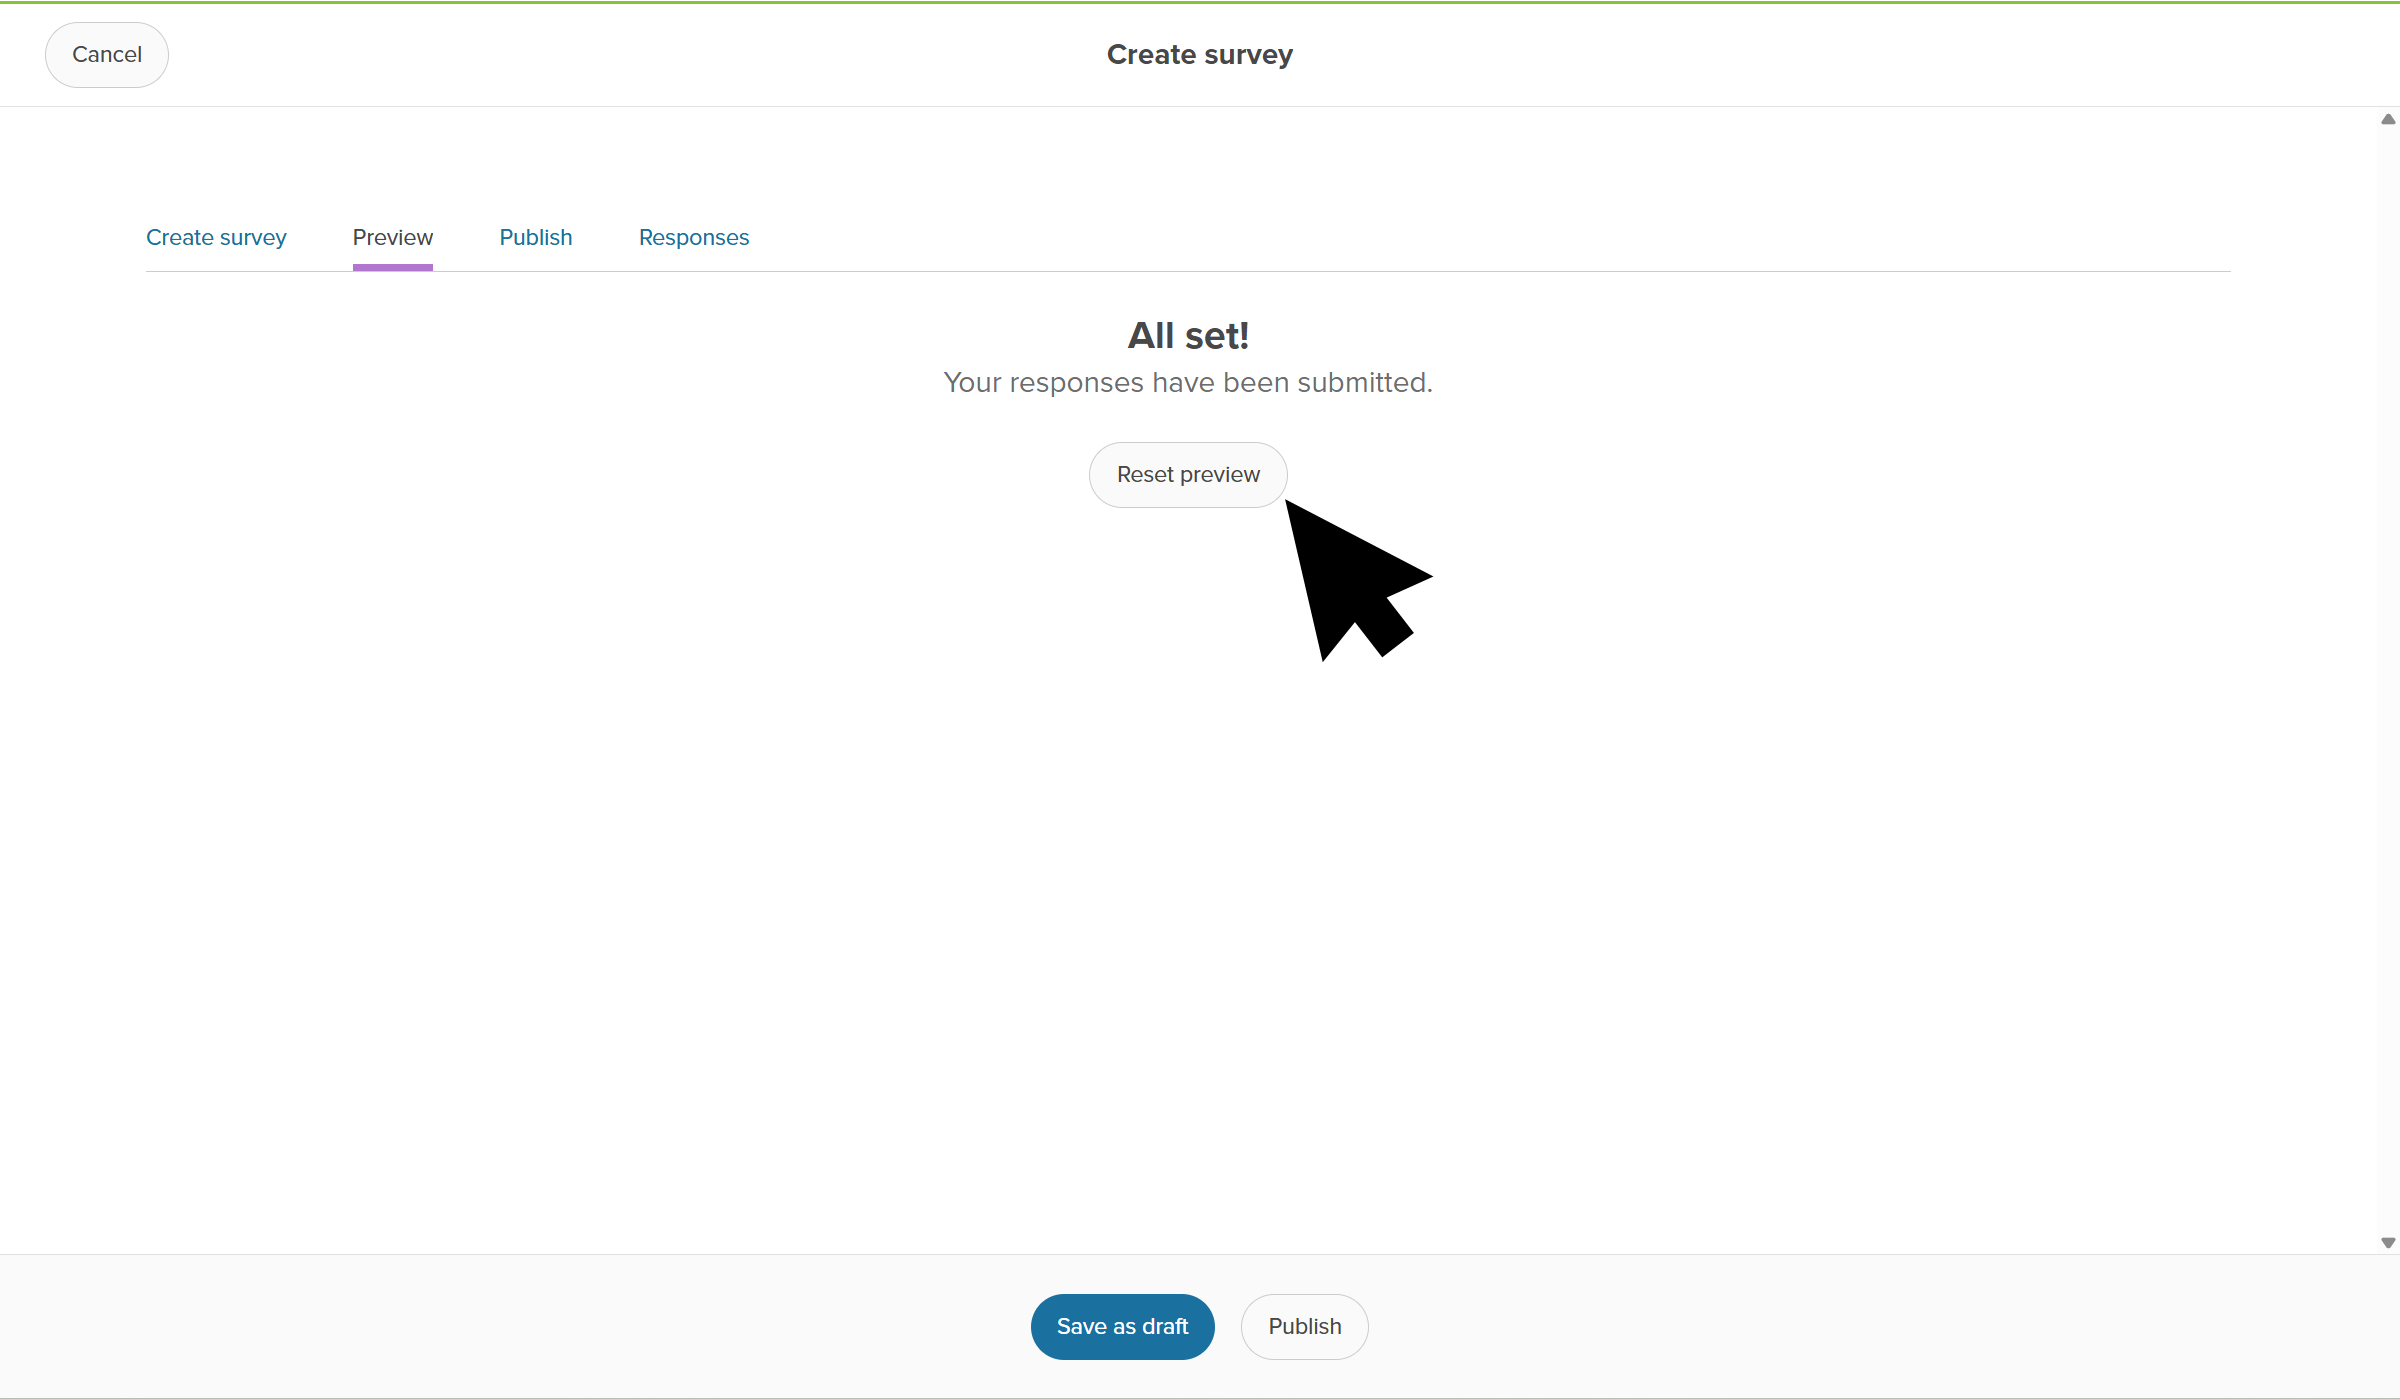
- Once you submit your answers, you'll also see a thank-you message. You can
- Click Reset preview to clear your entries and run another test if needed.
 Click to enlarge
Publish the survey
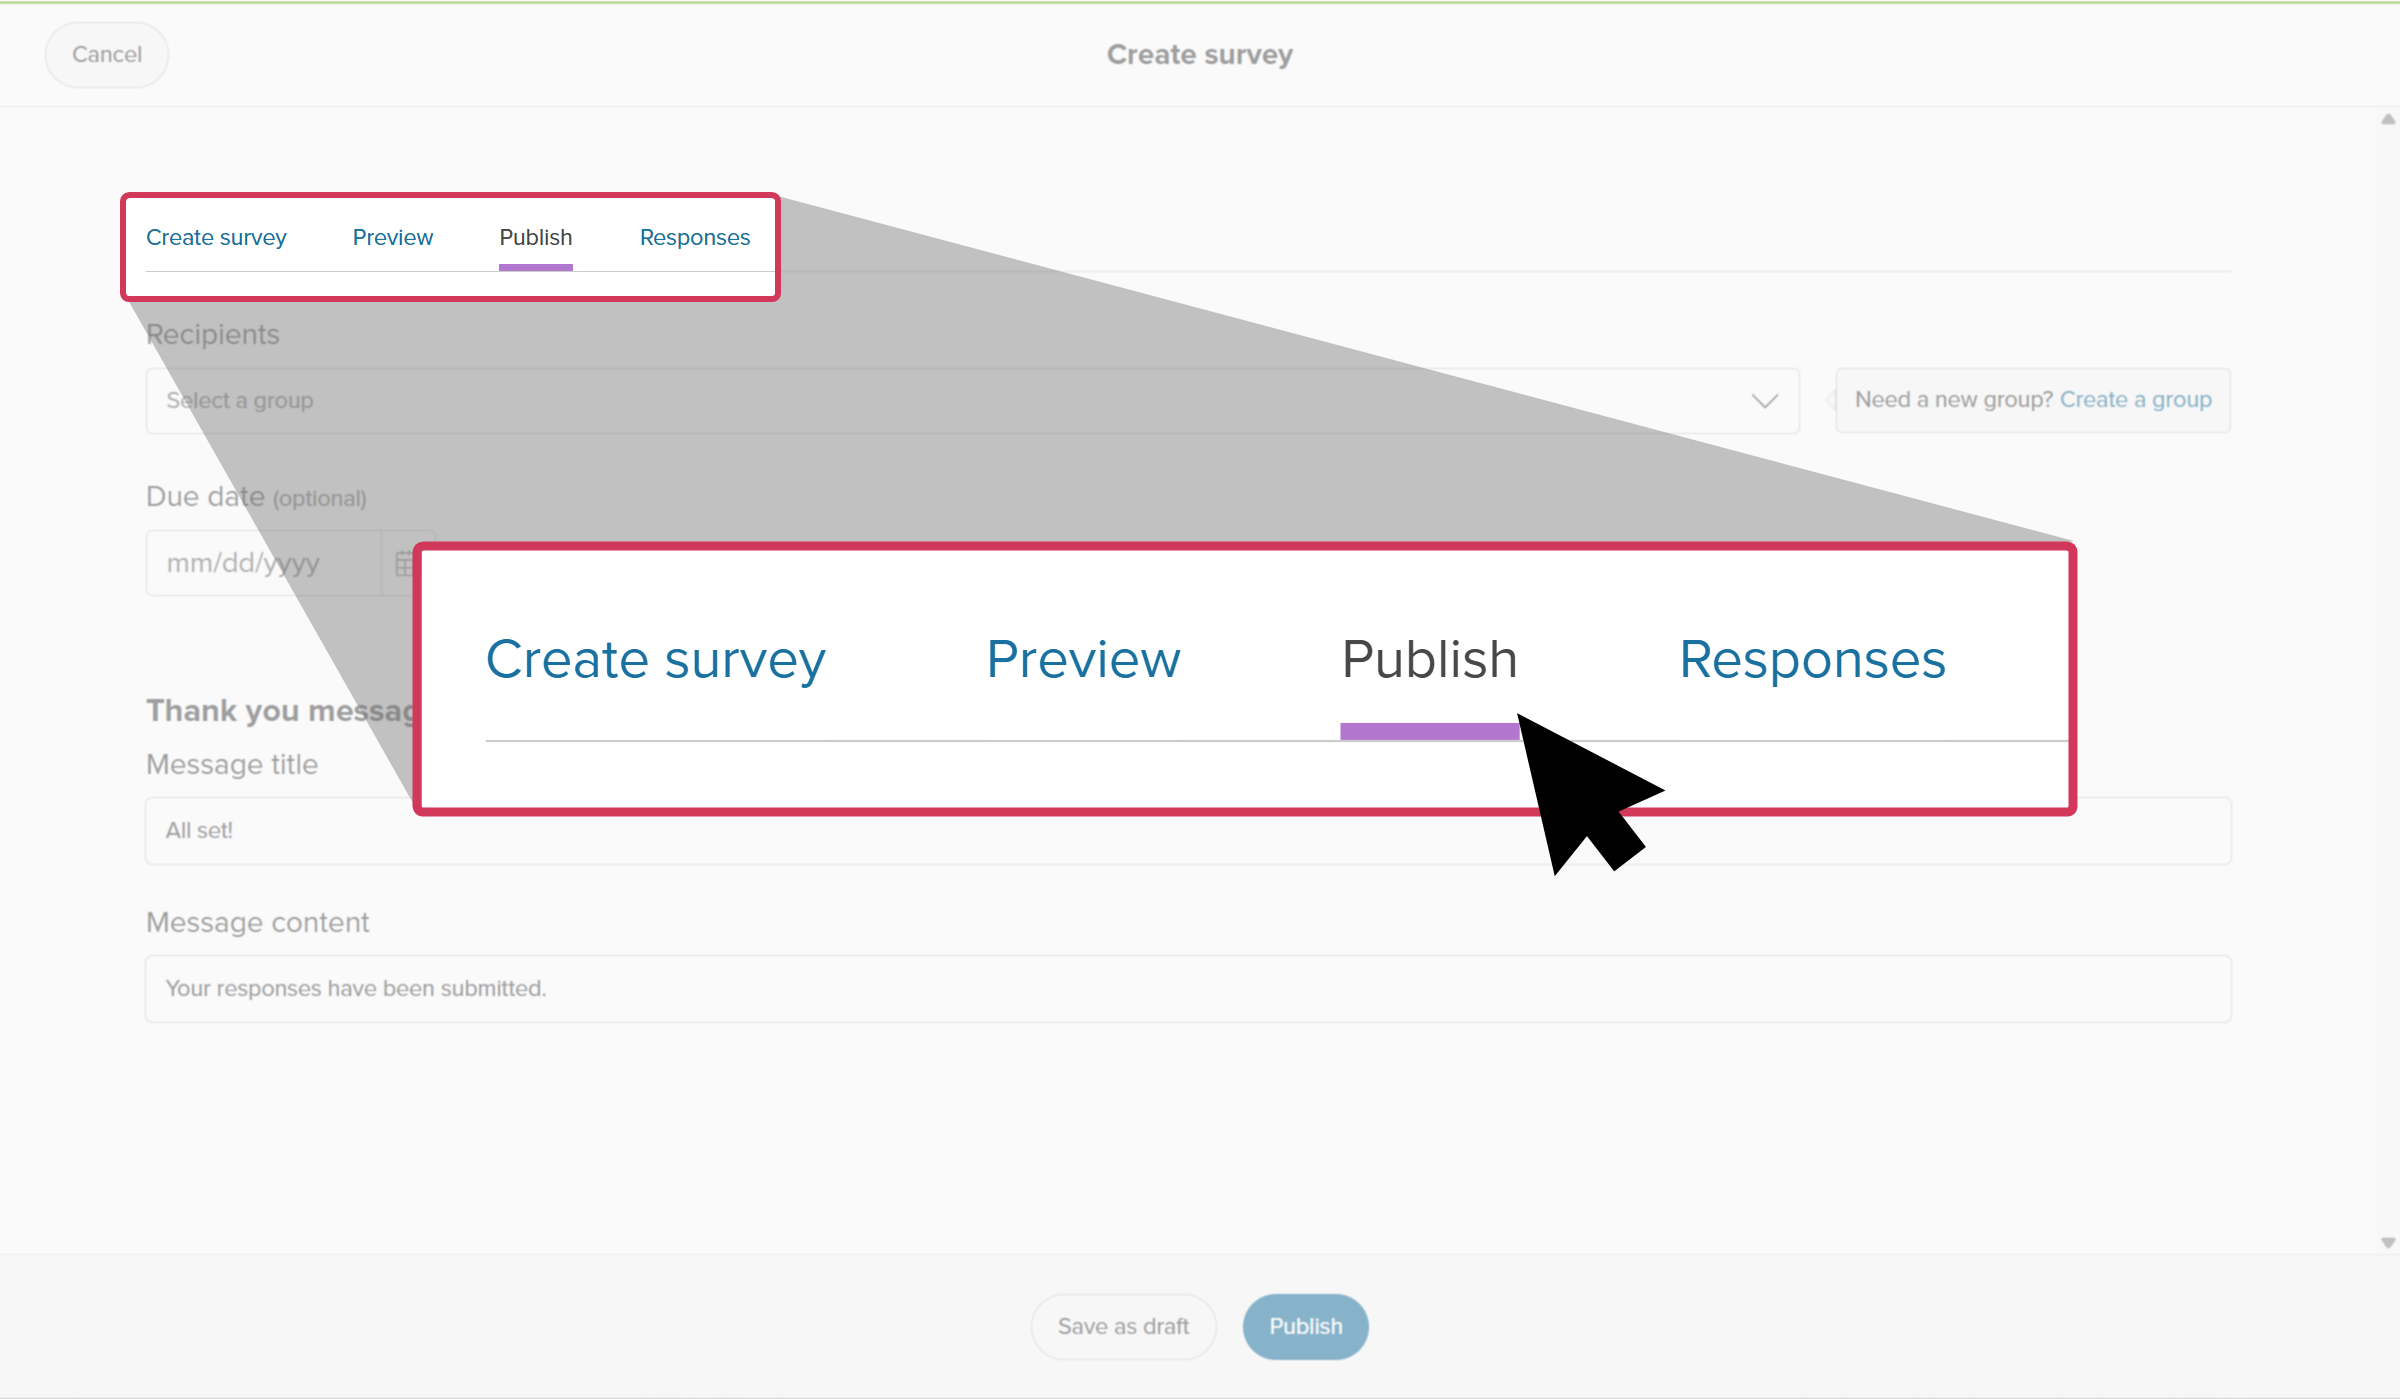
Set who receives the survey, configure an optional due date, and customize the submission confirmation message. Once published, the survey becomes active and visible to your selected audience.
- While in your drafted survey, click the Publish tab.
 Click to enlarge
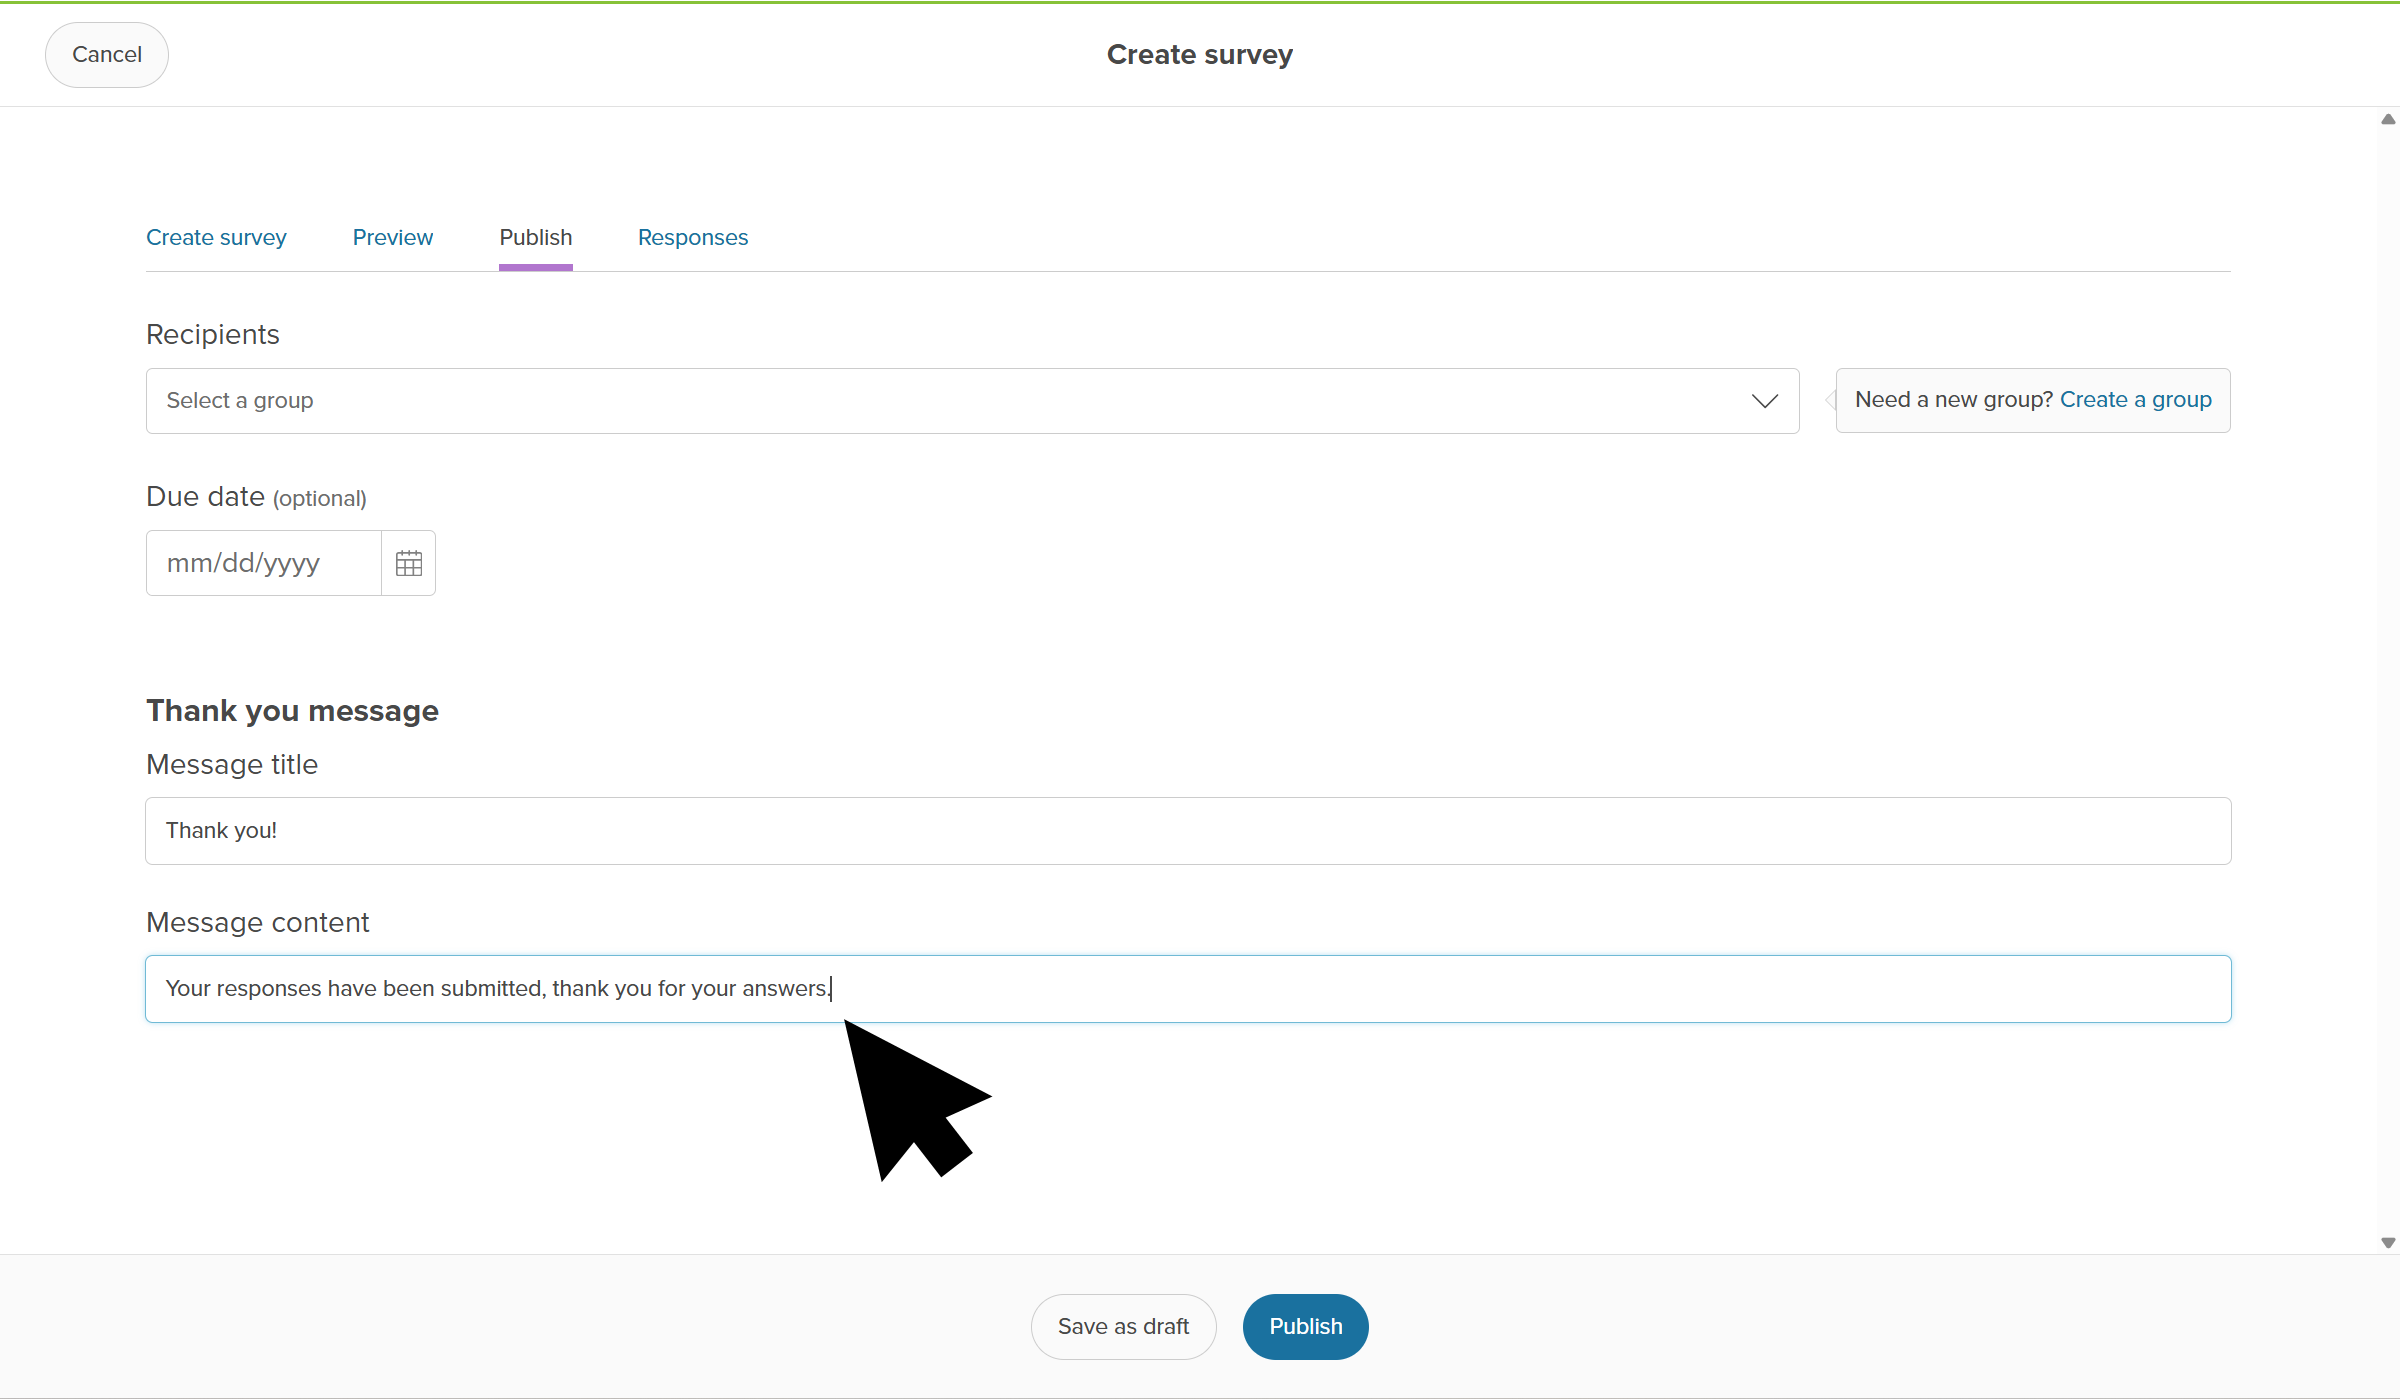
- Add the Recipients. Select an existing group of students, or create a new group.
 FYI: Clicking Create a group in the survey will redirect you to Student groups in Xello where you can create a new group. Don't worry, all your work will be saved and you can return to the survey to add the group you've just created.
 - Add a due date, if applicable.
- Edit the Thank you message, if you want. You can change the title and short message.
 Click to enlarge
- When you're ready, click Publish. It will immediately be available in the Surveys section for your students.
- Check out How students work with surveys to learn about their experience.
Tip: Need to make changes later? You can edit surveys that haven't received any submissions from students. Learn how to manage surveys, including how to copy, edit, close, or archive surveys in Manage surveys.
 Back to top