Once the student has had their request approved and has begun the opportunity, they can use Xello to add hours they've completed, and any necessary files related to the opportunity.
Access an active opportunity
If students have an active opportunity they're in the process of completing, they can access its profile by the banner at the top of the Explore opportunities page.

Track their hours for an opportunity
Once a student's status has been changed to Hired/Selected, they can begin to track the hours they've completed as they participate in an opportunity.
To record their time, students enter the dates they worked, their specific start and end times, and any breaks taken. They also provide the name and email of their supervisor and can upload supporting files, such as a signed timesheet.
The school can set a reporting schedule for the opportunity, such as weekly, biweekly, or monthly. If a submission schedule is set, then students will log their hours based on the assigned cadence. They'll be able to save their hours so they can record their shifts as they progress without having to complete the form in one sitting.
To track their hours for an opportunity:
- From the Explore opportunities page, they click My opportunities.
Click to enlarge
- They click on the opportunity where they'd like to add their time and files.
 Click to enlarge
- Alternatively, they can click the three-dot menu and select Add hours.
- They click Add hours.
 Click to enlarge
- If a submission schedule has been set, a banner will indicate the cadence students are expected to submit their hours.
- They fill out the required dates and time. They have the chance to also add their supervisor contact details, and any supporting files.
 Click to enlarge
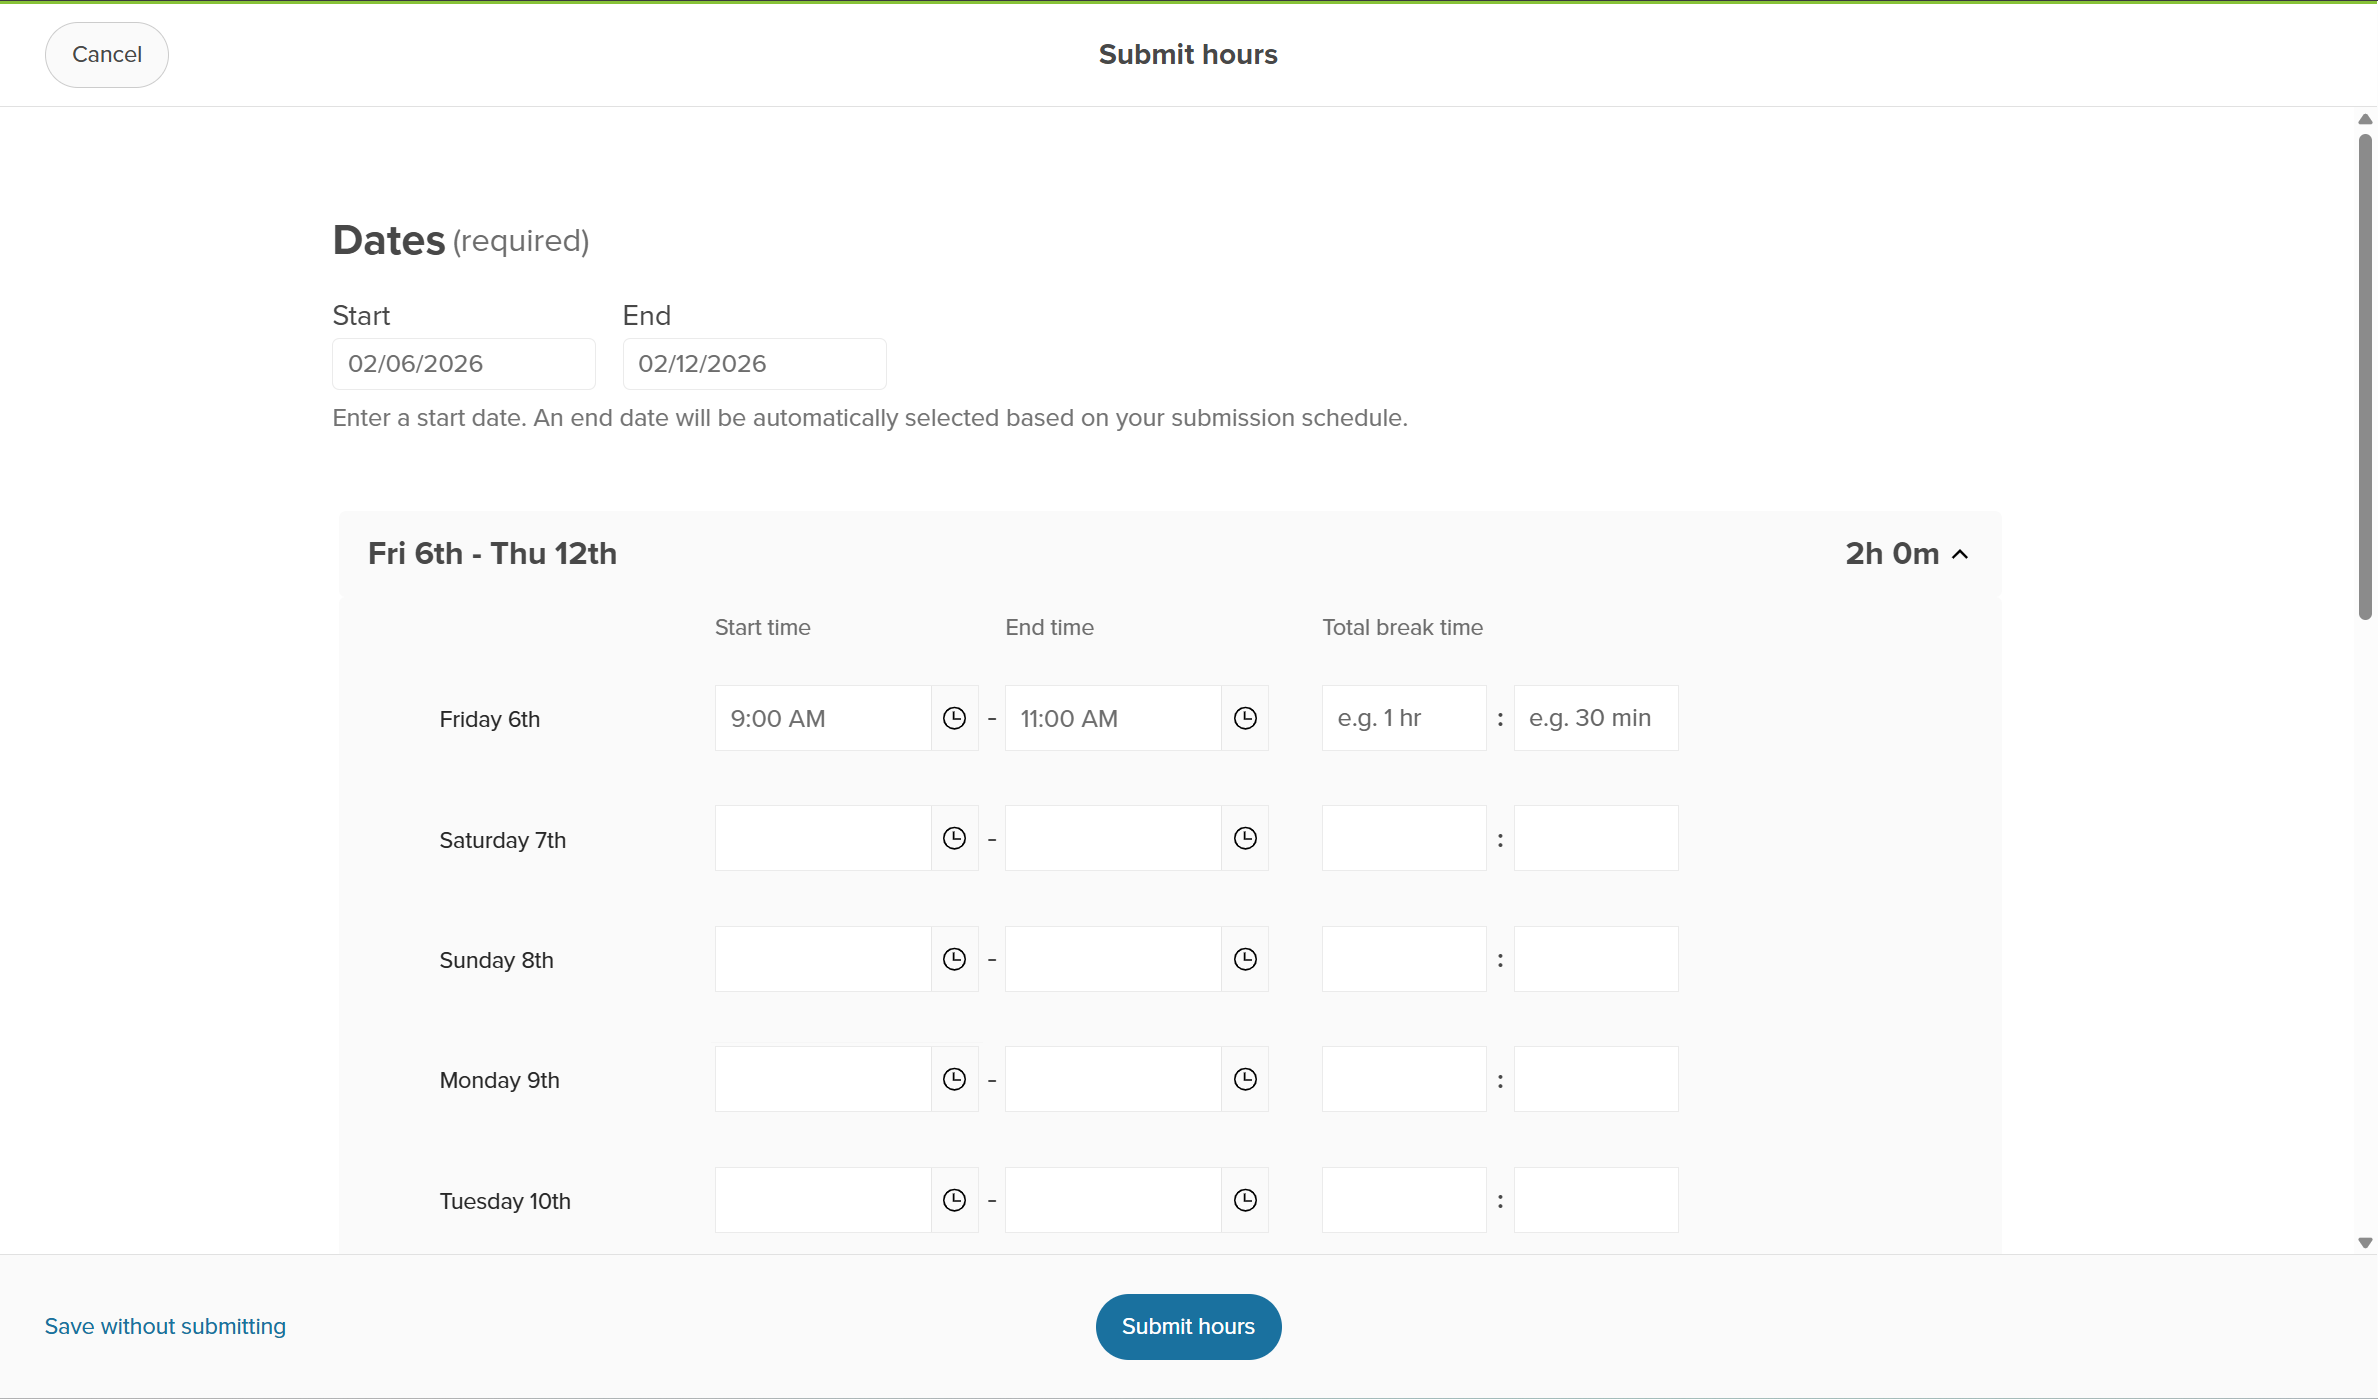
- If a submission schedule has been set, adding the date will generate a grid for the duration of that submission period. Students will add the shifts they participated in.
 Click to enlarge
- If a submission schedule has been set, adding the date will generate a grid for the duration of that submission period. Students will add the shifts they participated in.
- Students can Save without submitting, allowing them to return to this form as they participate in the opportunity.
- When they're done, they click Submit hours. When they return to the opportunity, they'll see their hours and any files that have been added.
Add files to their opportunity
Students can add any relevant files to their active opportunity. Depending on the opportunity, this might include a welcome letter or agreement, work they completed, or timesheets.
To add files to an opportunity:
- From the Explore opportunities page, they click My opportunities.
Click to enlarge
- They click on the opportunity where they'd like to add their files. Click to enlarge
- They scroll down the opportunity, past any hours they might have submitted and click Add file.
 Click to enlarge
 - They enter a title for the file and, if they want, a description. They attach a local file, or one from a cloud service such as Google Drive.
 Click to enlarge
 - When they're done, they click Add file. The file will be available to view.
Additional resources
-
 Short Video
How students request and track Work-related learning opportunities
Short Video
Short VideoHow students request and track Work-related learning opportunitiesWatch this video to learn how students use Xello to find, request, and track Work-related learning (WRL) opportunities. Learn where students find opportunities, how they filter searches, view details, and submit requests. They can also track their opportunities and log hours, while educators can verify hours and monitor requests.
-
 PDF
PDFIntroduction to WRL in Xello
PDF
PDFIntroduction to WRL in Xello -
Short Video
Short VideoHelp students thrive with Work-related learning
Use this short overview video to get an introduction to Xello's Work-related learning module. Learn how this integrated platform opens up a world of discovery for students and educators to better prepare them for an ever-changing world.
-
PDF
PDFOpportunity Coordinator Guide
-
PDF
PDFEducator's Guide to Opportunities