The new Texas CCMR Tracker evolves from a manual checklist tool into a centralized, strategic report designed to help districts not just track CCMR—but actively improve it by aligning people, data, and action. While the previous version relied on manual completion tracking, the new solution automatically centralizes data from multiple sources including Xello, your SIS, and scheduled uploads to provide real-time visibility into performance across your district and schools. Beyond just recording "met" indicators, the tracker now features proactive "planned vs. completed" monitoring and includes Outcomes Bonus funding projections, if enabled, to help districts manage financial risk. By integrating indicator tracking directly into student action planning, it empowers you and other school staff to identify gaps early and improve CCMR outcomes through proactive intervention.
Students Planning & Completion
When the visibility for the CCMR Tracker is toggled to ON, students can identify the indicators they're planning to complete and track those they've completed.
Manage visibility for students
You can manage student access to the Texas CCMR Tracker and individual indicators from your educator tools in Xello.
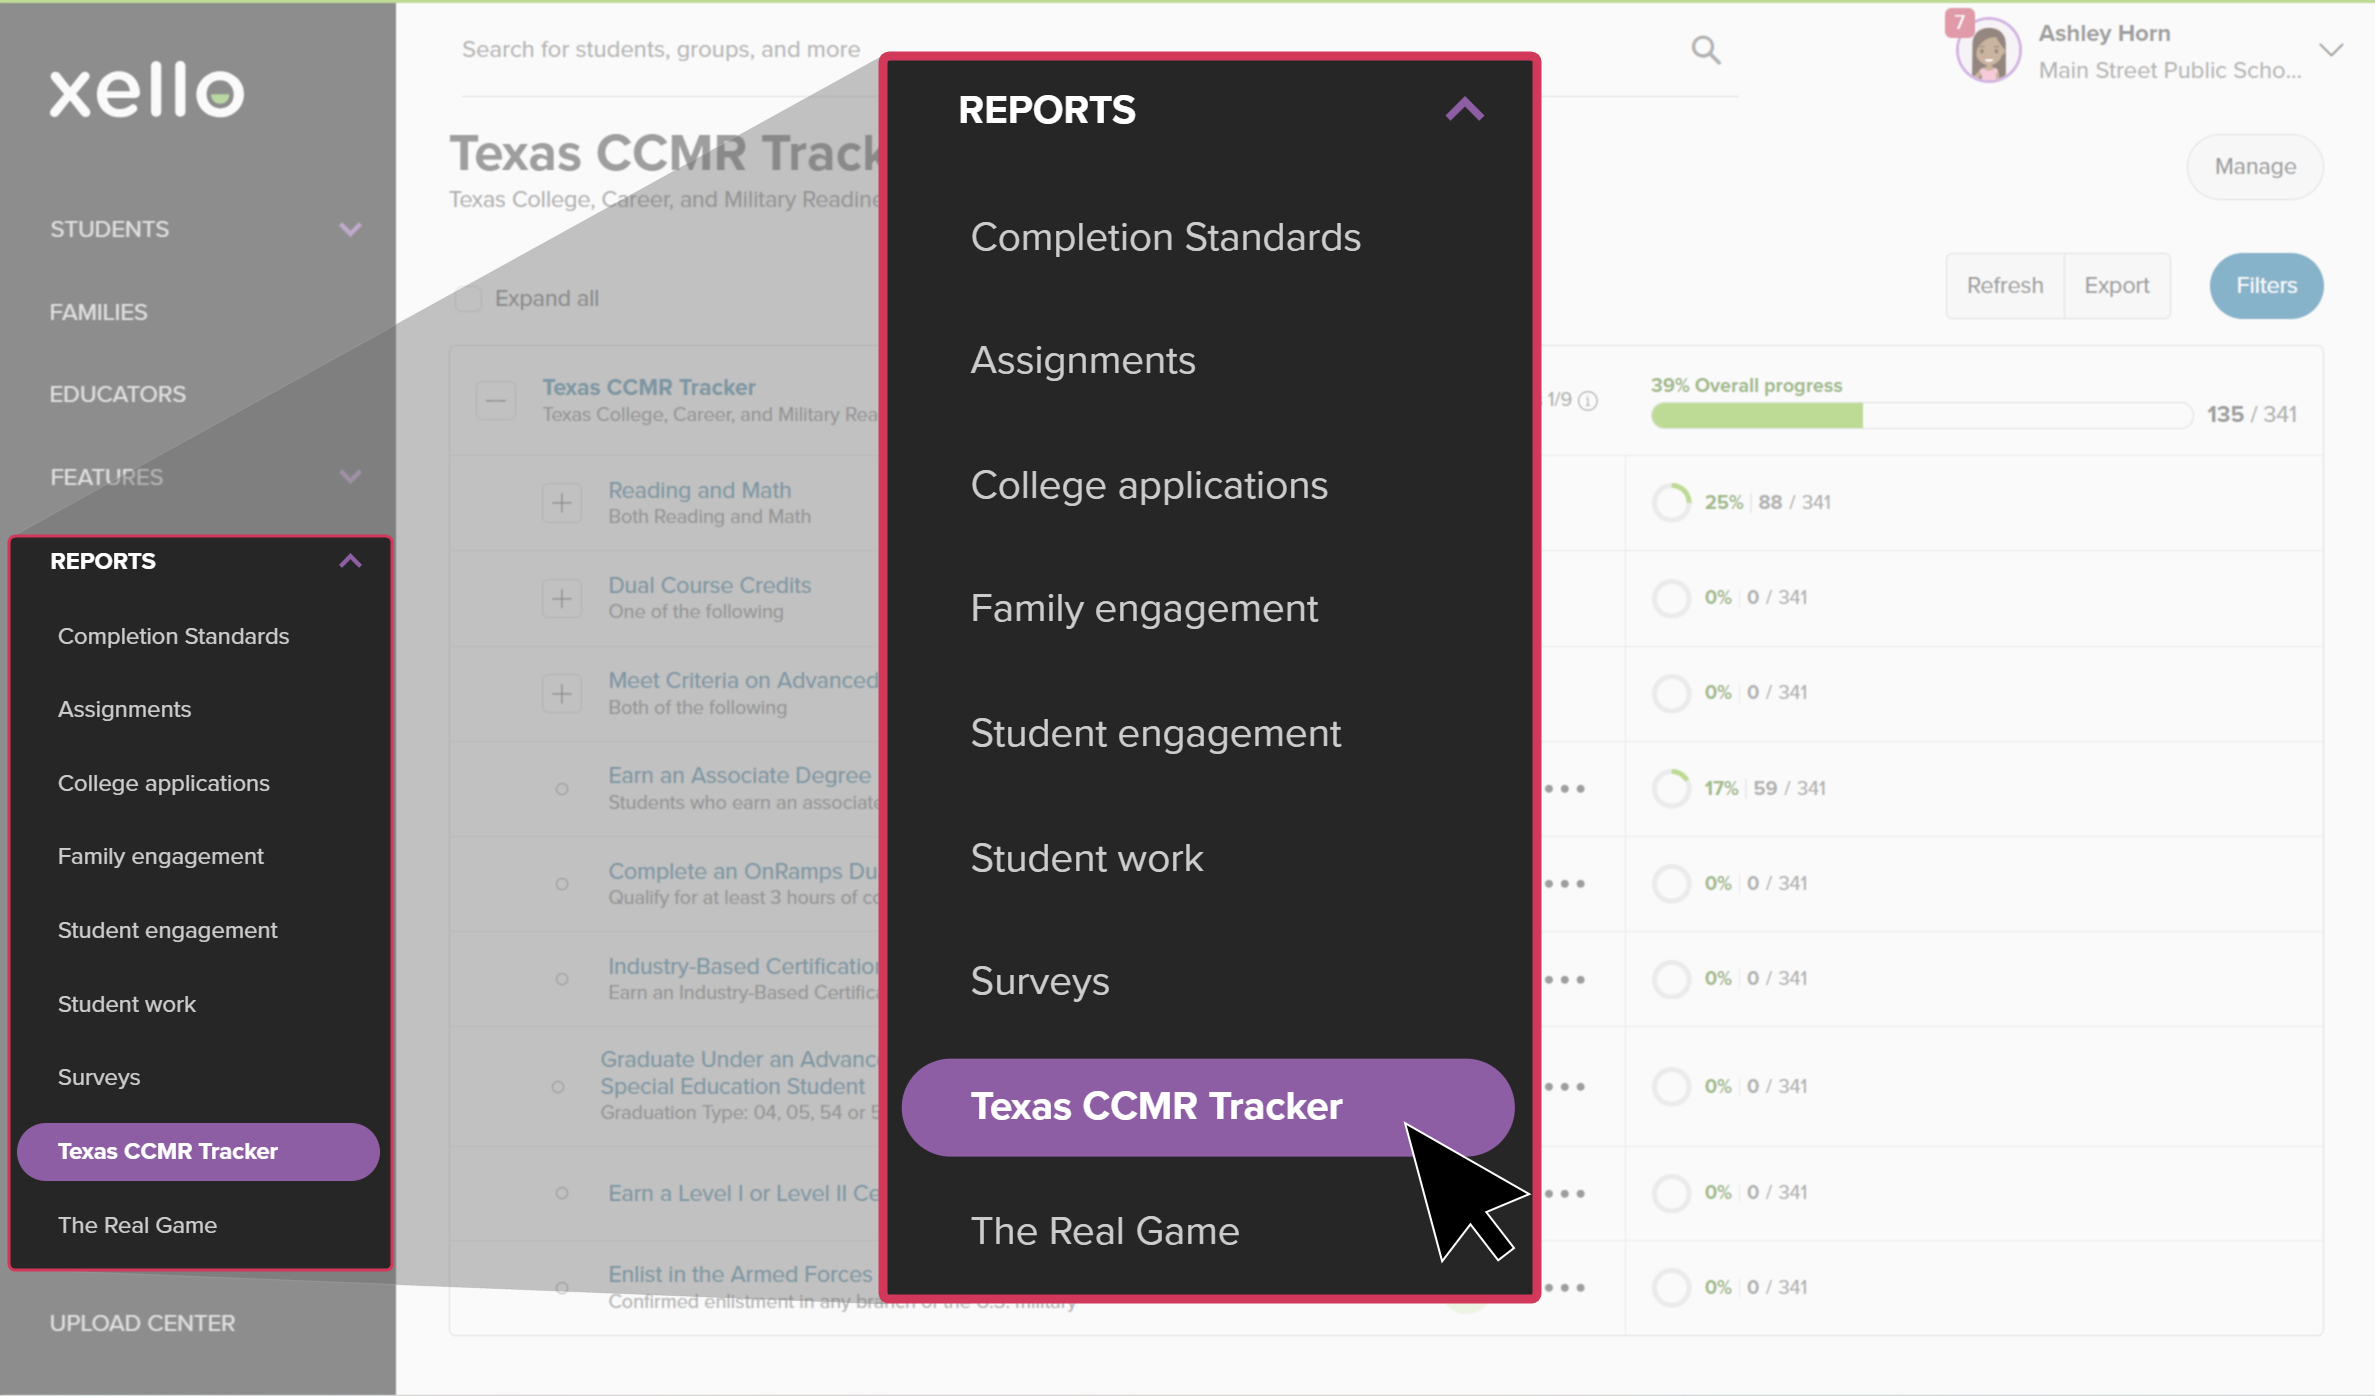
- From your educator account, click Reports and select Texas CCMR Tracker.
 Click to enlarge
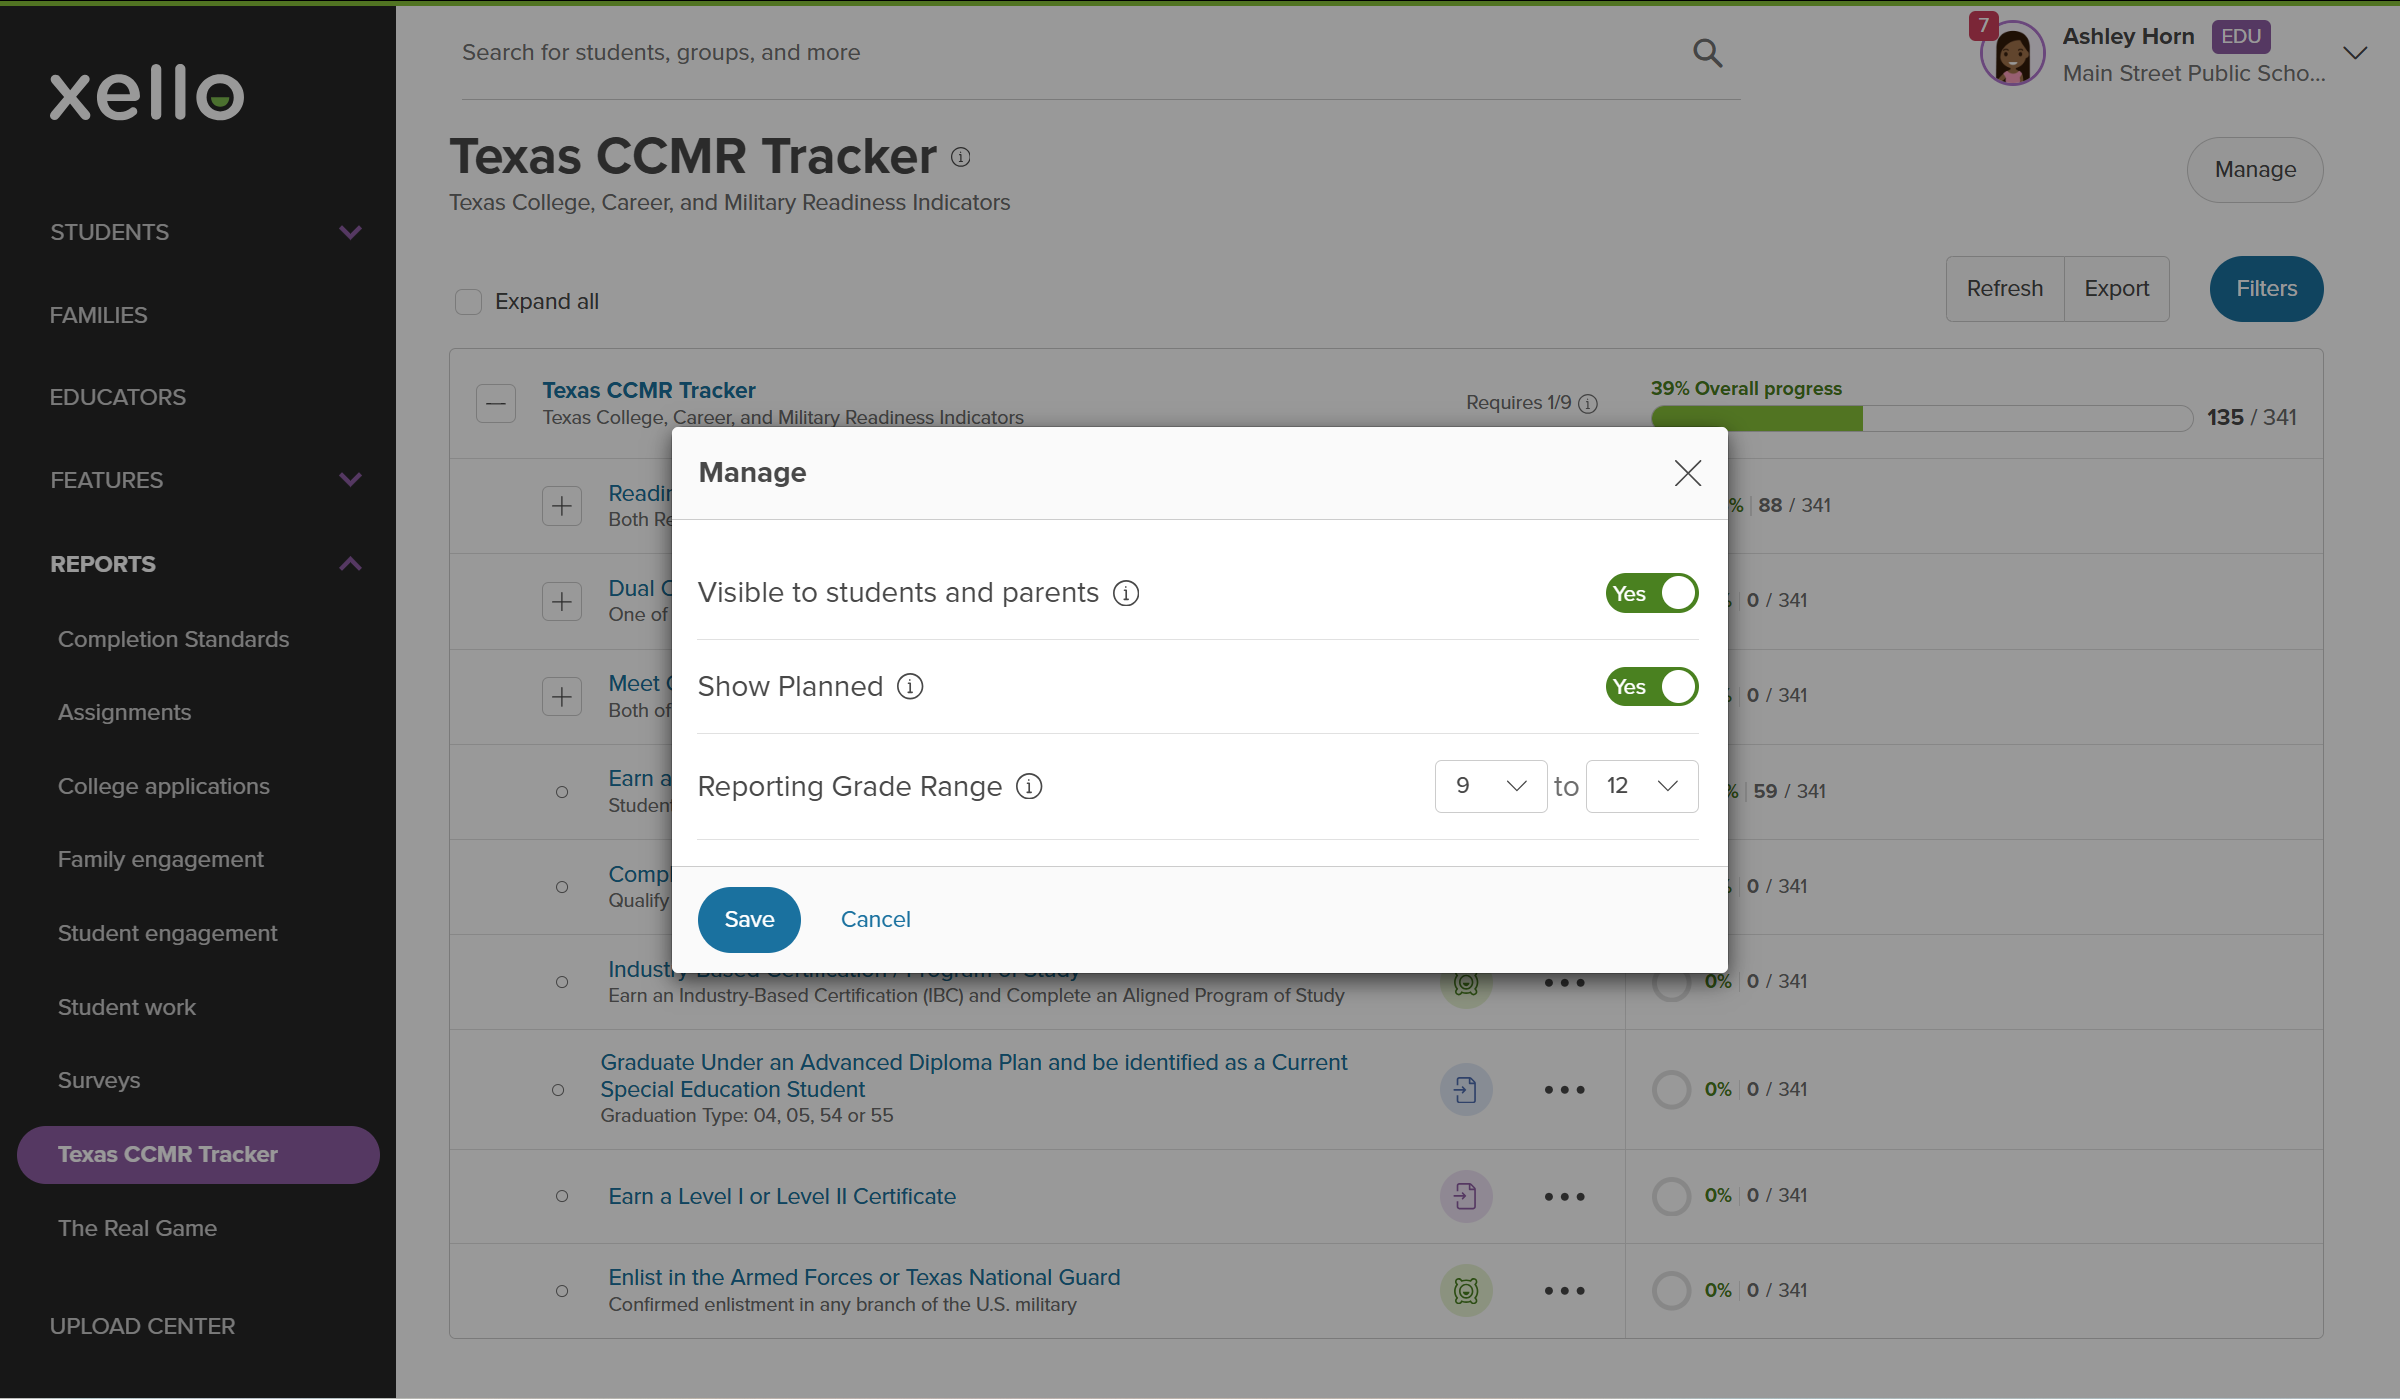
- At the top of the page, click Manage.
 Click to enlarge
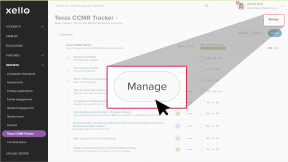
- Choose whether or not students will see the CCMR Tracker within the Plans section, if they can also plan the indicators they want to pursue, and the grade range.
 Click to enlarge
- Click Save to confirm the settings.
- To manage the visibility of individual indicators, locate the indicator and click its name to open the requirement details modal.
- Update the Visible to students toggle to Yes or No.
 Click to enlarge
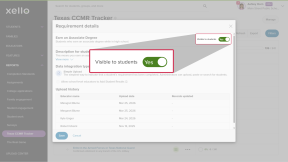
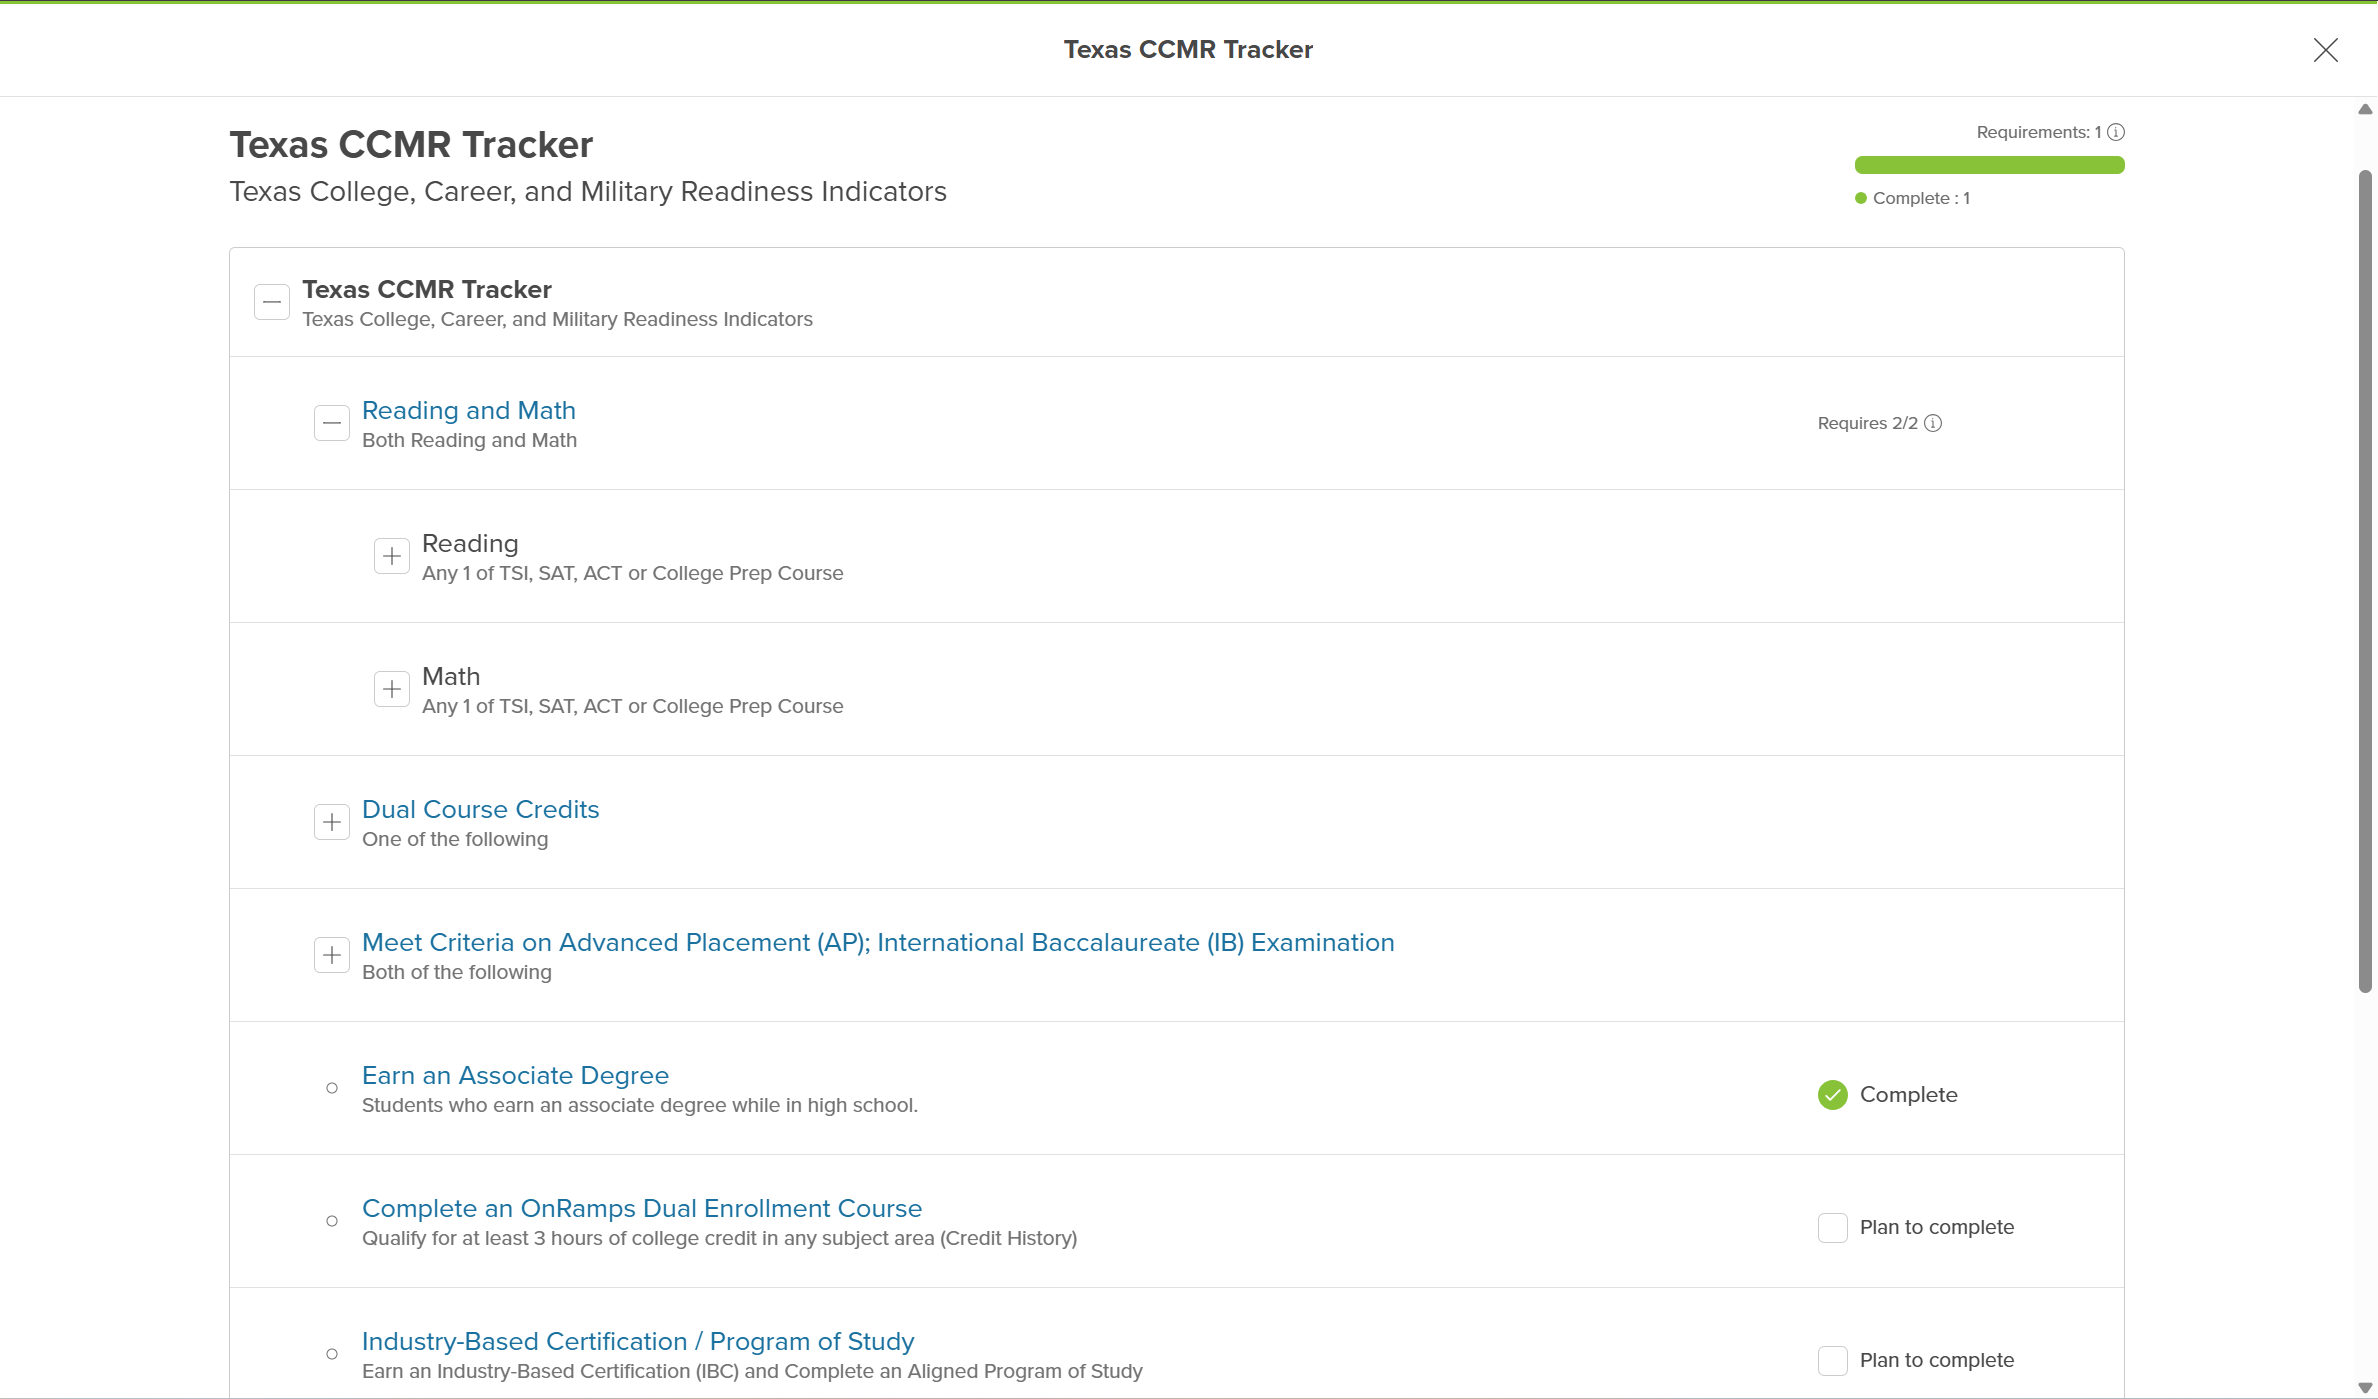
How students plan and track CCMR indicators
Students can plan and track their CCMR Indicator requirements in Xello when visibility is enabled for their grade level.
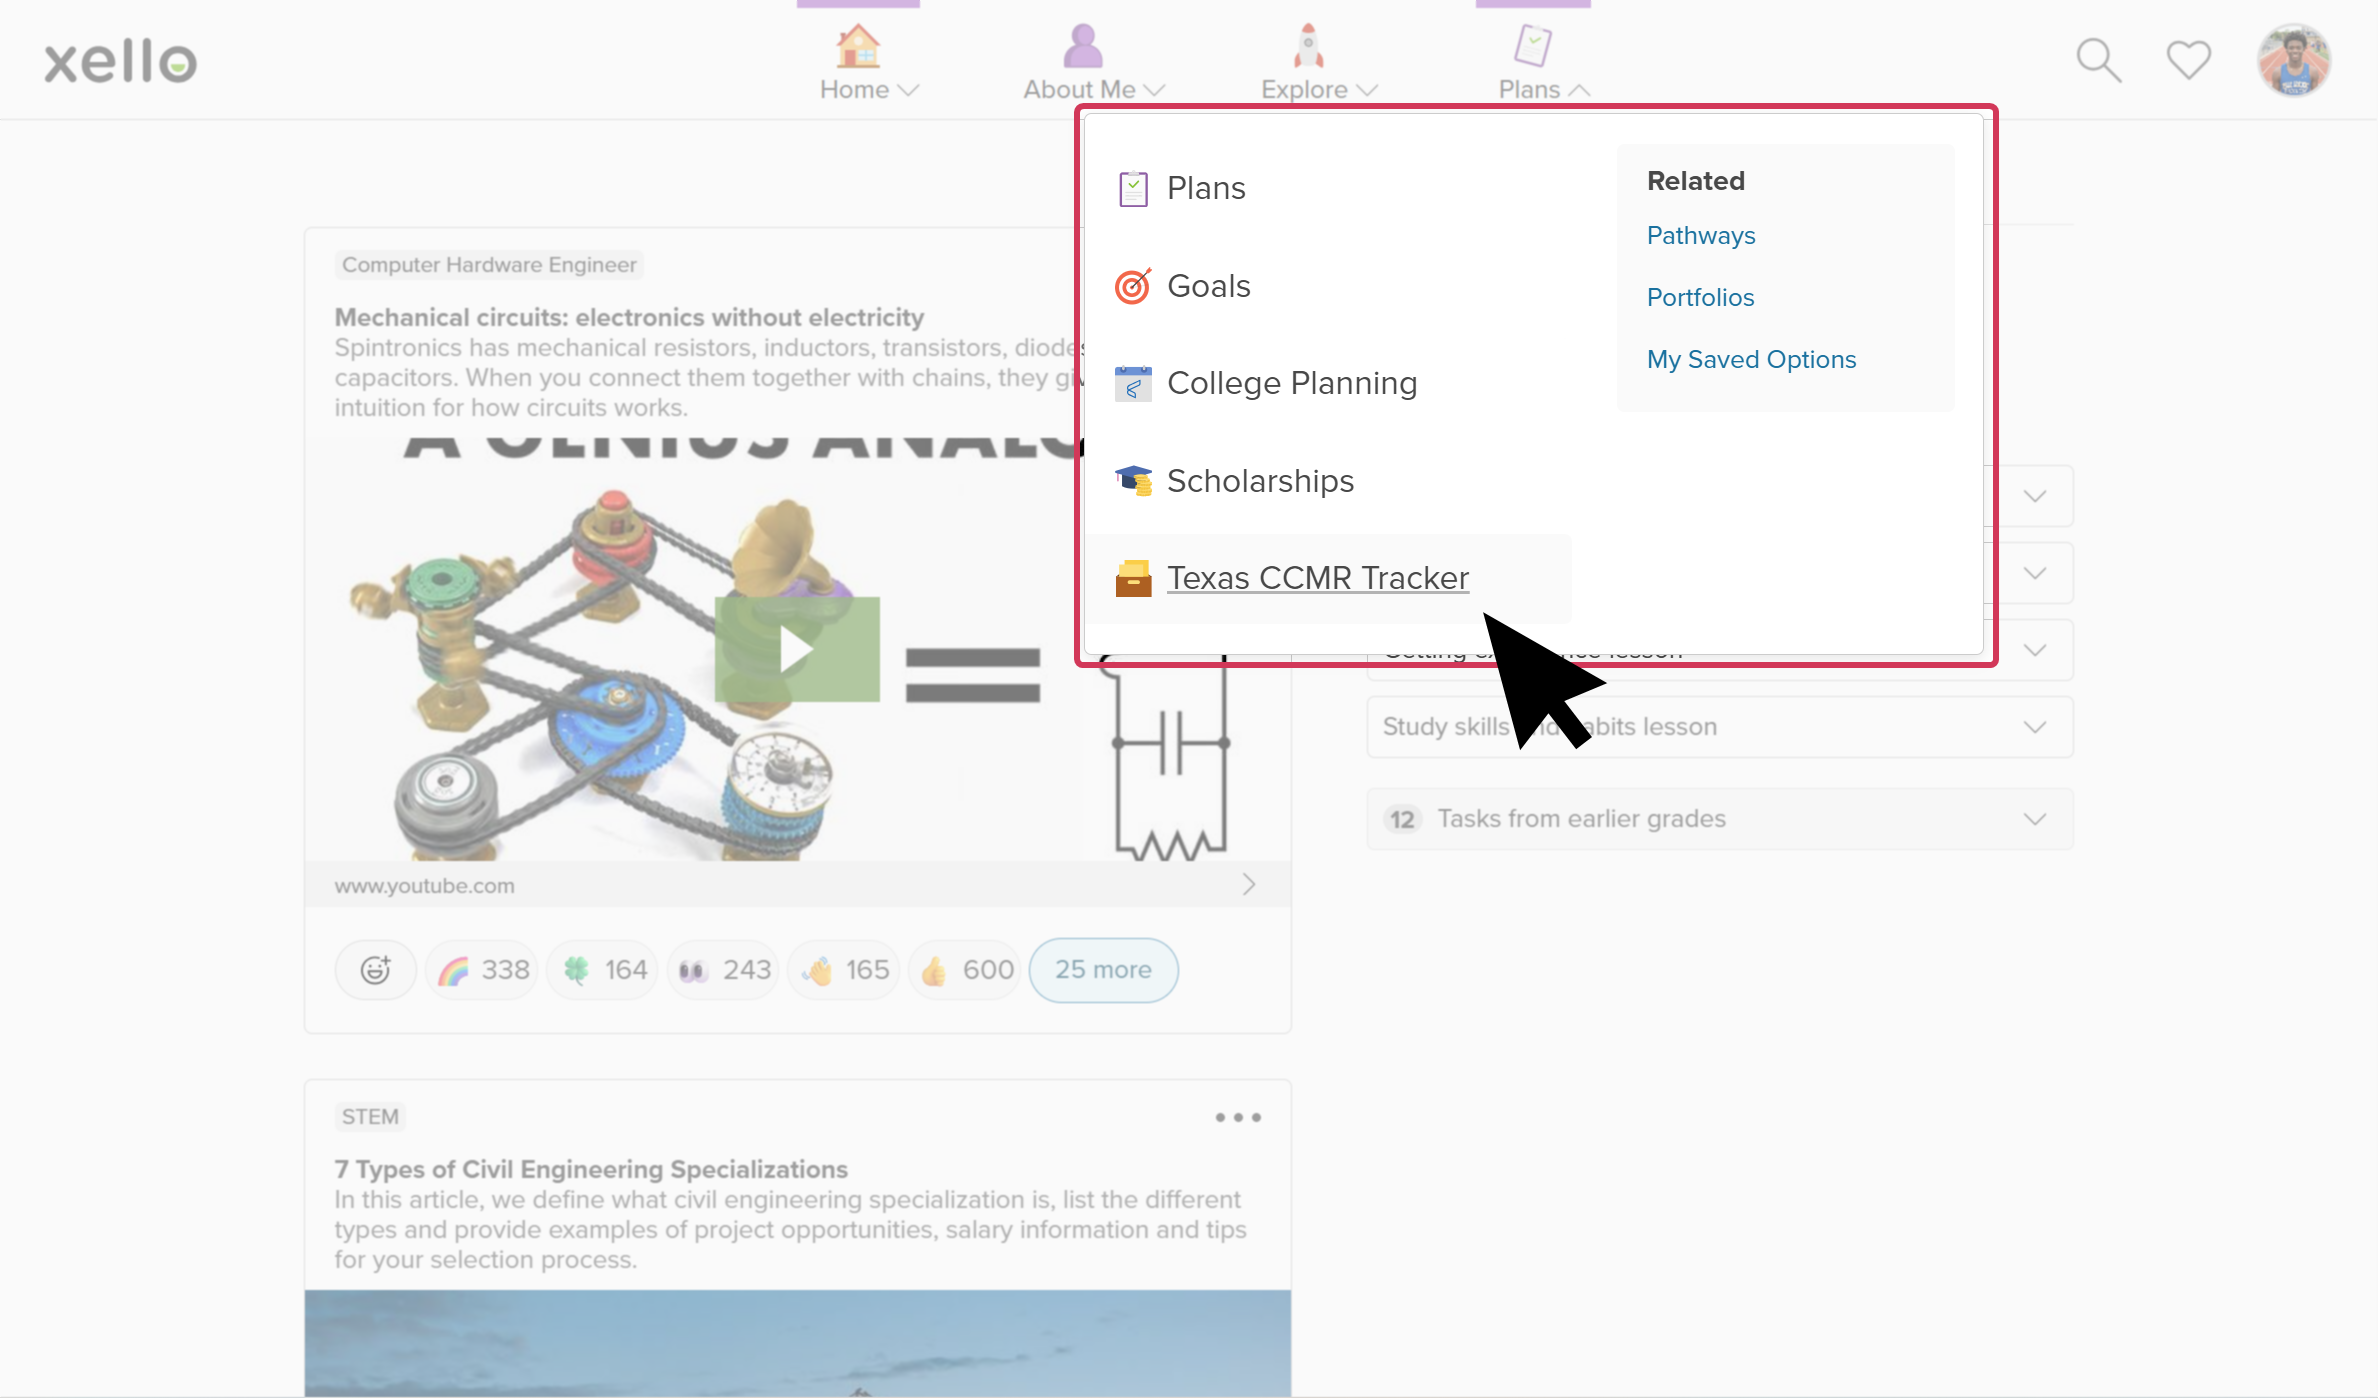
Students access the CCMR Tracker from the Plans menu.

A green progress bar at the top of the page lets students know when they’ve met at least one approved readiness indicator. Once they click in, students will find the list of the indicators, including the type of indicator and a description. They have the option to check off the ones they plan to complete. The student cannot change any indicators that have been set to complete.
CCMR Indicator Tracking
Data source formats
Indicator completion tracking is dependent on your district’s report set up. Each indicator will rely on 1 of 3 source formats:


For Simple or Template uploads, your district may have scheduled these uploads to automatically update through a secure file transfer with Xello. Scheduled uploads will be indicated with a calendar icon within the reporting table.
| Format | Description |
|---|---|
|
Scheduled simple upload
|
District tracks requirement fulfillment through an automated Yes/No secure file transfer. Optionally, educators copy/paste student IDs or search/select students to record fulfillment. |
|
Scheduled template upload
|
District tracks requirement fulfillment through an automated file transfer that contains a series of columns for each student. Xello validates the file for accuracy before updating requirement fulfillment. |


Track indicators in the student profile
You can review the status of a student’s CCMR indicators in their student profile.
-
In the search bar located at the top of any page in your educator account, enter the student's name or ID.
 Click to enlarge
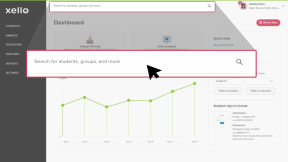
 Tip: Alternatively, from the left menu, click Students and select Student list to browse the full list of students.
 -
Click on the student's name. The About student tab of their profile opens.
 Click to enlarge
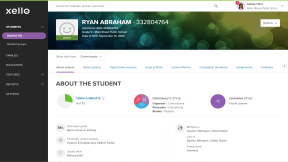
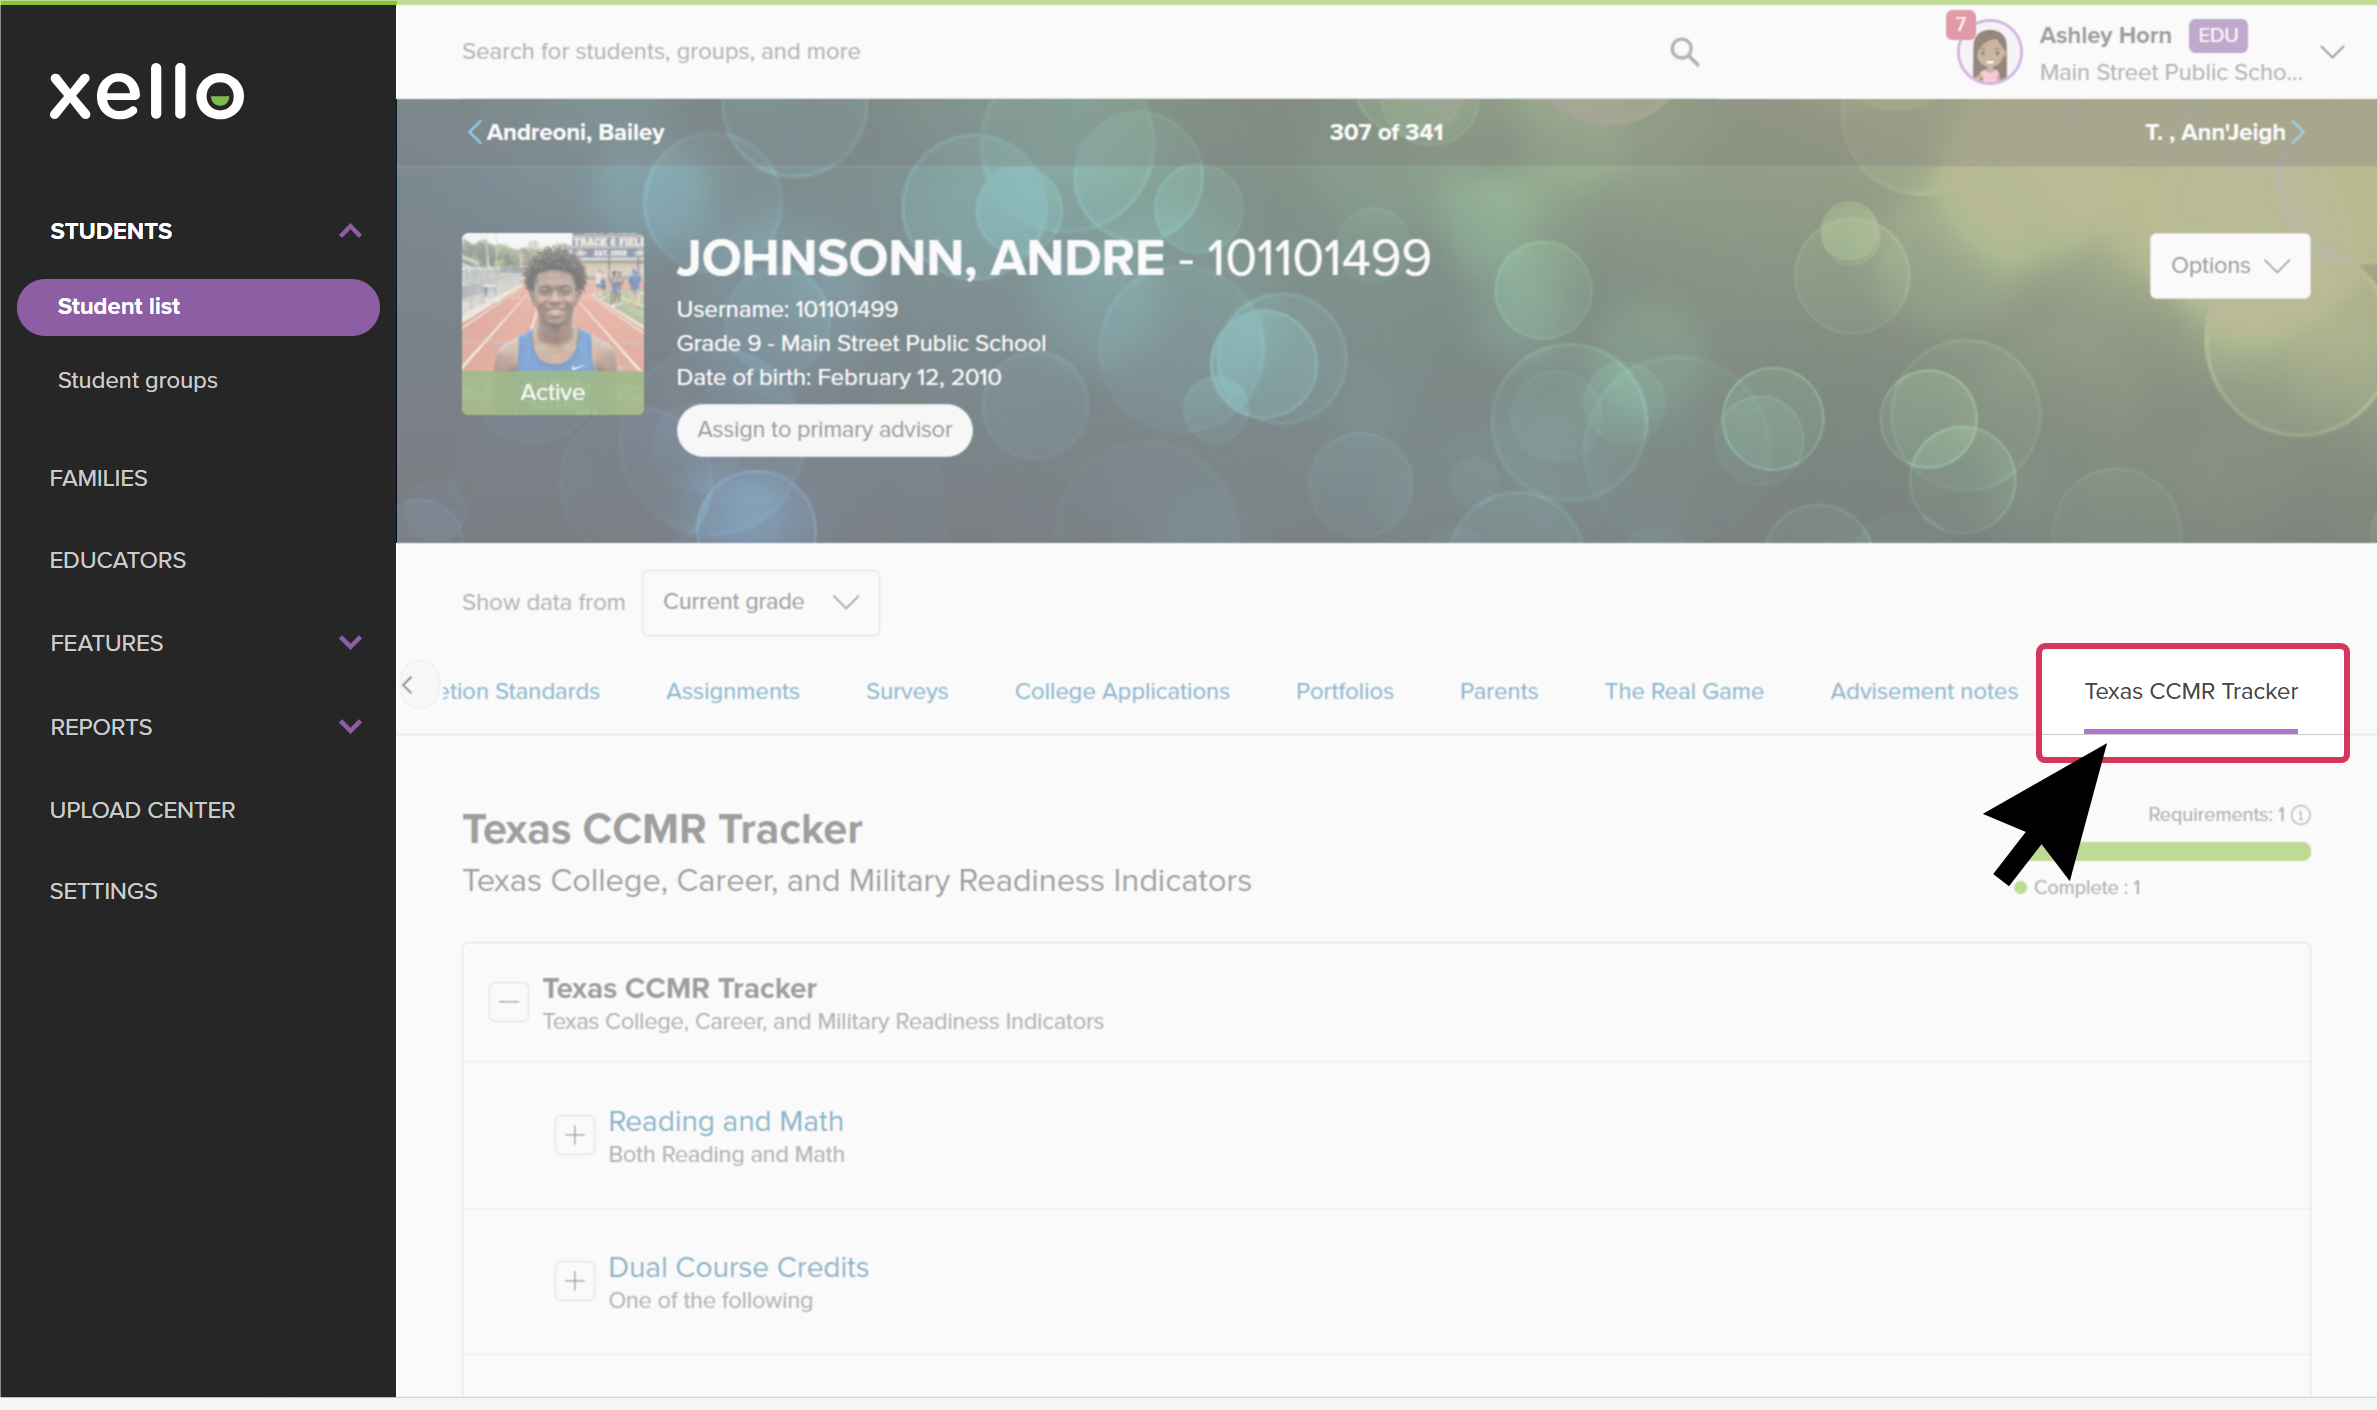
- Click the Texas CCMR Tracker tab.
 Click to enlarge
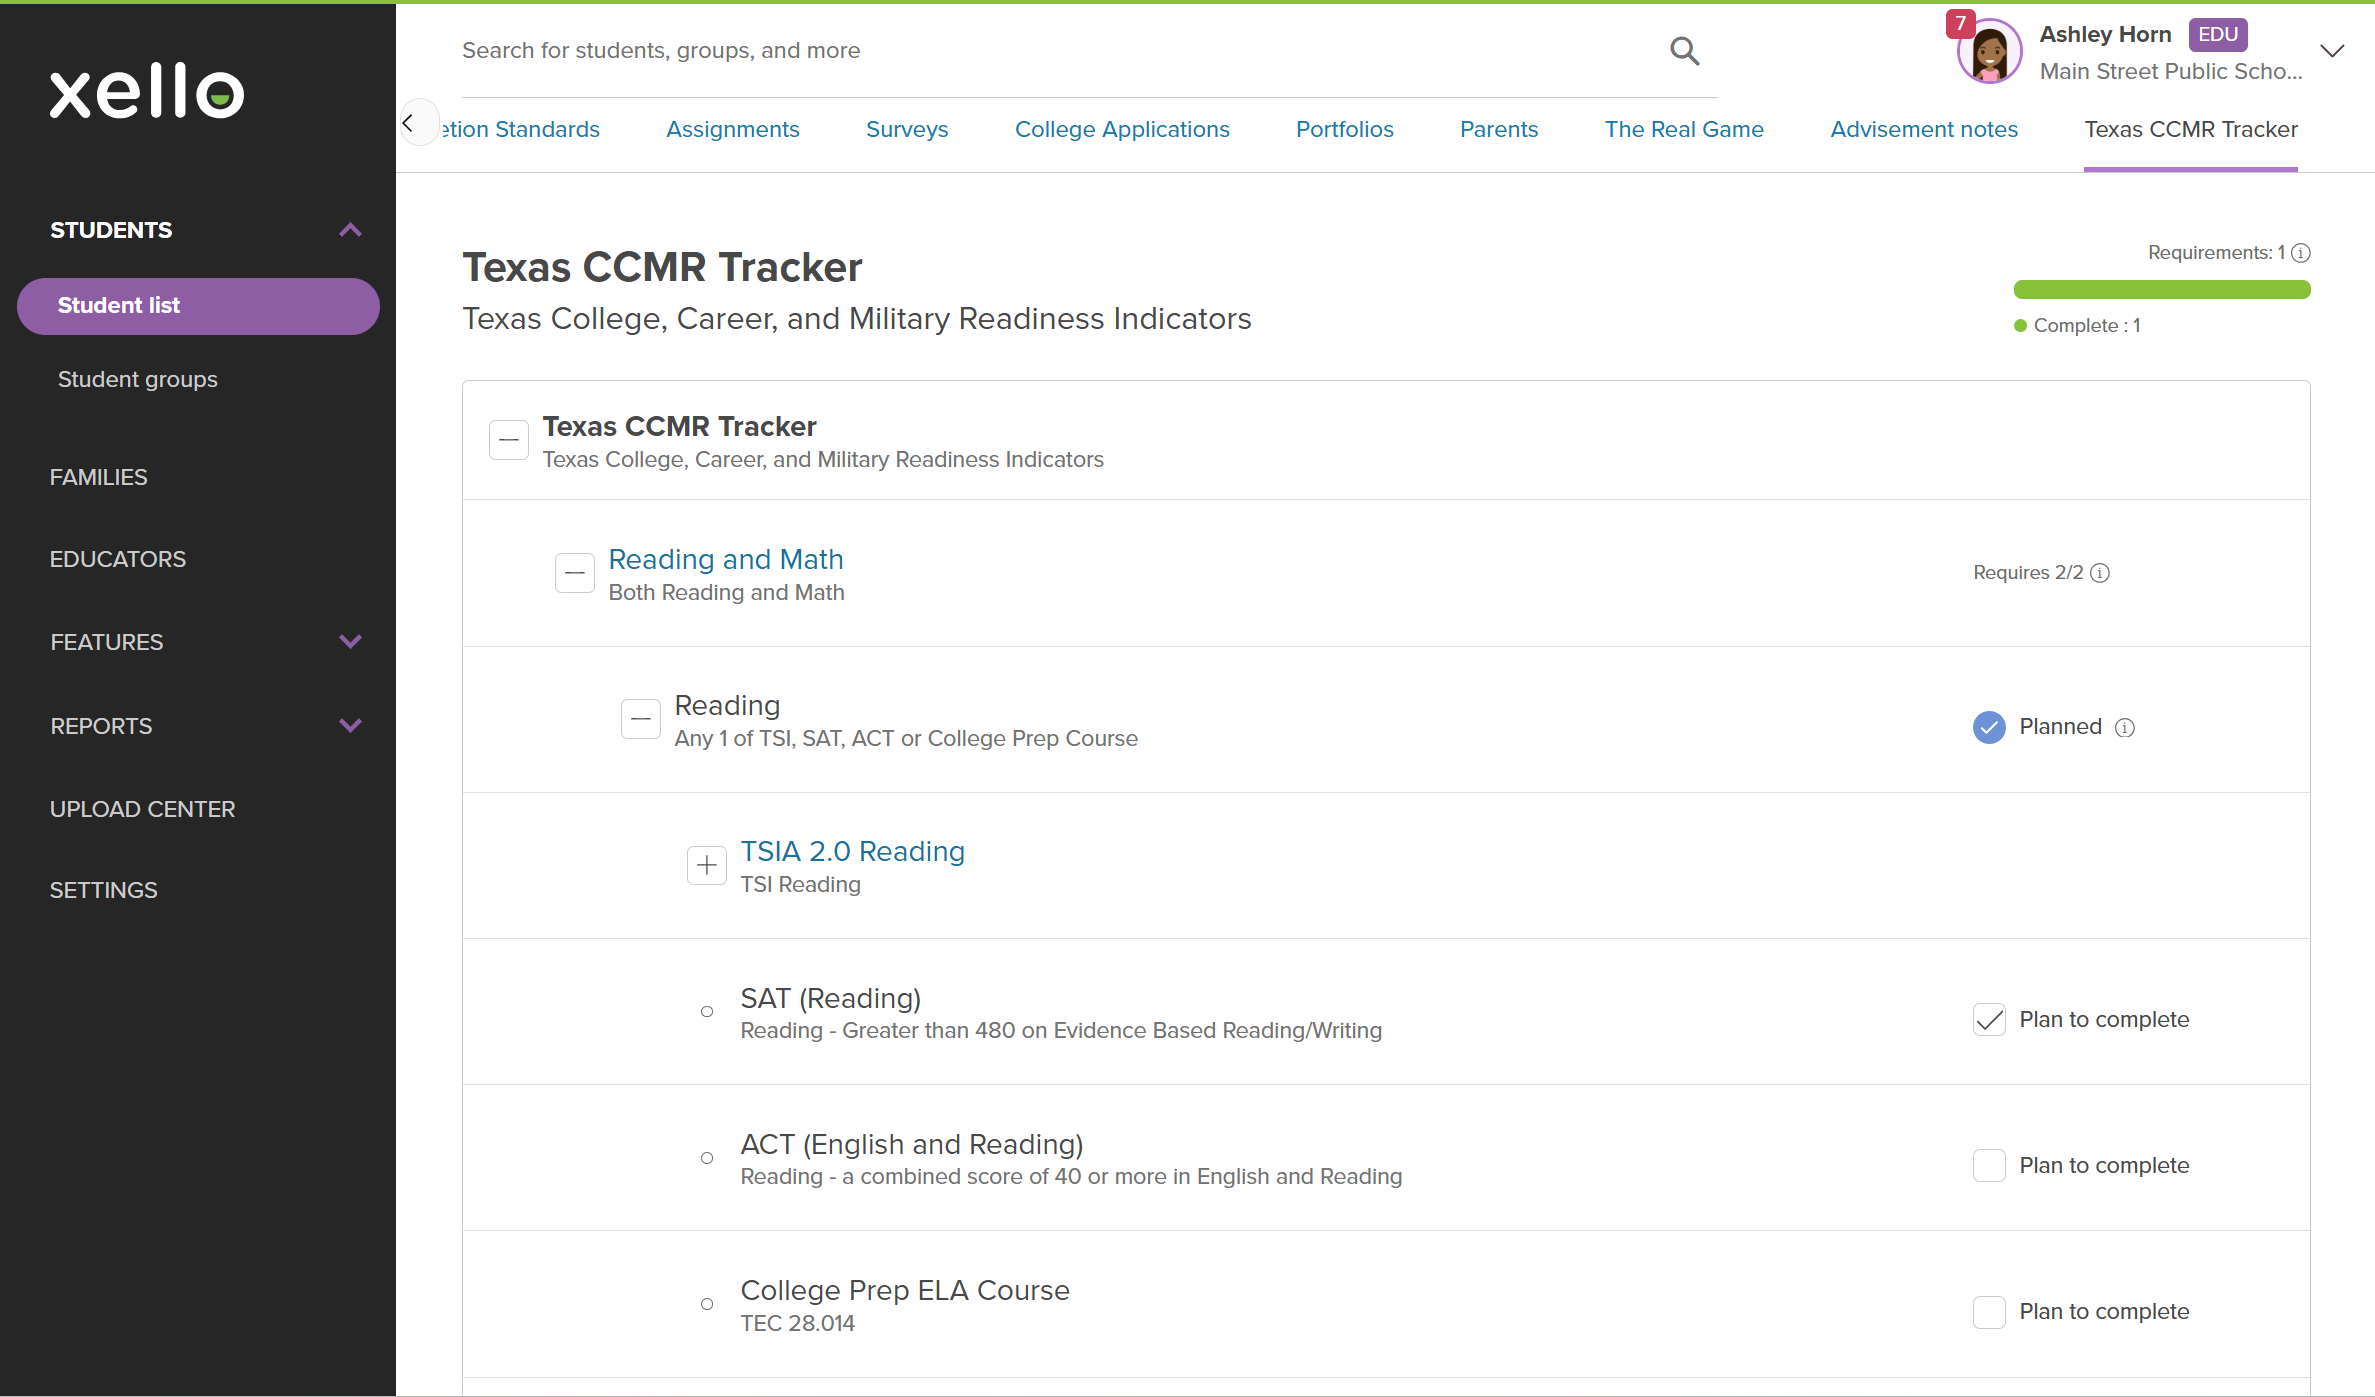
- If an indicator has more than 1 requirement, click the plus icon to expand the nested requirement details.
- A green checkmark and ‘Complete’ identifies the indicator(s) the student has completed. A grey checkbox identifies the indicator(s) the student plans to complete.
 Click to enlarge
 Note: Students can select which indicators they plan to complete; they cannot enter or modify completion data.
Update student completion data
You have the option to manually update the completion status for one or more students regarding a specific CCMR indicator directly within the report. This is dependent on the data source format for the CCMR indicator you wish to record and your permission access level.
Follow these steps for those indicators you have permission to upload completion for:
- From your educator account, click Reports and select Texas CCMR Tracker.
Click to enlarge
- Locate the requirement you need to update.
Note: To review the requirement details, select the requirement name.
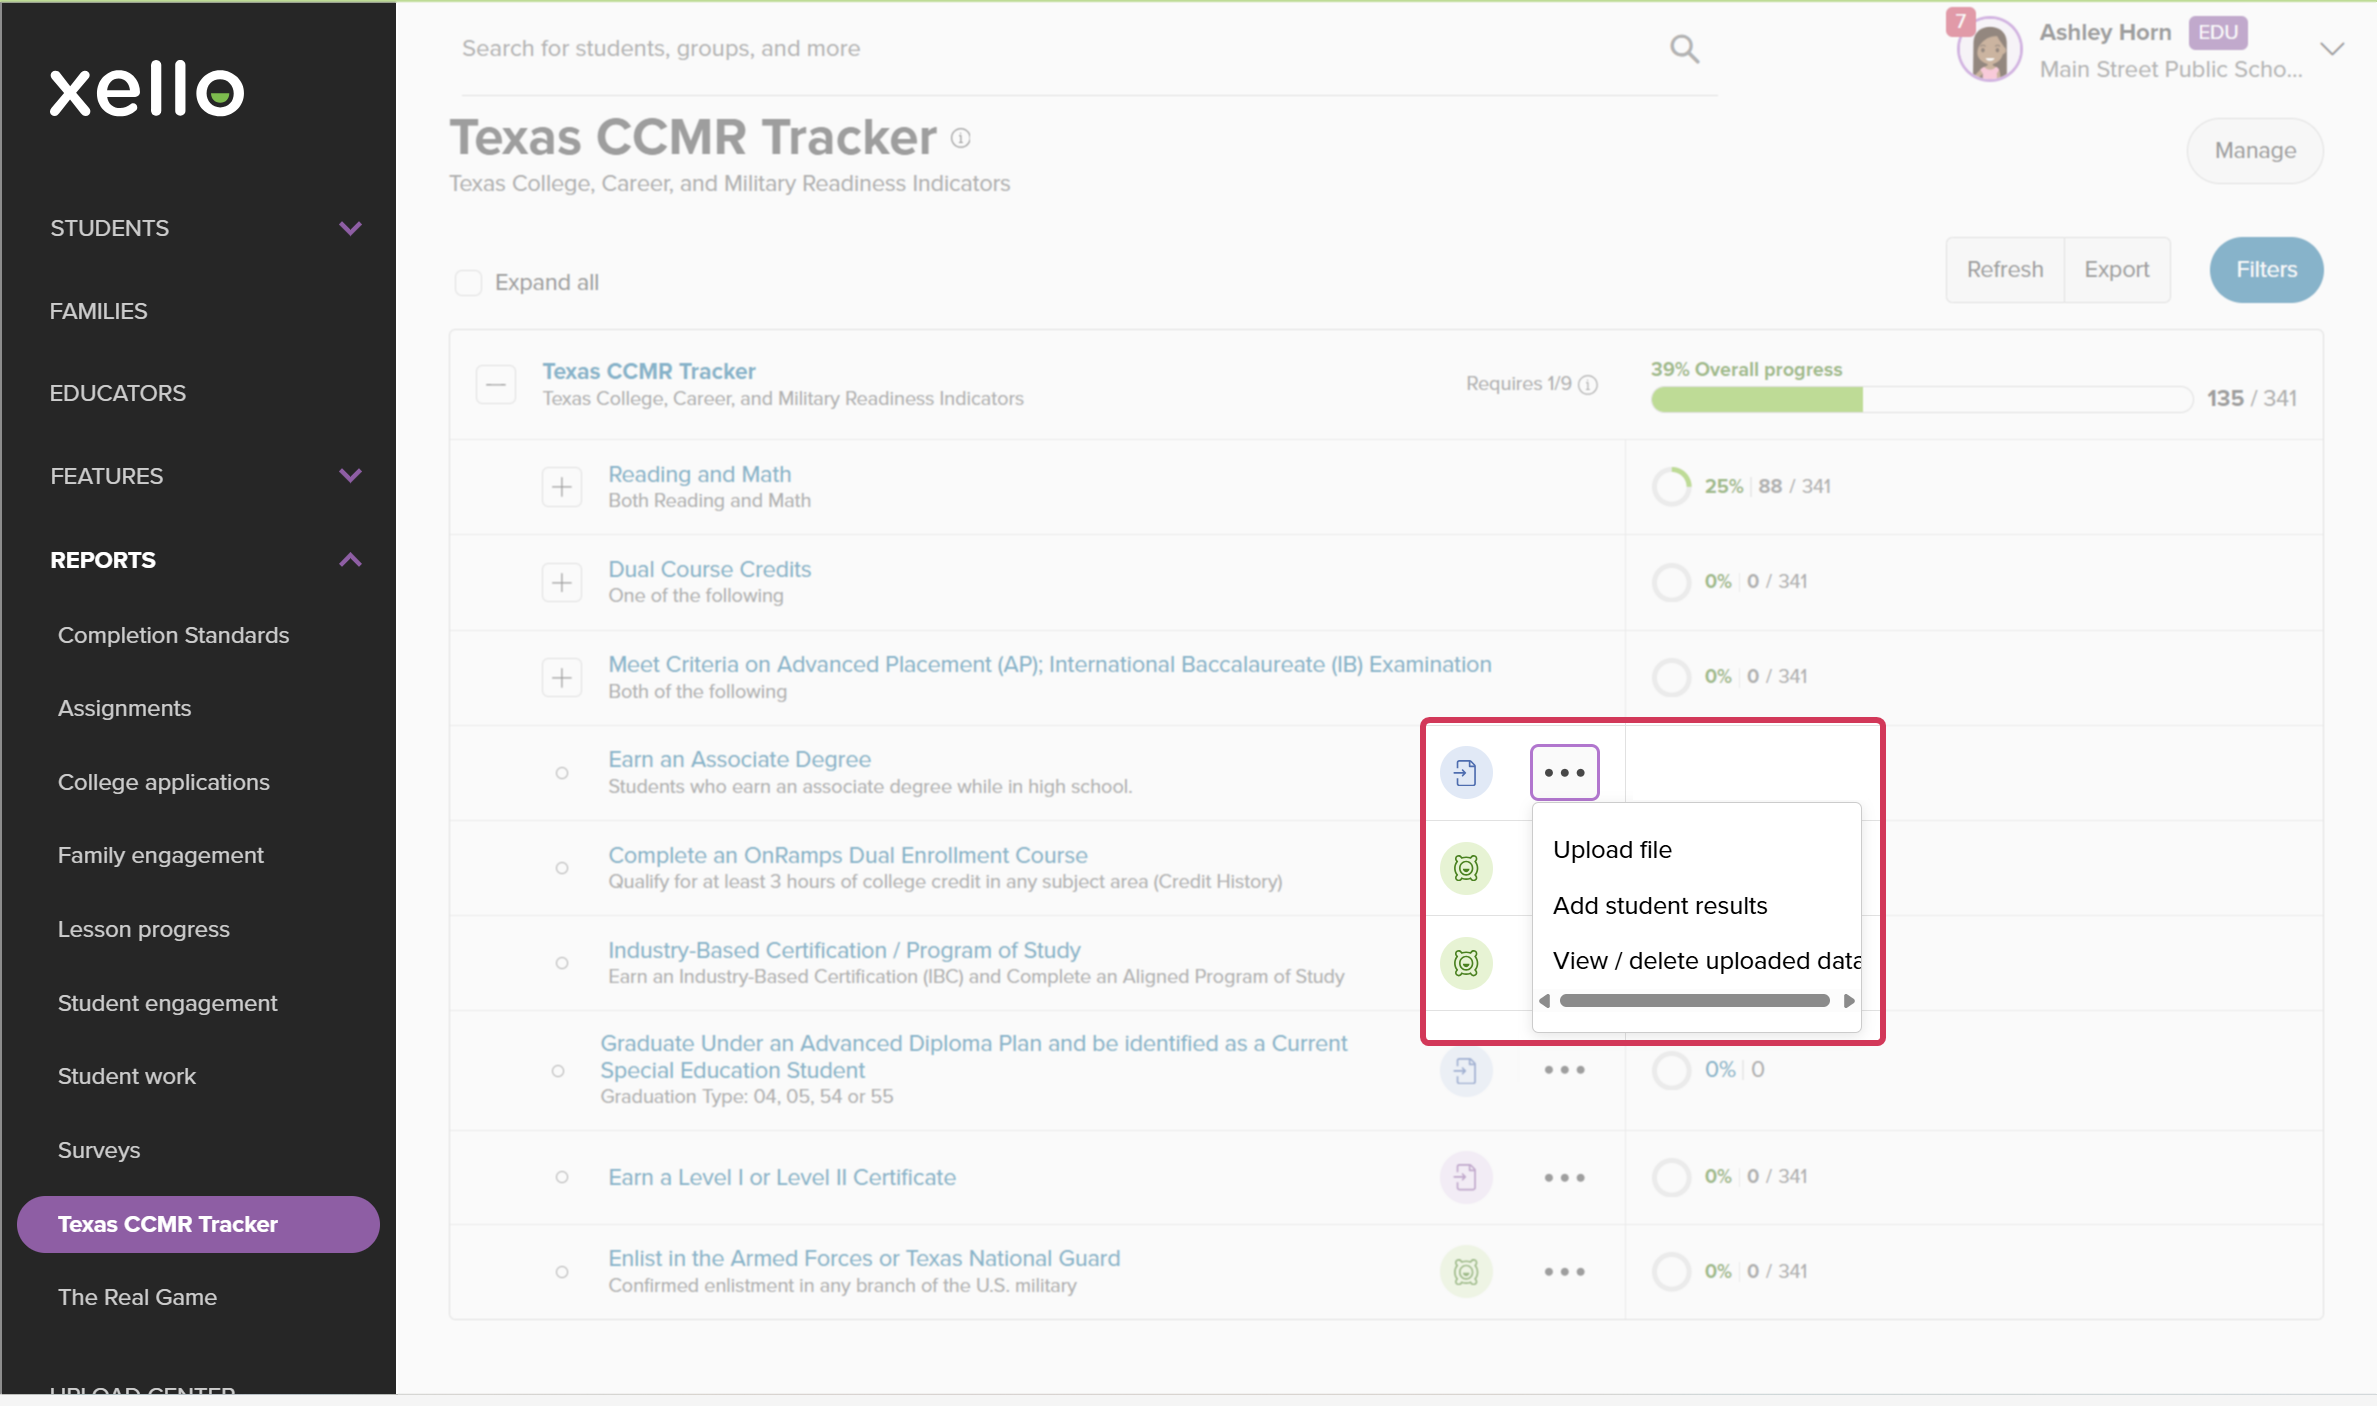
- Next to the requirement, click the three-dot menu and select Upload file.
 Click to enlarge
 Note: For Simple upload formats you will also have the option to add student results. Click Add student results to paste student IDs or Search for students by name to mark specific students as complete.
 - Click Download sample CSV for the data file template.
 Click to enlarge
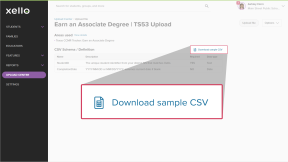
- Update the CSV template with the required data.
- Click Upload file to drag and drop the file or select it from your device.
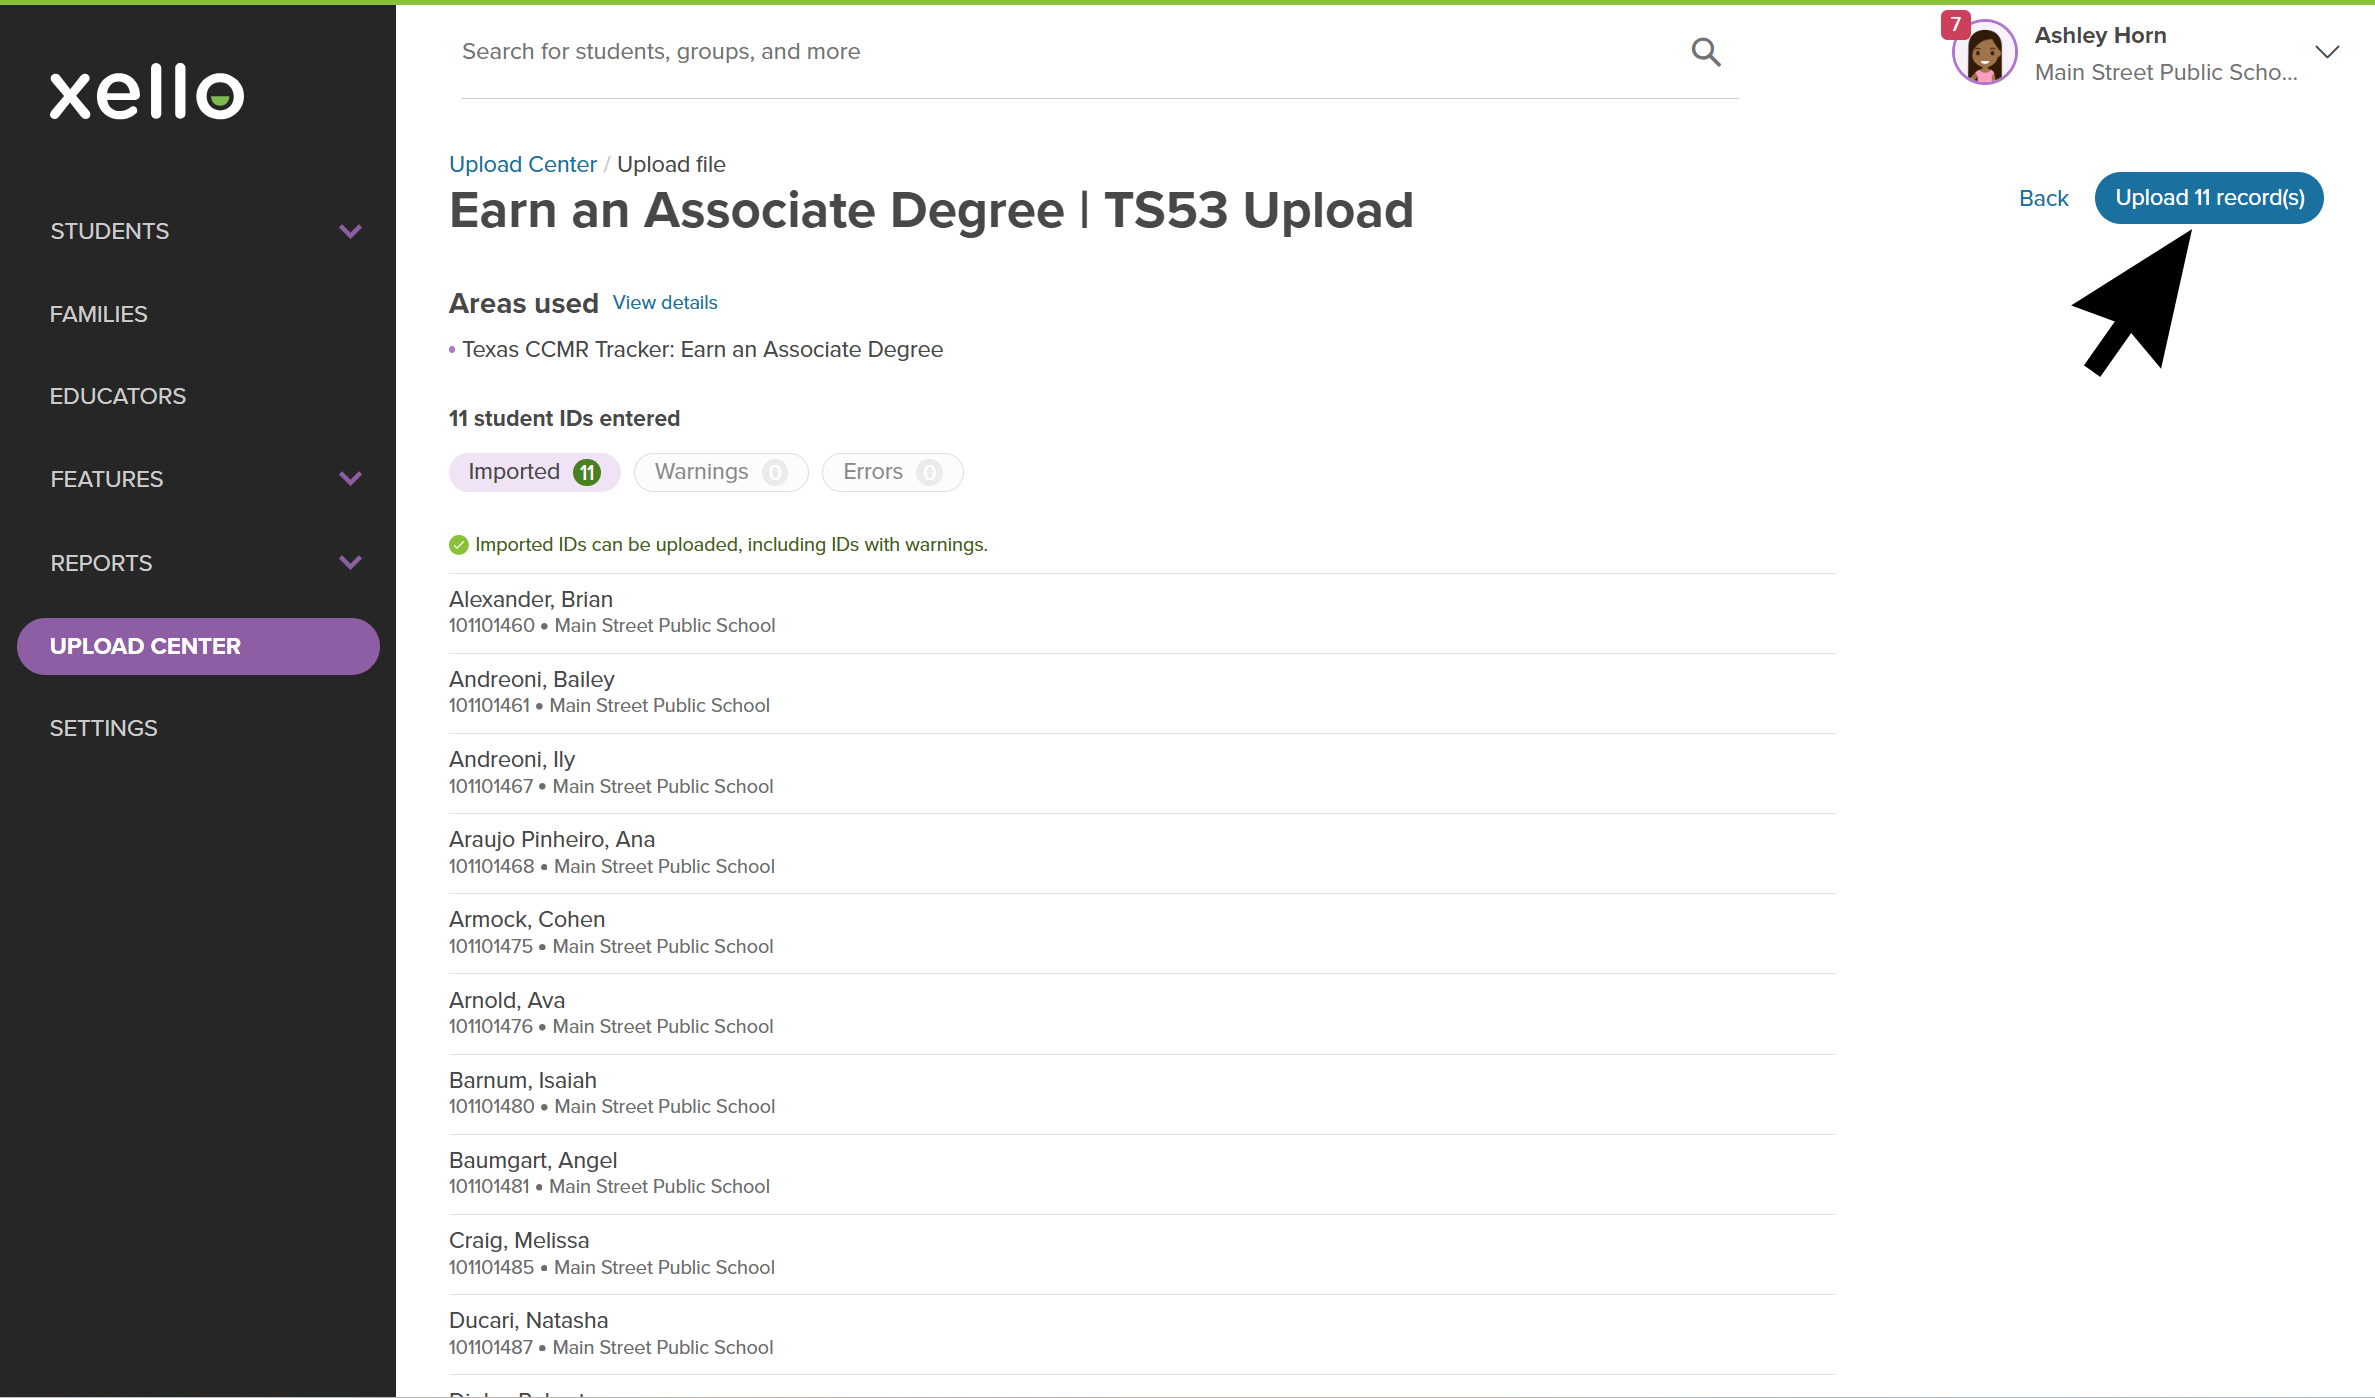
- A summary of your import will display on screen. If there are any issues with the import the details will appear under Warnings or Errors. Fix any issues in your file and re-upload if necessary.
- Click Upload # records to complete the import.
 Click to enlarge
- A banner at the top of the page will confirm the import was successful.
- Return to the Texas CCMR Tracker report to confirm the imported file has been reflected. Click Reports and select Texas CCMR Tracker. Verify the percentage and student count has increased for the indicator requirement you imported.
Run Reports on CCMR Indicators
You can run reports on your students' CCMR Indicator status.
To run a report on students' CCMR Indicator status:
- From your educator account, click Reports and select Texas CCMR Tracker.
Click to enlarge
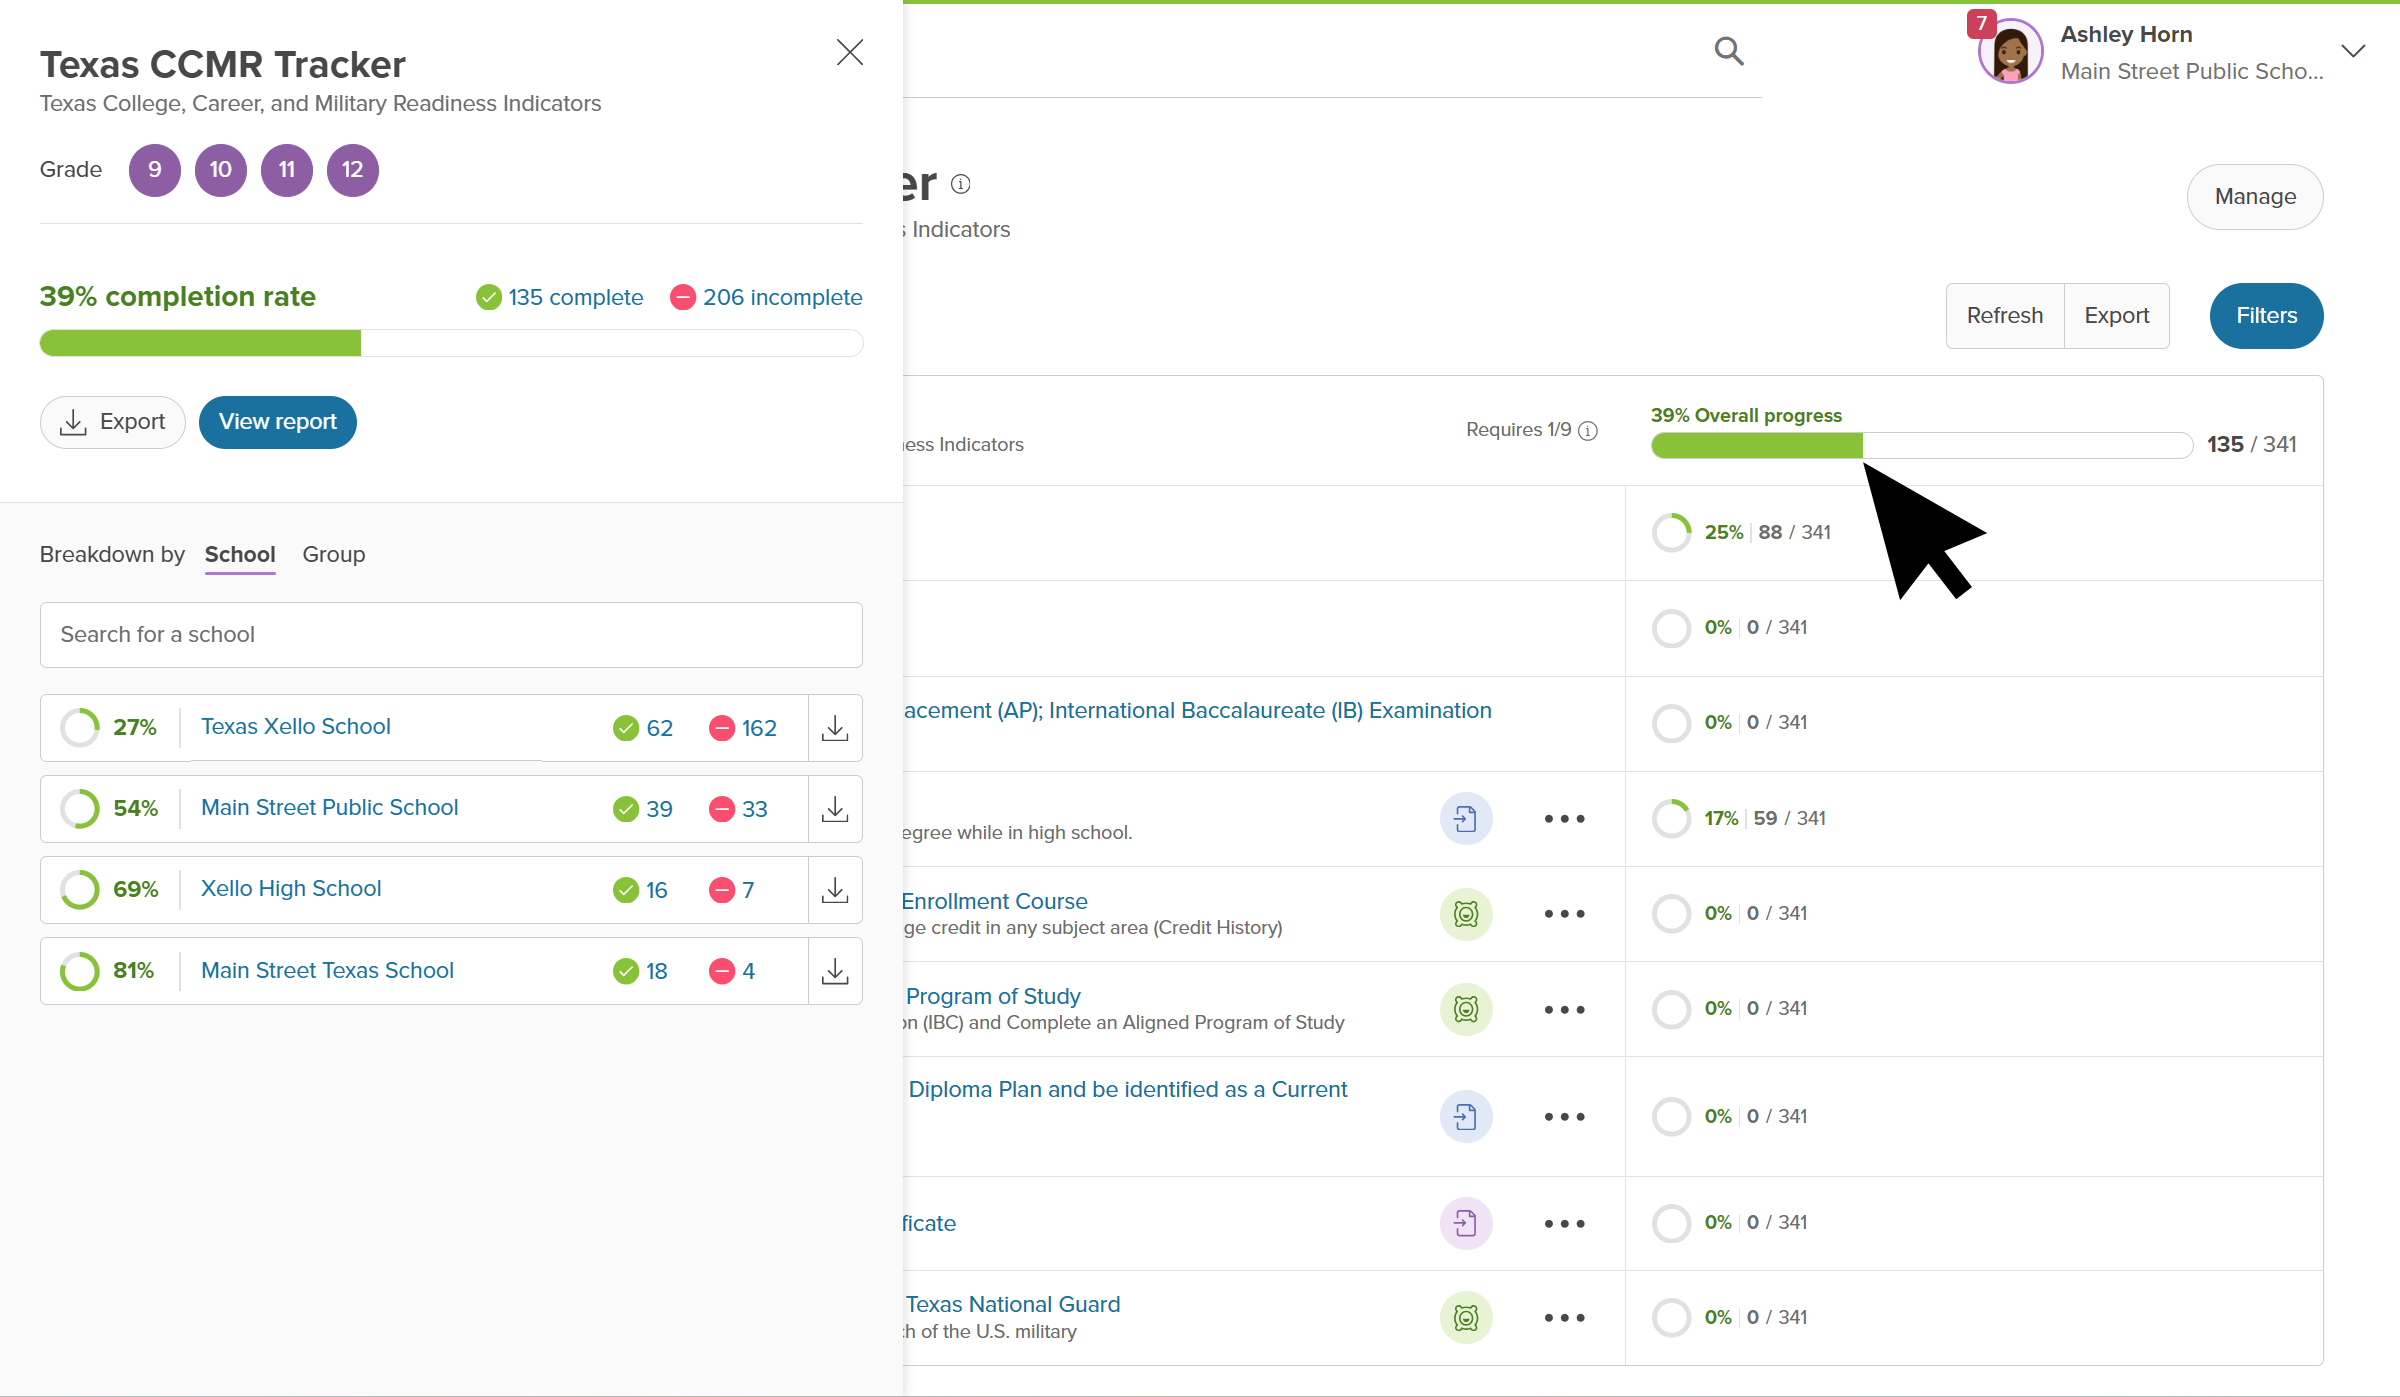
- At the top of the table, click Overall progress.
 Click to enlarge
- To see the complete list of students and their completion status, click View report. From this report, you can select multiple students to add to a group or send a message to.
Tip: Select only those grades, school name, or completion status to view a filtered view of the report.
- Click Export to download a copy of the current report as a CSV or Excel file. Or to return to the previous view, at the top of the report, click X.
Run Reports on Outcomes Bonus
The Outcomes Bonus Tracker uses the same CCMR readiness data uploaded for the Texas CCMR Tracker, plus student demographic data from your student data integration file. Required demographic categories include economically disadvantaged (students eligible for free or reduced-price lunch or for other public assistance) and special education (students who meet the criteria under the Individuals with Disabilities Education Act). Without this data, projections may be incomplete or may not provide meaningful category-level funding insight.
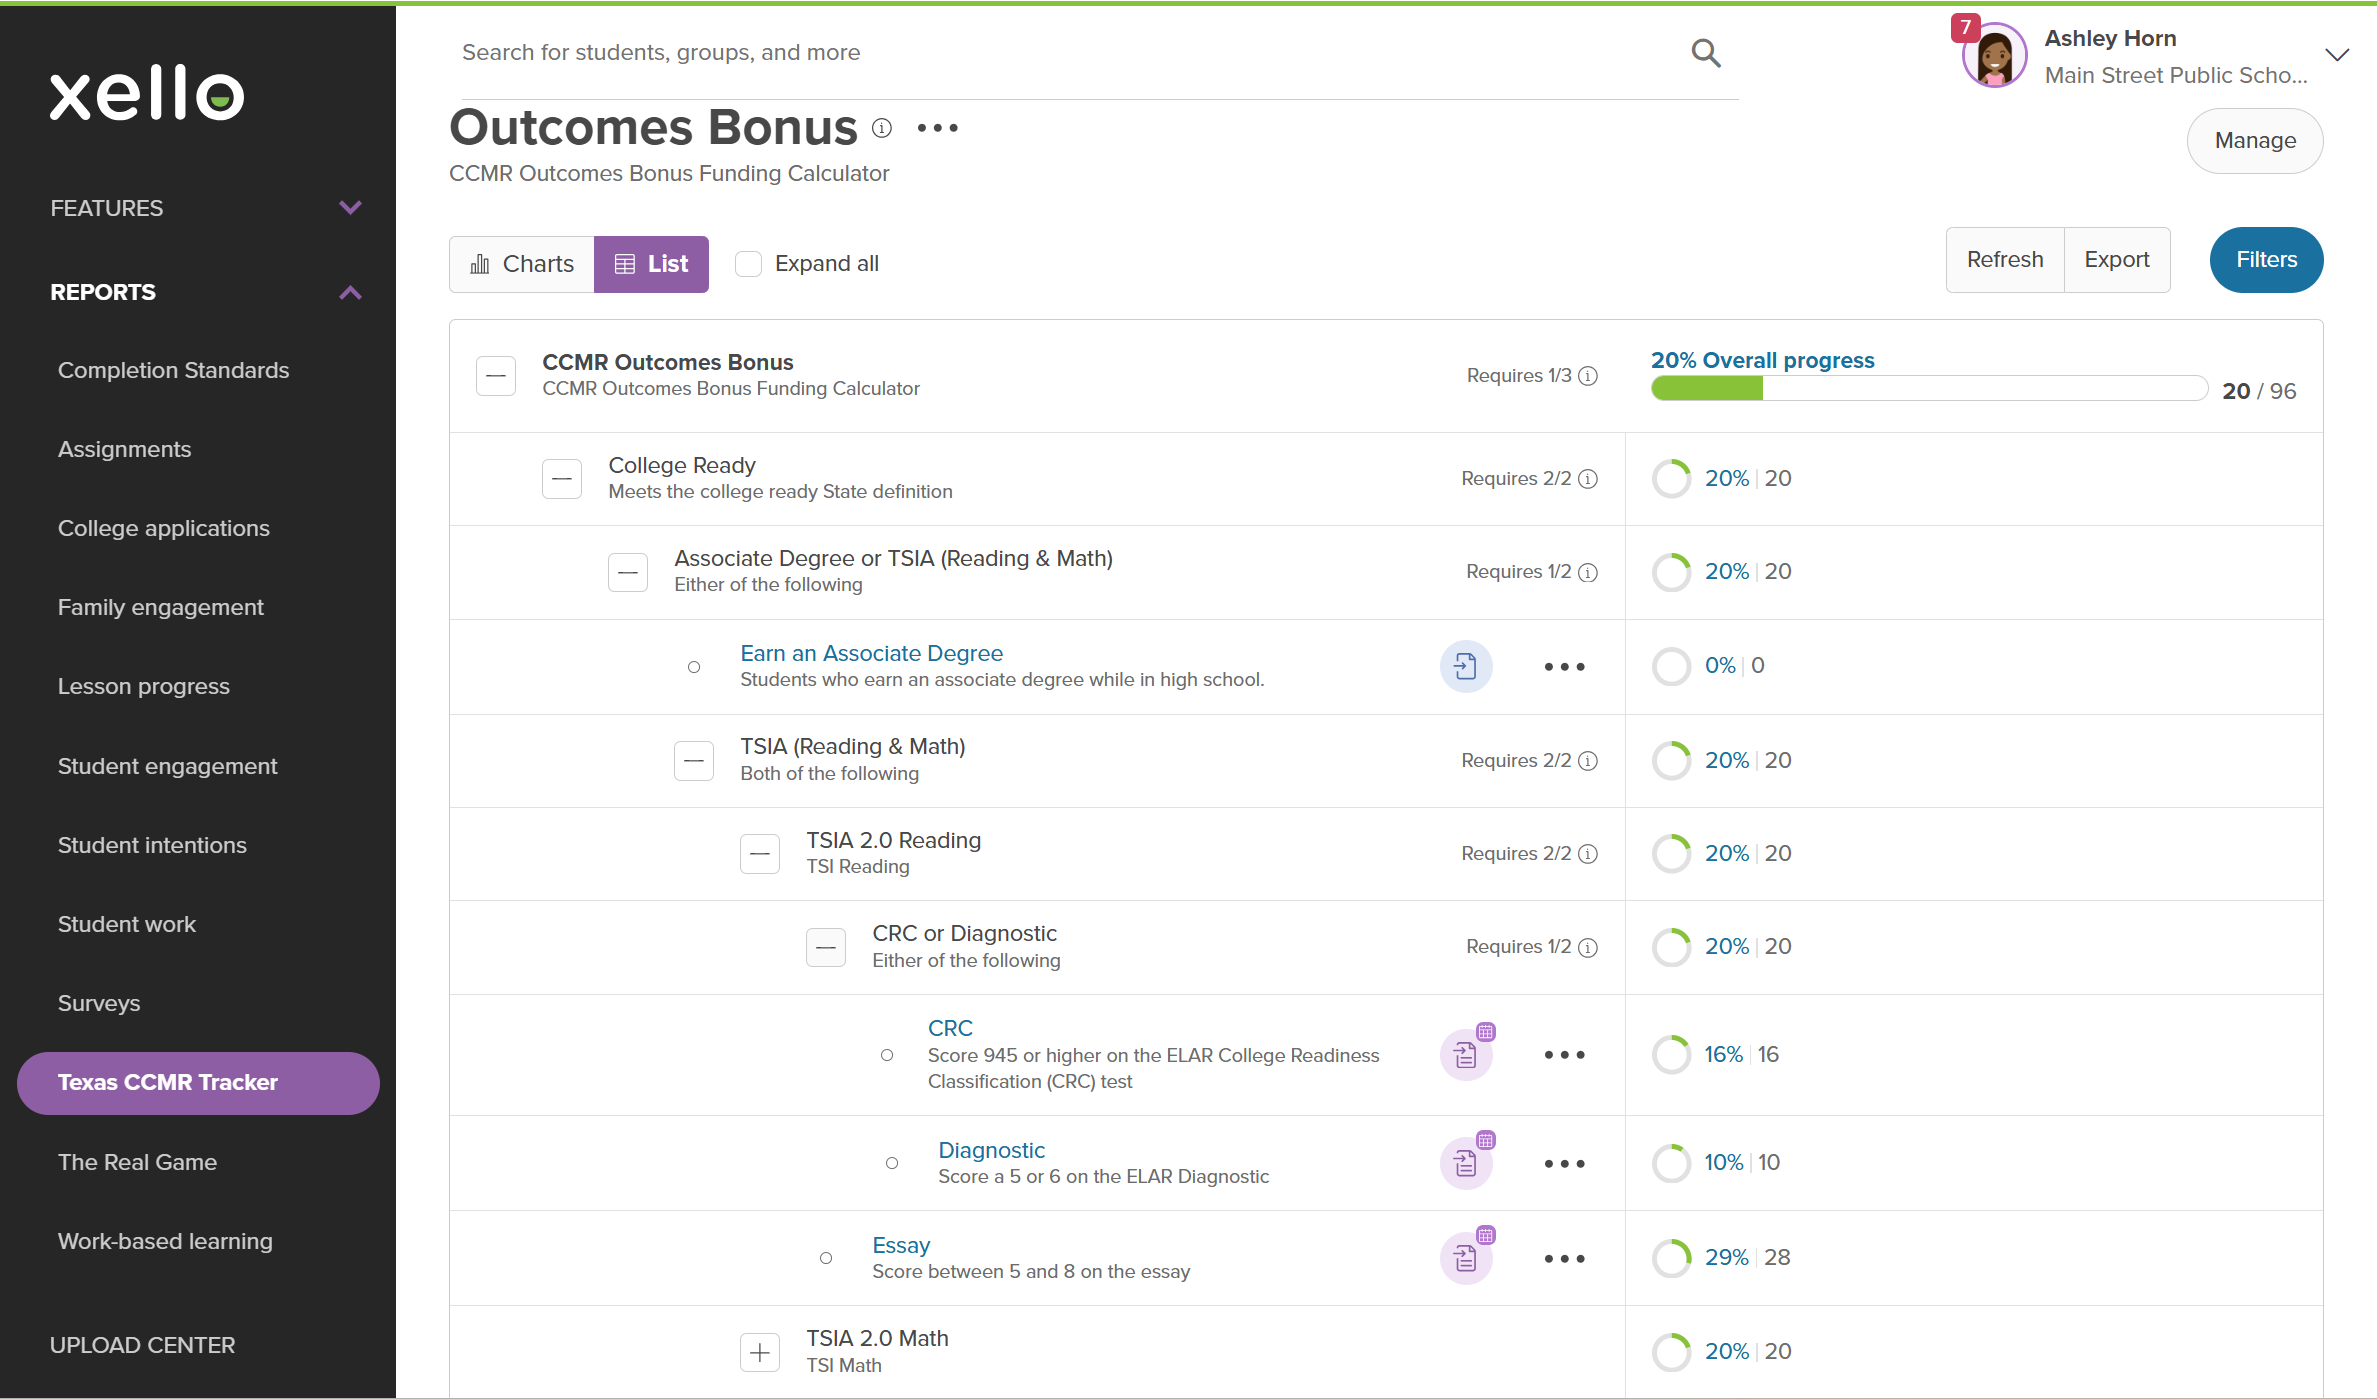
To access the Outcomes Bonus report, click the 3 dot menu beside the Texas CCMR Tracker header and select Outcomes Bonus.

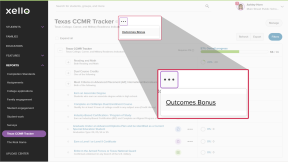
Projected funding amounts for qualified and potential are displayed for 3 categories:
- Economically disadvantaged
- Non-economically disadvantaged
- Special education.
To show projected funding by demographic category, including qualified and potential funding, use the Charts view.
Select List view to show the underlying Outcomes Bonus logic tree. It helps users understand which readiness pathways and indicators are causing students to qualify or not qualify. Percentages represent student progress against requirements, not funding percentages.