When it comes to helping students with
Consider the
Add a document
All document management, including adding new documents, can be done from the Document
To add a document:
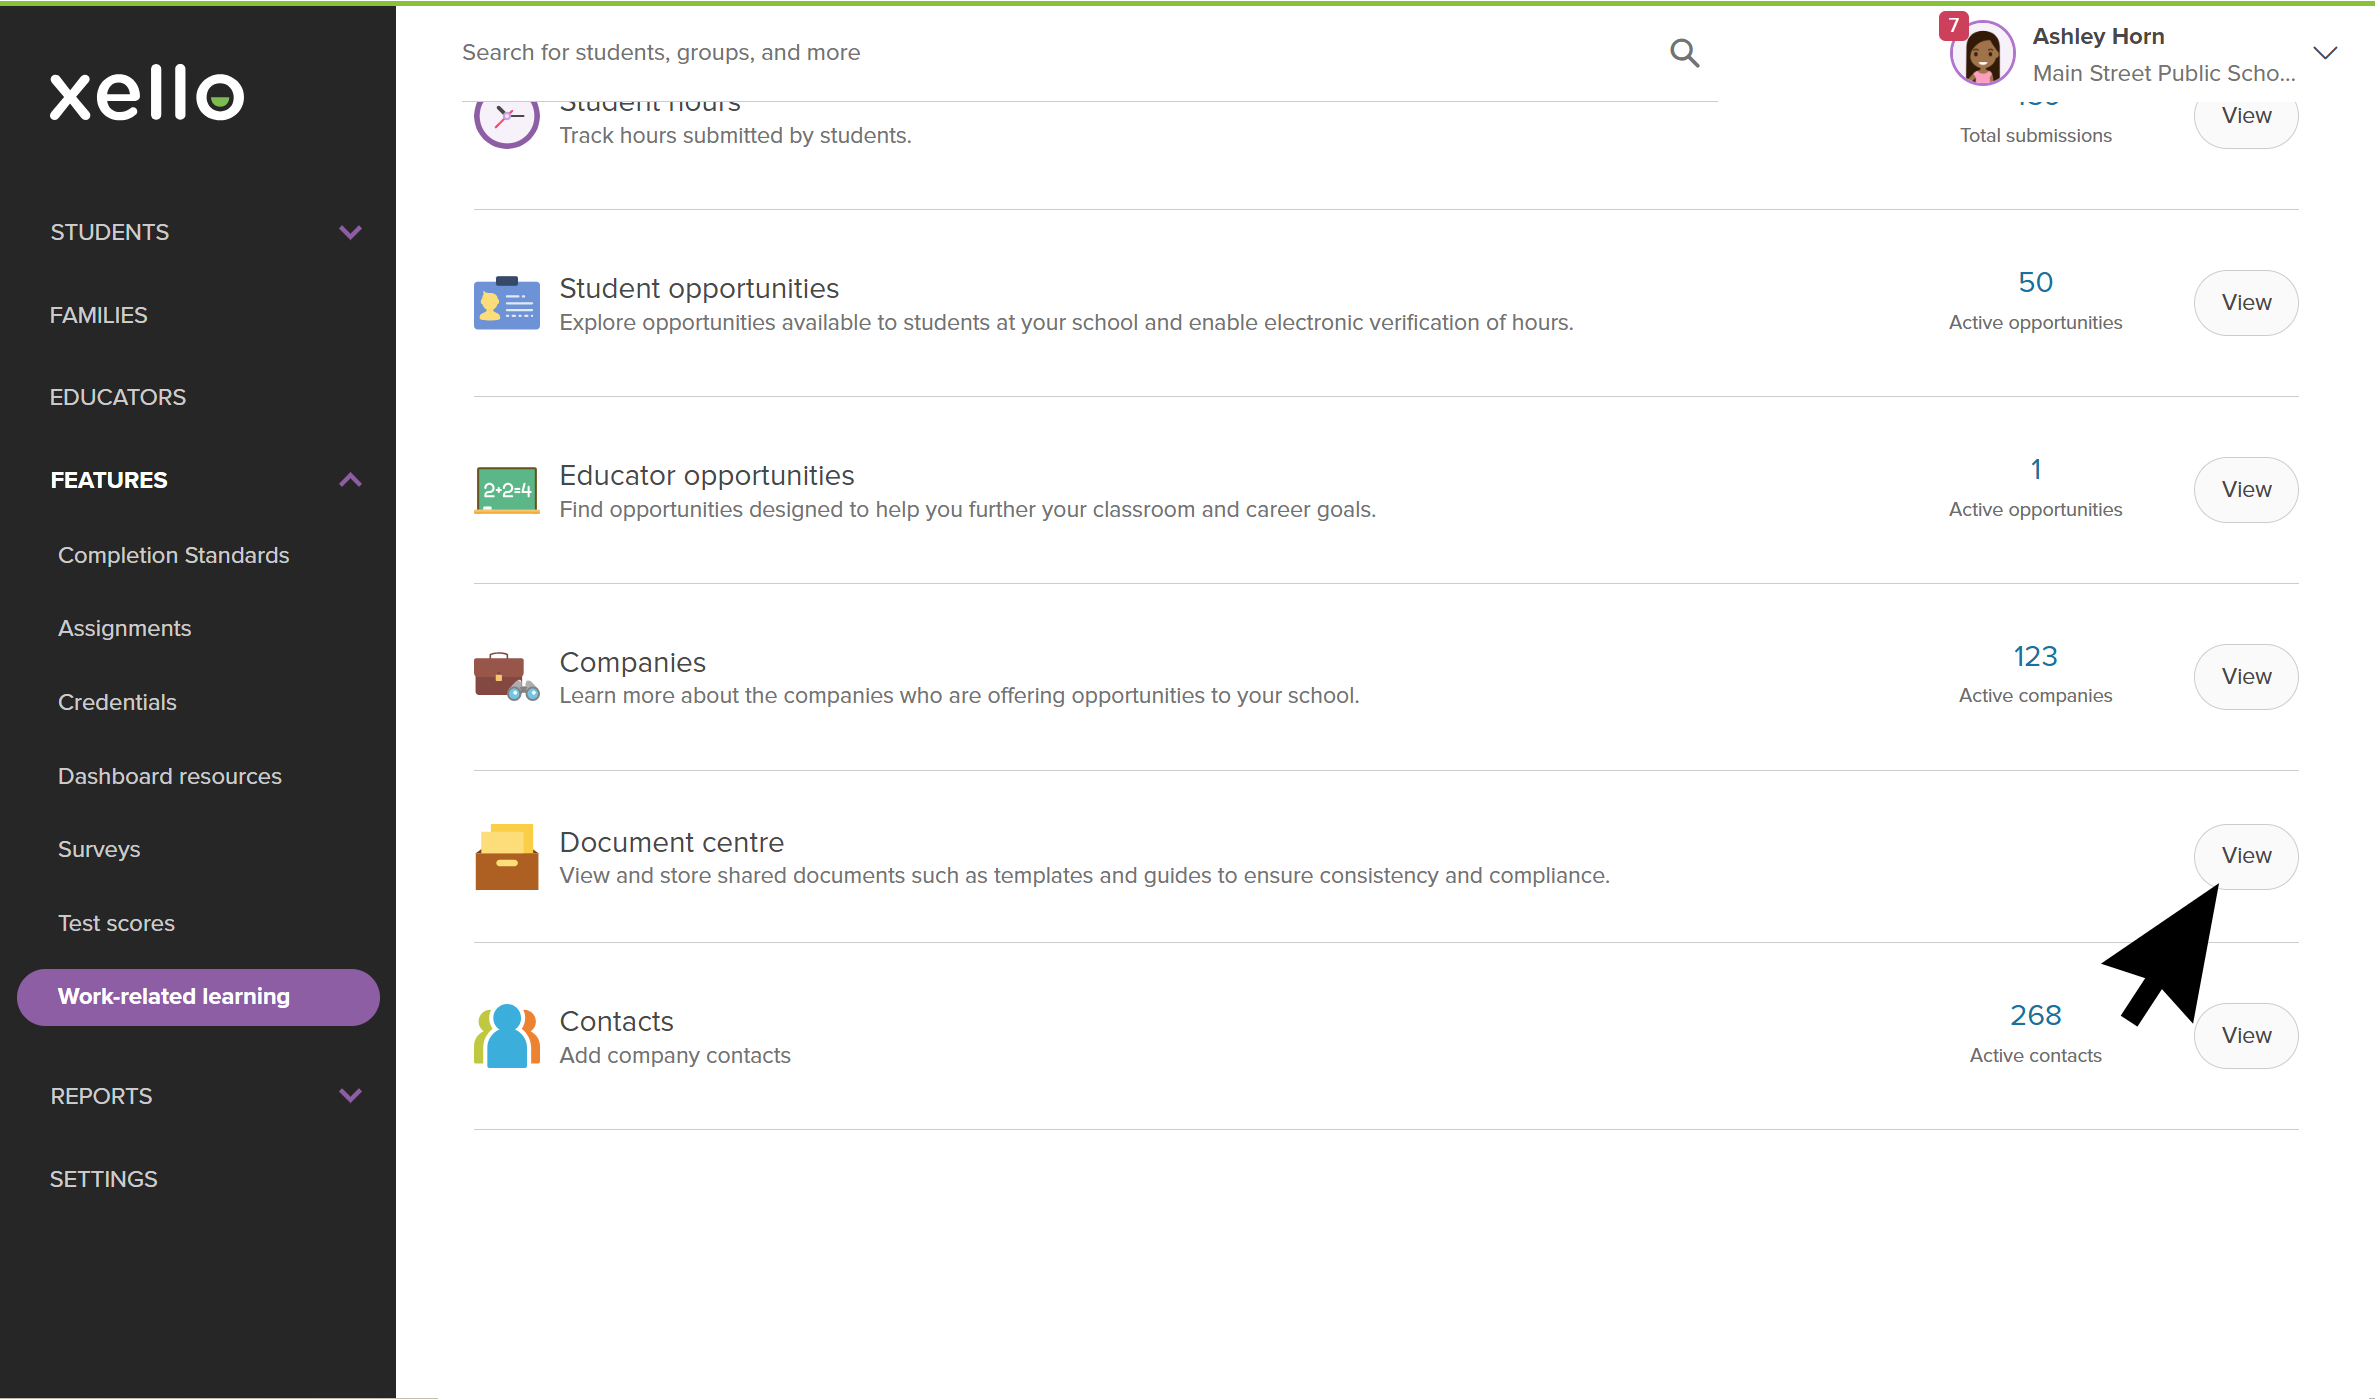
- From your educator account, click Features and select
 Click to enlarge
 - From the
 Click to enlarge
 - Click Add document.
 Click to enlarge
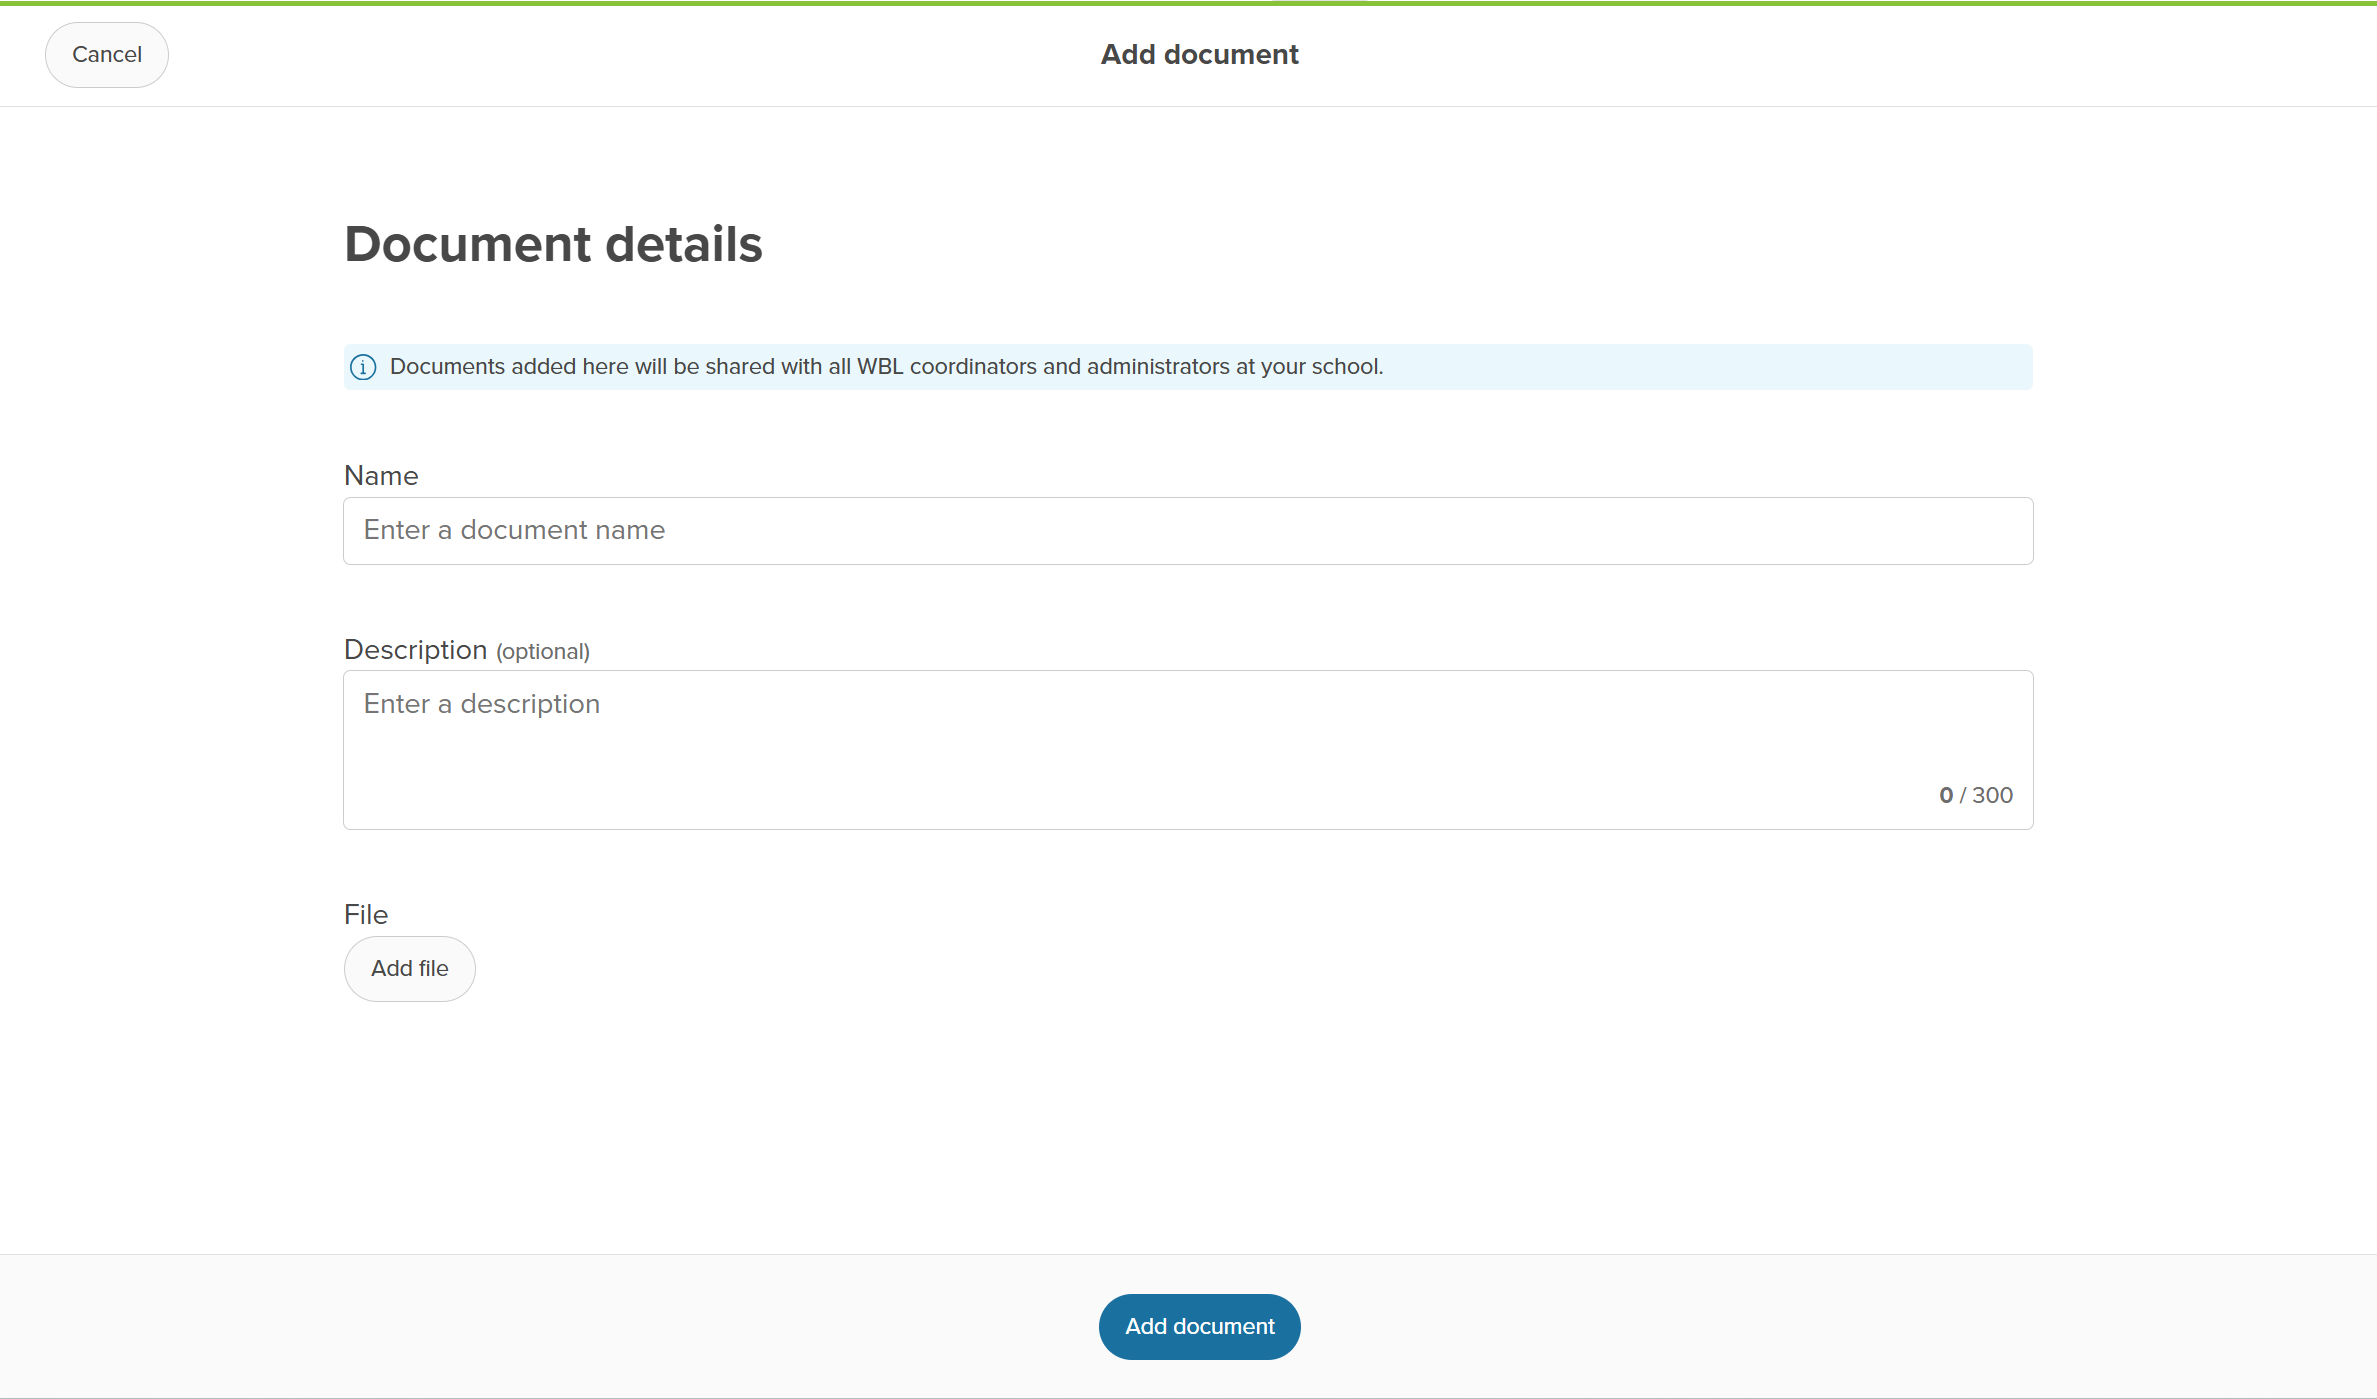
 - Fill in the Document details. A name for the document is required, but a description is optional.
 Click to enlarge
 - Click Add file to drag and drop or choose the file locally from your device.
- Click Add document.
- A success banner will indicate the document has been uploaded.
Work with added documents
Once a document has been added, you can view and download the document, edit the details, or delete the document.
To work with uploaded documents:
- From your educator account, click Features and select Click to enlarge
- From the Click to enlarge
- From this page, there are a few things you can do to easily view and work with documents.
 Click to enlarge
- Search for a specific document by name.
- To narrow the list, click Filters. You can filter by which school or network added the document and when.
- Click a column name to sort the table by that column.
- Click the name of the document to open it in a new tab.
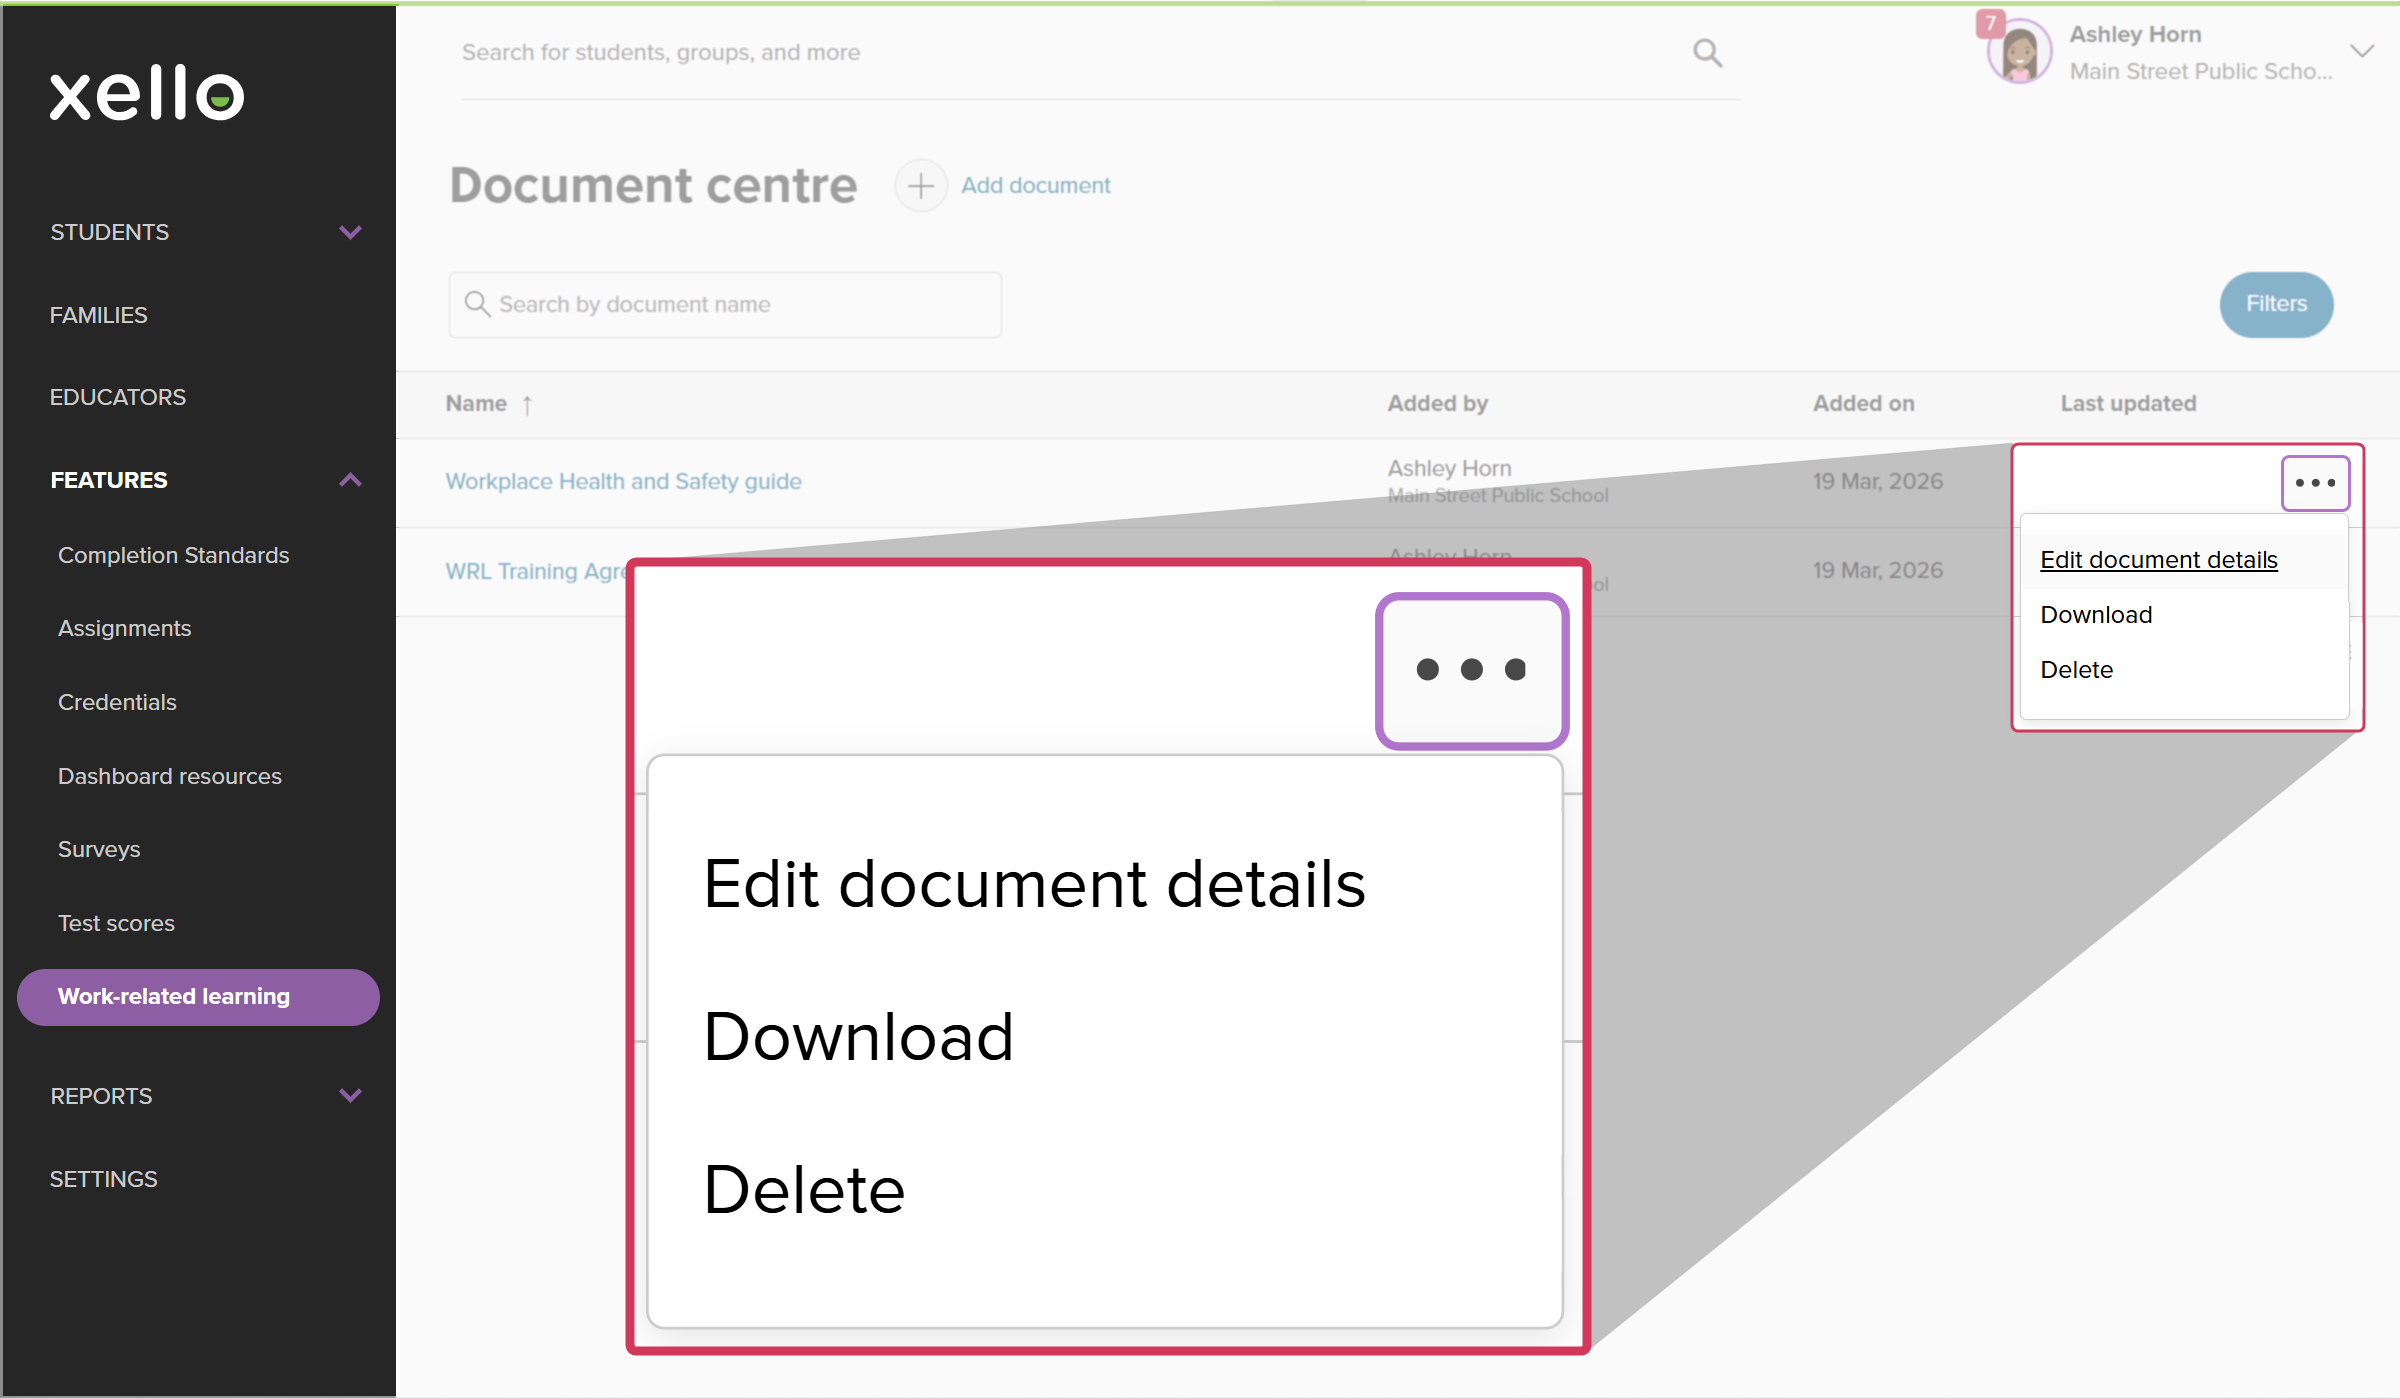
- Click the three-dot menu next to a document to Edit document details, Download, or Delete the document.
 Click to enlarge
Sharing hierarchy
To maintain a clean and
| Contributor level | Who can view the document |
|---|---|
| Added at the umbrella network level |
|
| Added at the local |
|
| Added at the district |
|
| Added at the school level |
|
Additional resources
-
 PDF
PDFIntroduction to WRL in Xello
PDF
PDFIntroduction to WRL in Xello -
PDF
PDFTrack Gatsby Benchmarks 5 and 6 with Bulk Status Updates in WRL
-
 Short Video
Help students thrive with Work-related learning
Short Video
Short VideoHelp students thrive with Work-related learningUse this short overview video to get an introduction to Xello's Work-related learning module. Learn how this integrated platform opens up a world of discovery for students and educators to better prepare them for an ever-changing world.
-
 Xello Resource
Get Started for WRL Administrators
Xello Resource
Xello ResourceGet Started for WRL Administrators