In Xello, students search for and save the scholarships they're most interested in. They can then access their saved list from the Scholarship matches page, or by clicking the heart in the top right corner of any page in Xello. This list makes it easy for them to track all the scholarships they plan to apply to and then update the status as applicable.
Meanwhile, you can run a report on how many students are interested in which scholarships, how many have applied, and how many have reported that they've won. You'll be able to view saved scholarships that are national, institutional, state, and school-added.
To get a different view of the data, run the report either by scholarship or by student. This way you can review each scholarship that was saved and which students saved it. Or, you can view each student and each of their saved scholarships.
Scholarships that are inactive will not be included in the reports.
Run a report on saved scholarships
Run the Saved scholarships report to check out the top saved scholarships. You'll be able to view the scholarships most saved and by how many students. Dive into a scholarship to learn who has saved it, and if they've reported a status update.
To run reports on saved scholarships:
- From your educator account, click Reports and select College applications.
 Click to enlarge
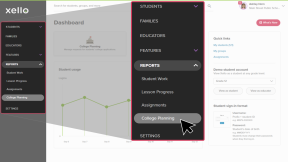
- In the tile called Saved scholarships, click the Select report dropdown and select Saved scholarships.
 Click to enlarge
- In the graph, view the top 5 saved scholarships and how many students have saved each one. Click on a scholarship name in the list below for more details.
 Click to enlarge
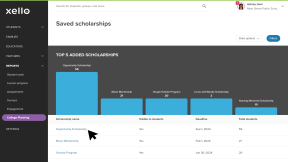
- From the scholarship page, you'll be able to see which students saved it, when they saved it, and what their self-reported status is.
 Click to enlarge
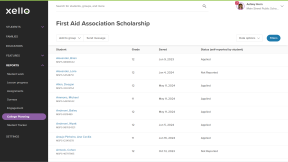
- You can also add the students to a new or existing group, or send them a message.
- Clicking on the student's name will open their student profile to the Saved options tab where you can view all of their saved scholarships.
 Click to enlarge
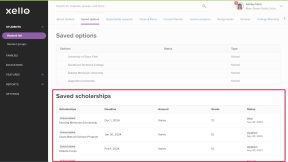
Run a report on saved scholarships by student
Running the Saved scholarships by student report will let you check out how many scholarships each student has saved and which ones.
To run a report on saved scholarships by student:
- From your educator account, click Reports and select College applications.
Click to enlarge
- In the tile called Saved scholarships, click the Select report dropdown and select Saved scholarships by student.
Click to enlarge
- In the table, view the list of students who have saved a scholarship. You'll be able to view how many scholarships the student has saved and which ones. Scrolling to the right, you can view the deadline for each scholarship, when the student saved it, and the self-reported status.
 Click to enlarge
- You can also add the students to a new or existing group, or send them a message.
- Clicking on the student's name will open their student profile to the Saved options tab where you can view all of their saved scholarships.
Click to enlarge