5 minutes
You can track and manage FAFSA and state financial aid applications on behalf of your students. If a student brings in physical proof, needs help submitting their application, or chooses to opt out, you can enter and update their details directly from their student profile in your educator account in Xello.
 Note: The FAFSA and state aid section is visible for students in grades 11–12. The option to track state aid applications is only visible when state aid is available in your state.
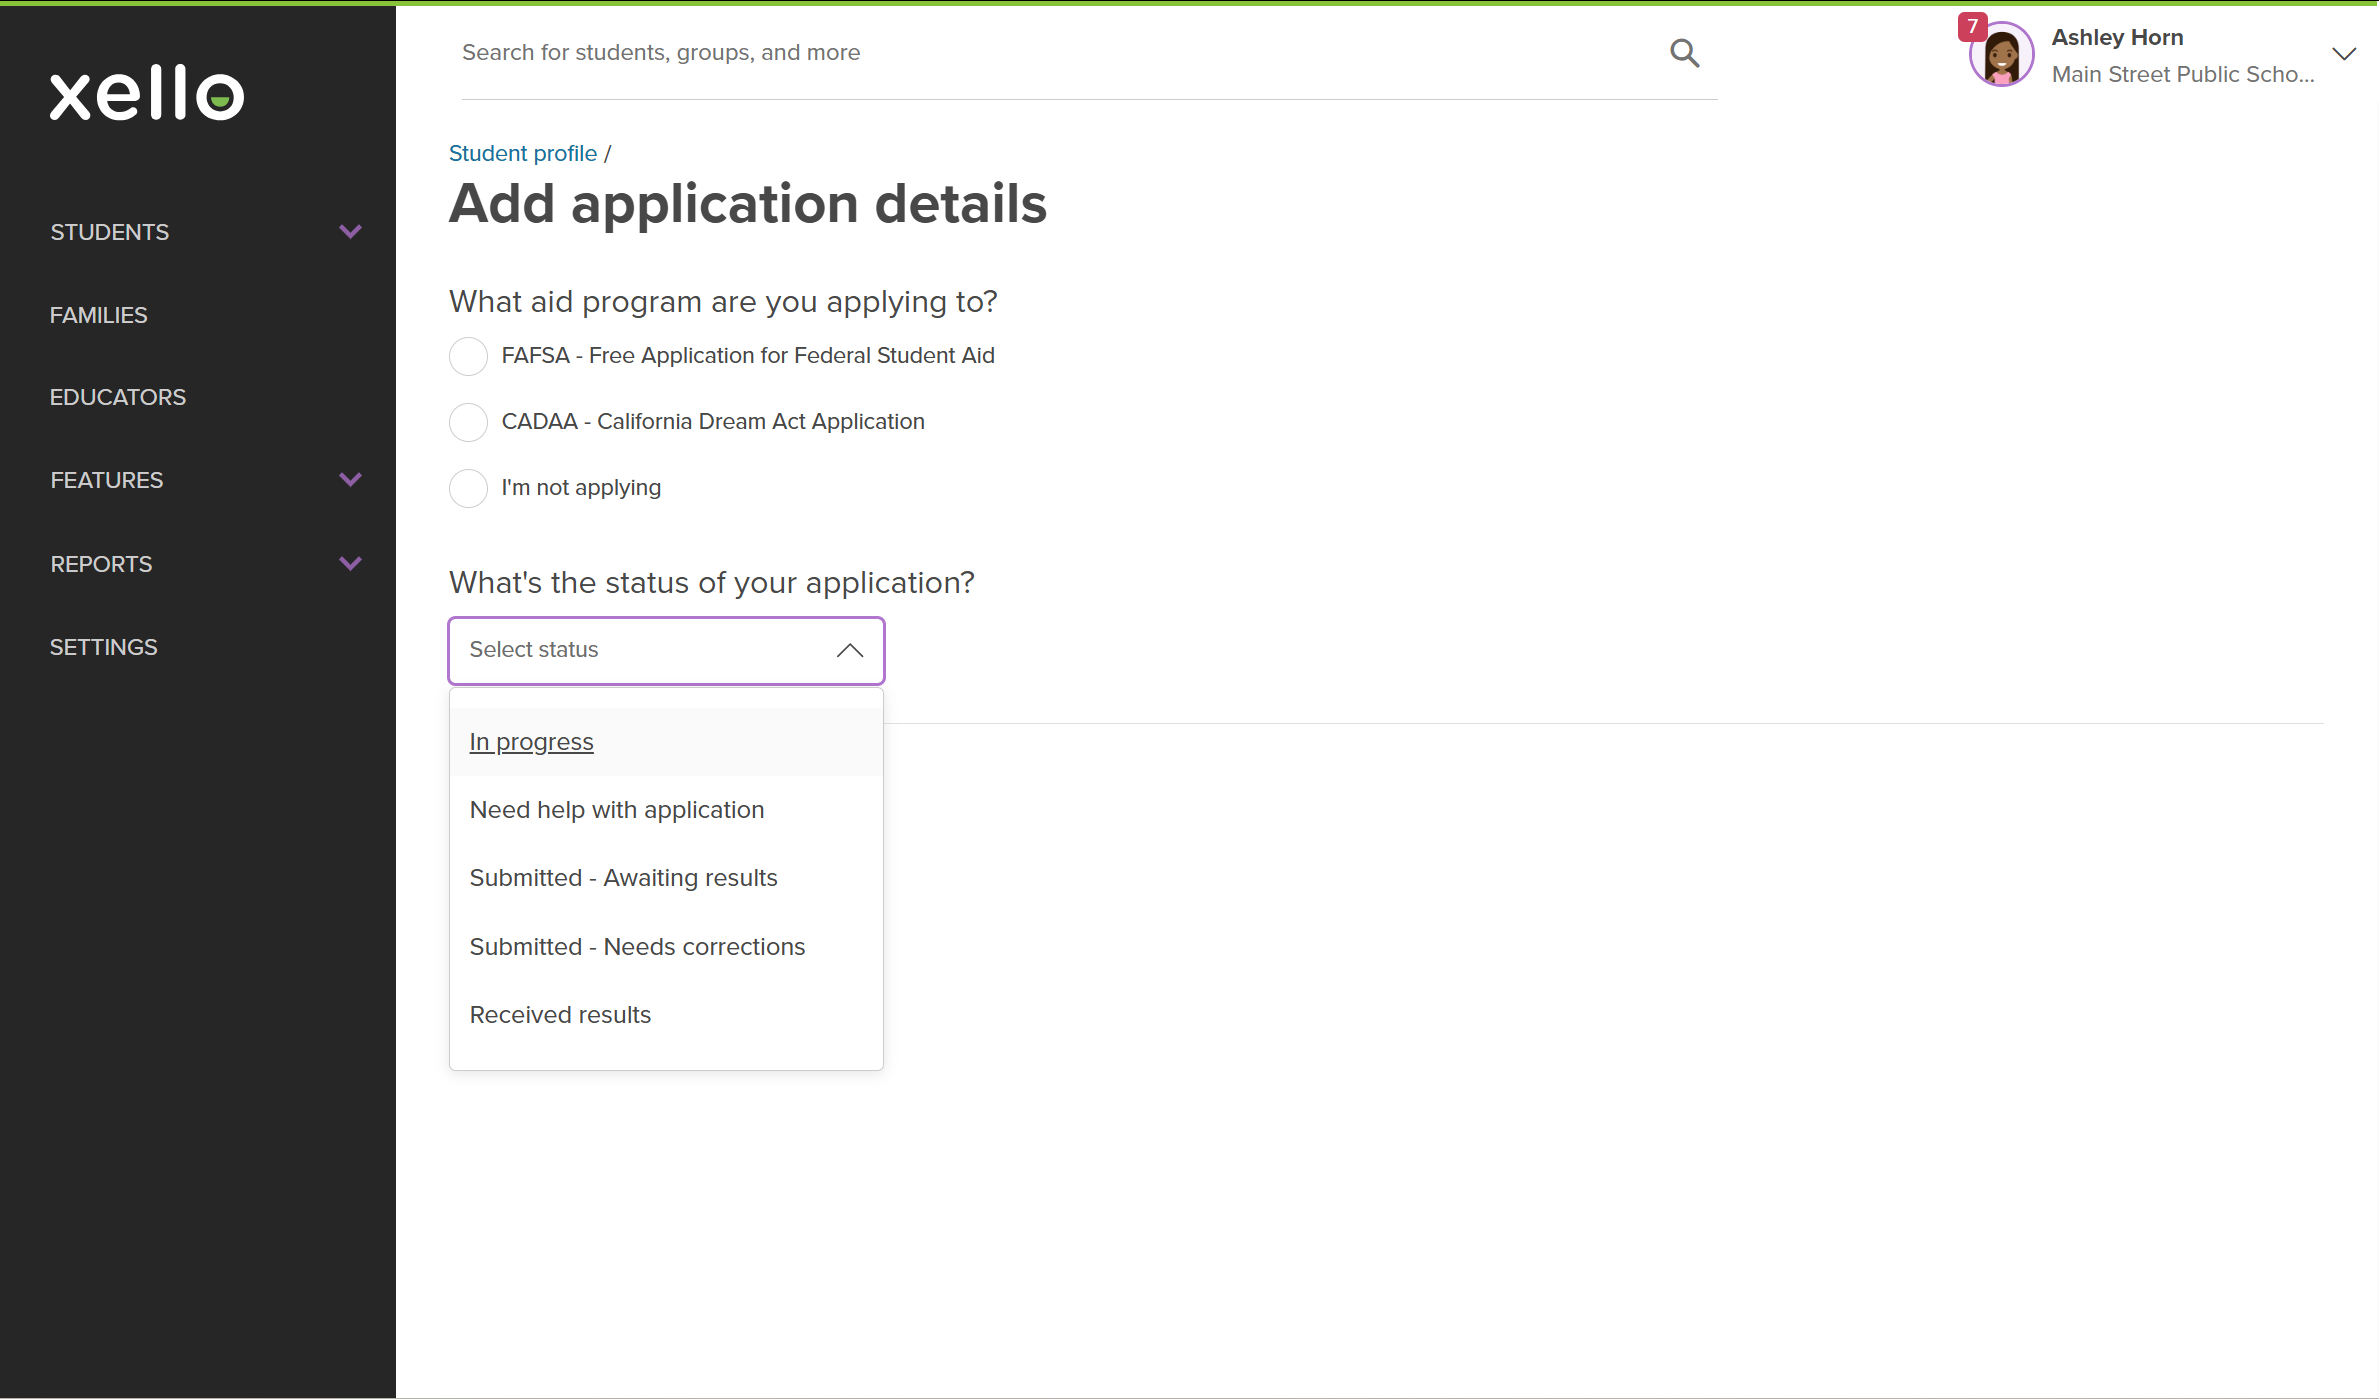
Educators can manage all stages of the financial aid workflow on behalf of a student. The available statuses you or your students can select are:
- In progress: The student has begun the application process and is not looking for help.
- Need help with application: The student has begun the application process and is looking for assistance.
- Submitted - Awaiting results: The application has been submitted and is awaiting results. Confirmation of submission (screenshot, file upload, or in-person verification) is required.
- Submitted - Needs corrections: The application was submitted and processed, but a correction is required.
- Received results: The application has been submitted and results have been received. Confirmation of results (screenshot, file upload, or in-person verification) is required.
You can also indicate if a student is opting out of applying for financial aid by selecting Not applying. If opting out, you can attach their financial aid opt-out form or record that it was provided in person.
In your educator account, you can also Run reports on FAFSA and state aid tracking to monitor submission statuses across your school or district, filter applications by who entered them, and export financial aid data.
Add financial aid details
Educators can add FAFSA and state aid details directly from a student's profile.
To add financial aid application details on behalf of a student:
-
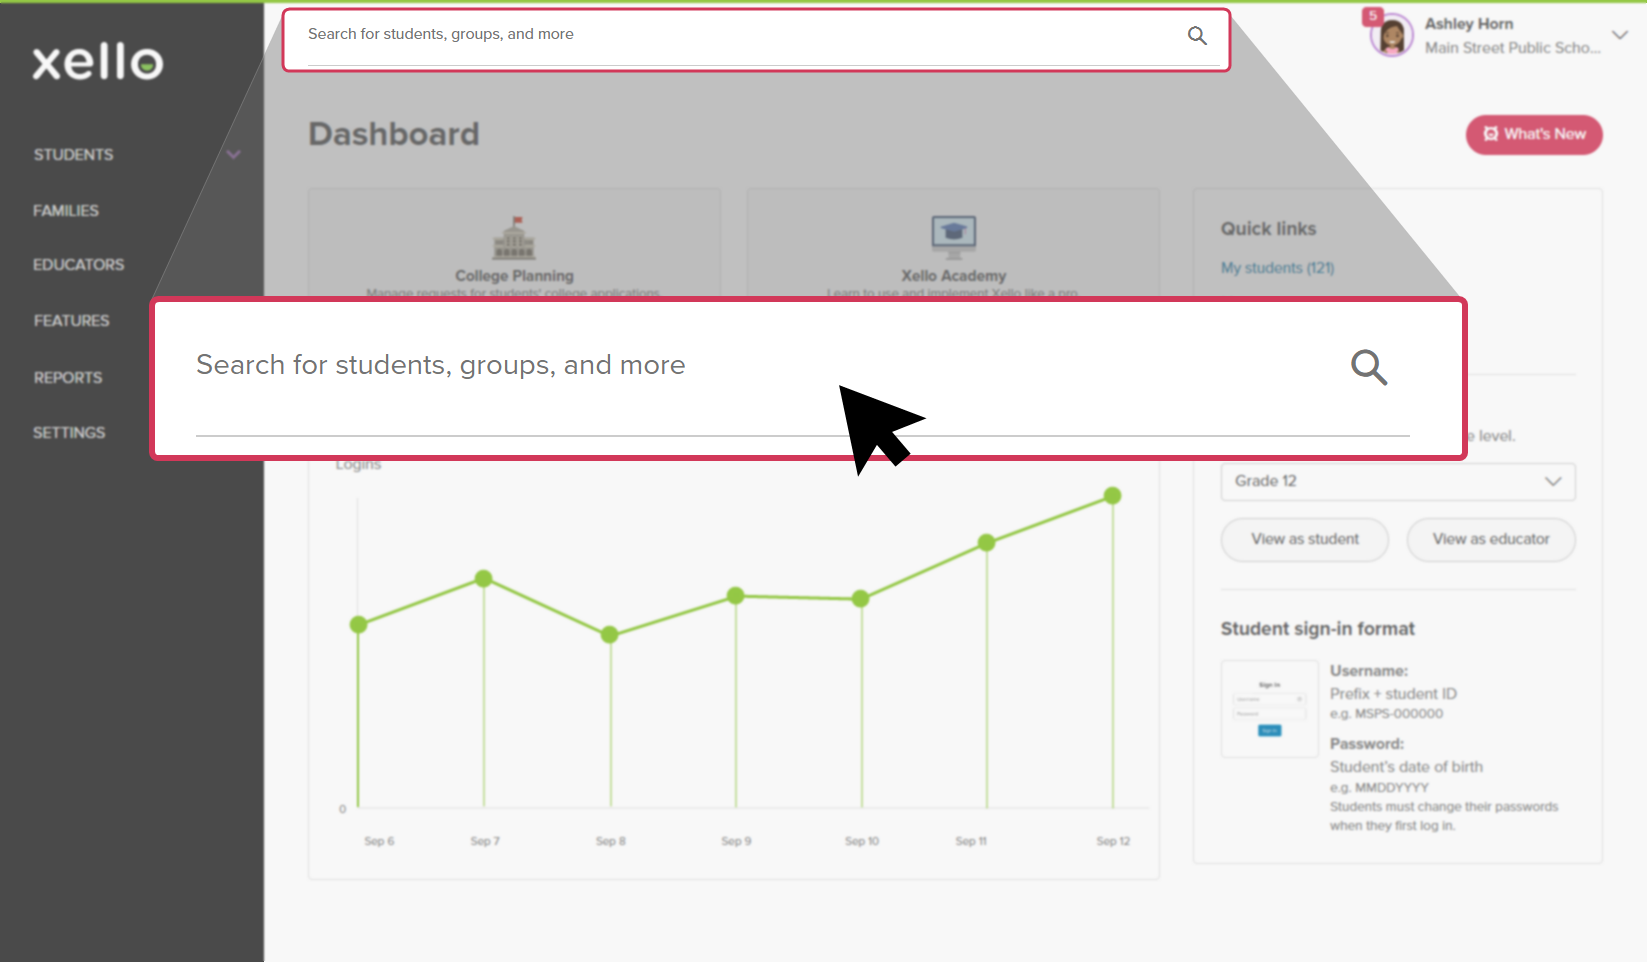
In the search bar located at the top of any page in your educator account, enter the student's name or ID.
 Click to enlarge
 Tip: Alternatively, from the left menu, click Students and select Student list to browse the full list of students.
 -
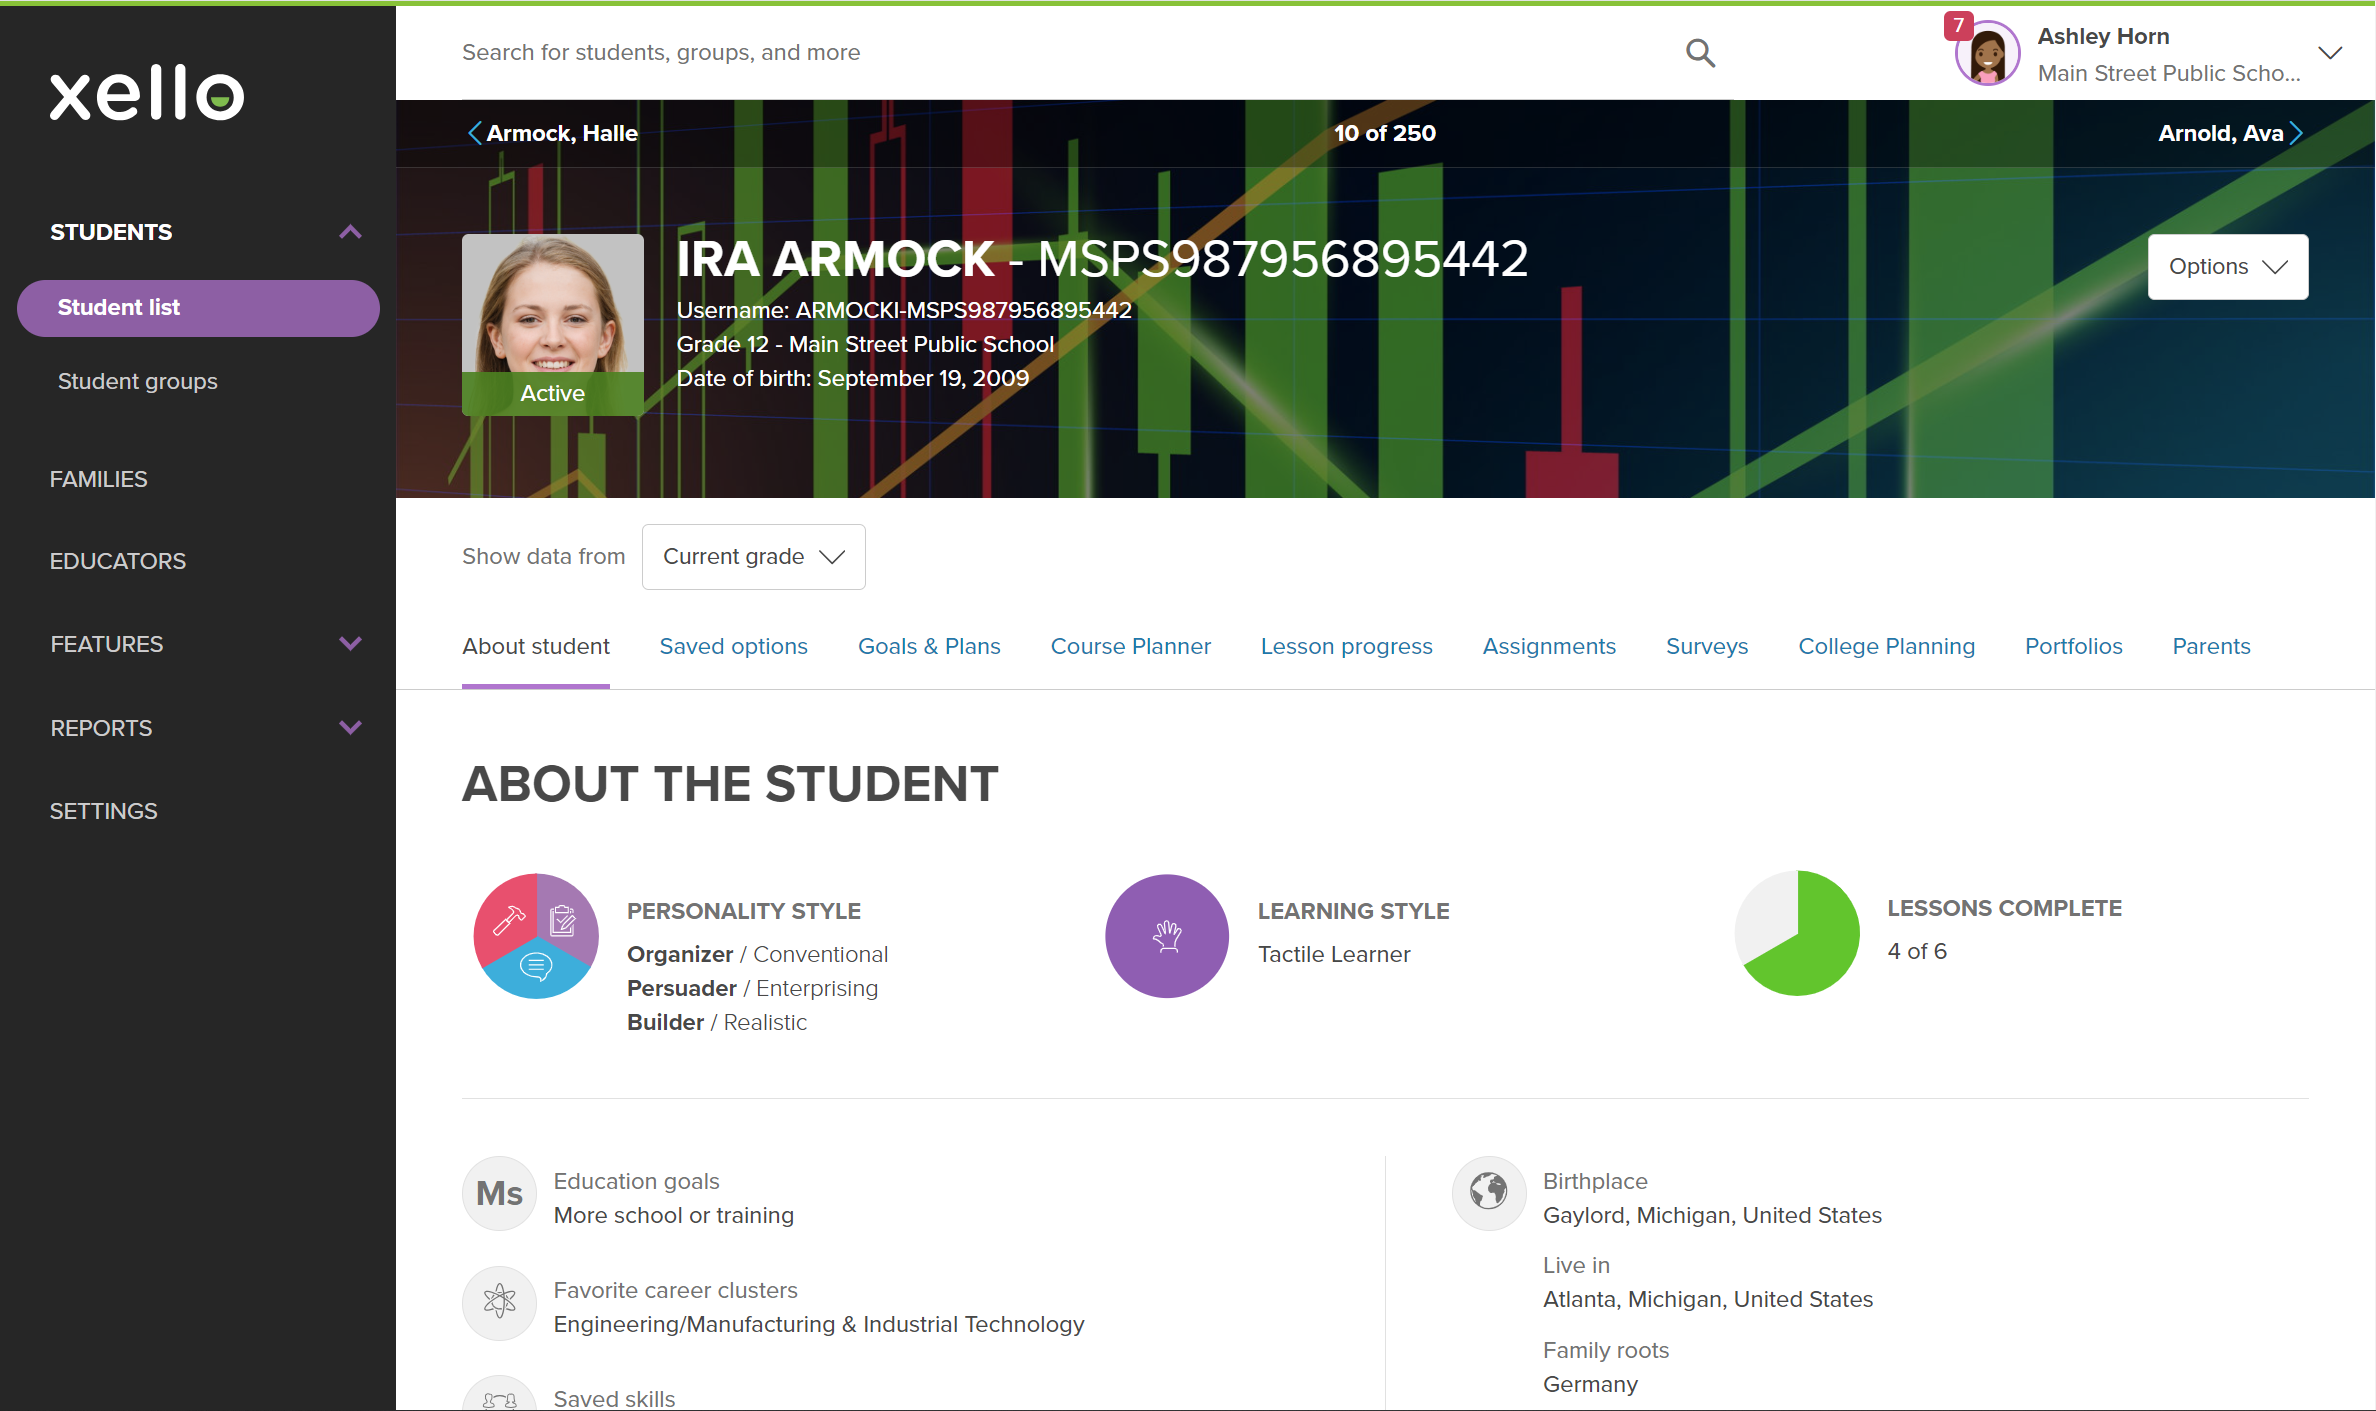
Click on the student's name. The About student tab of their profile opens.
 Click to enlarge
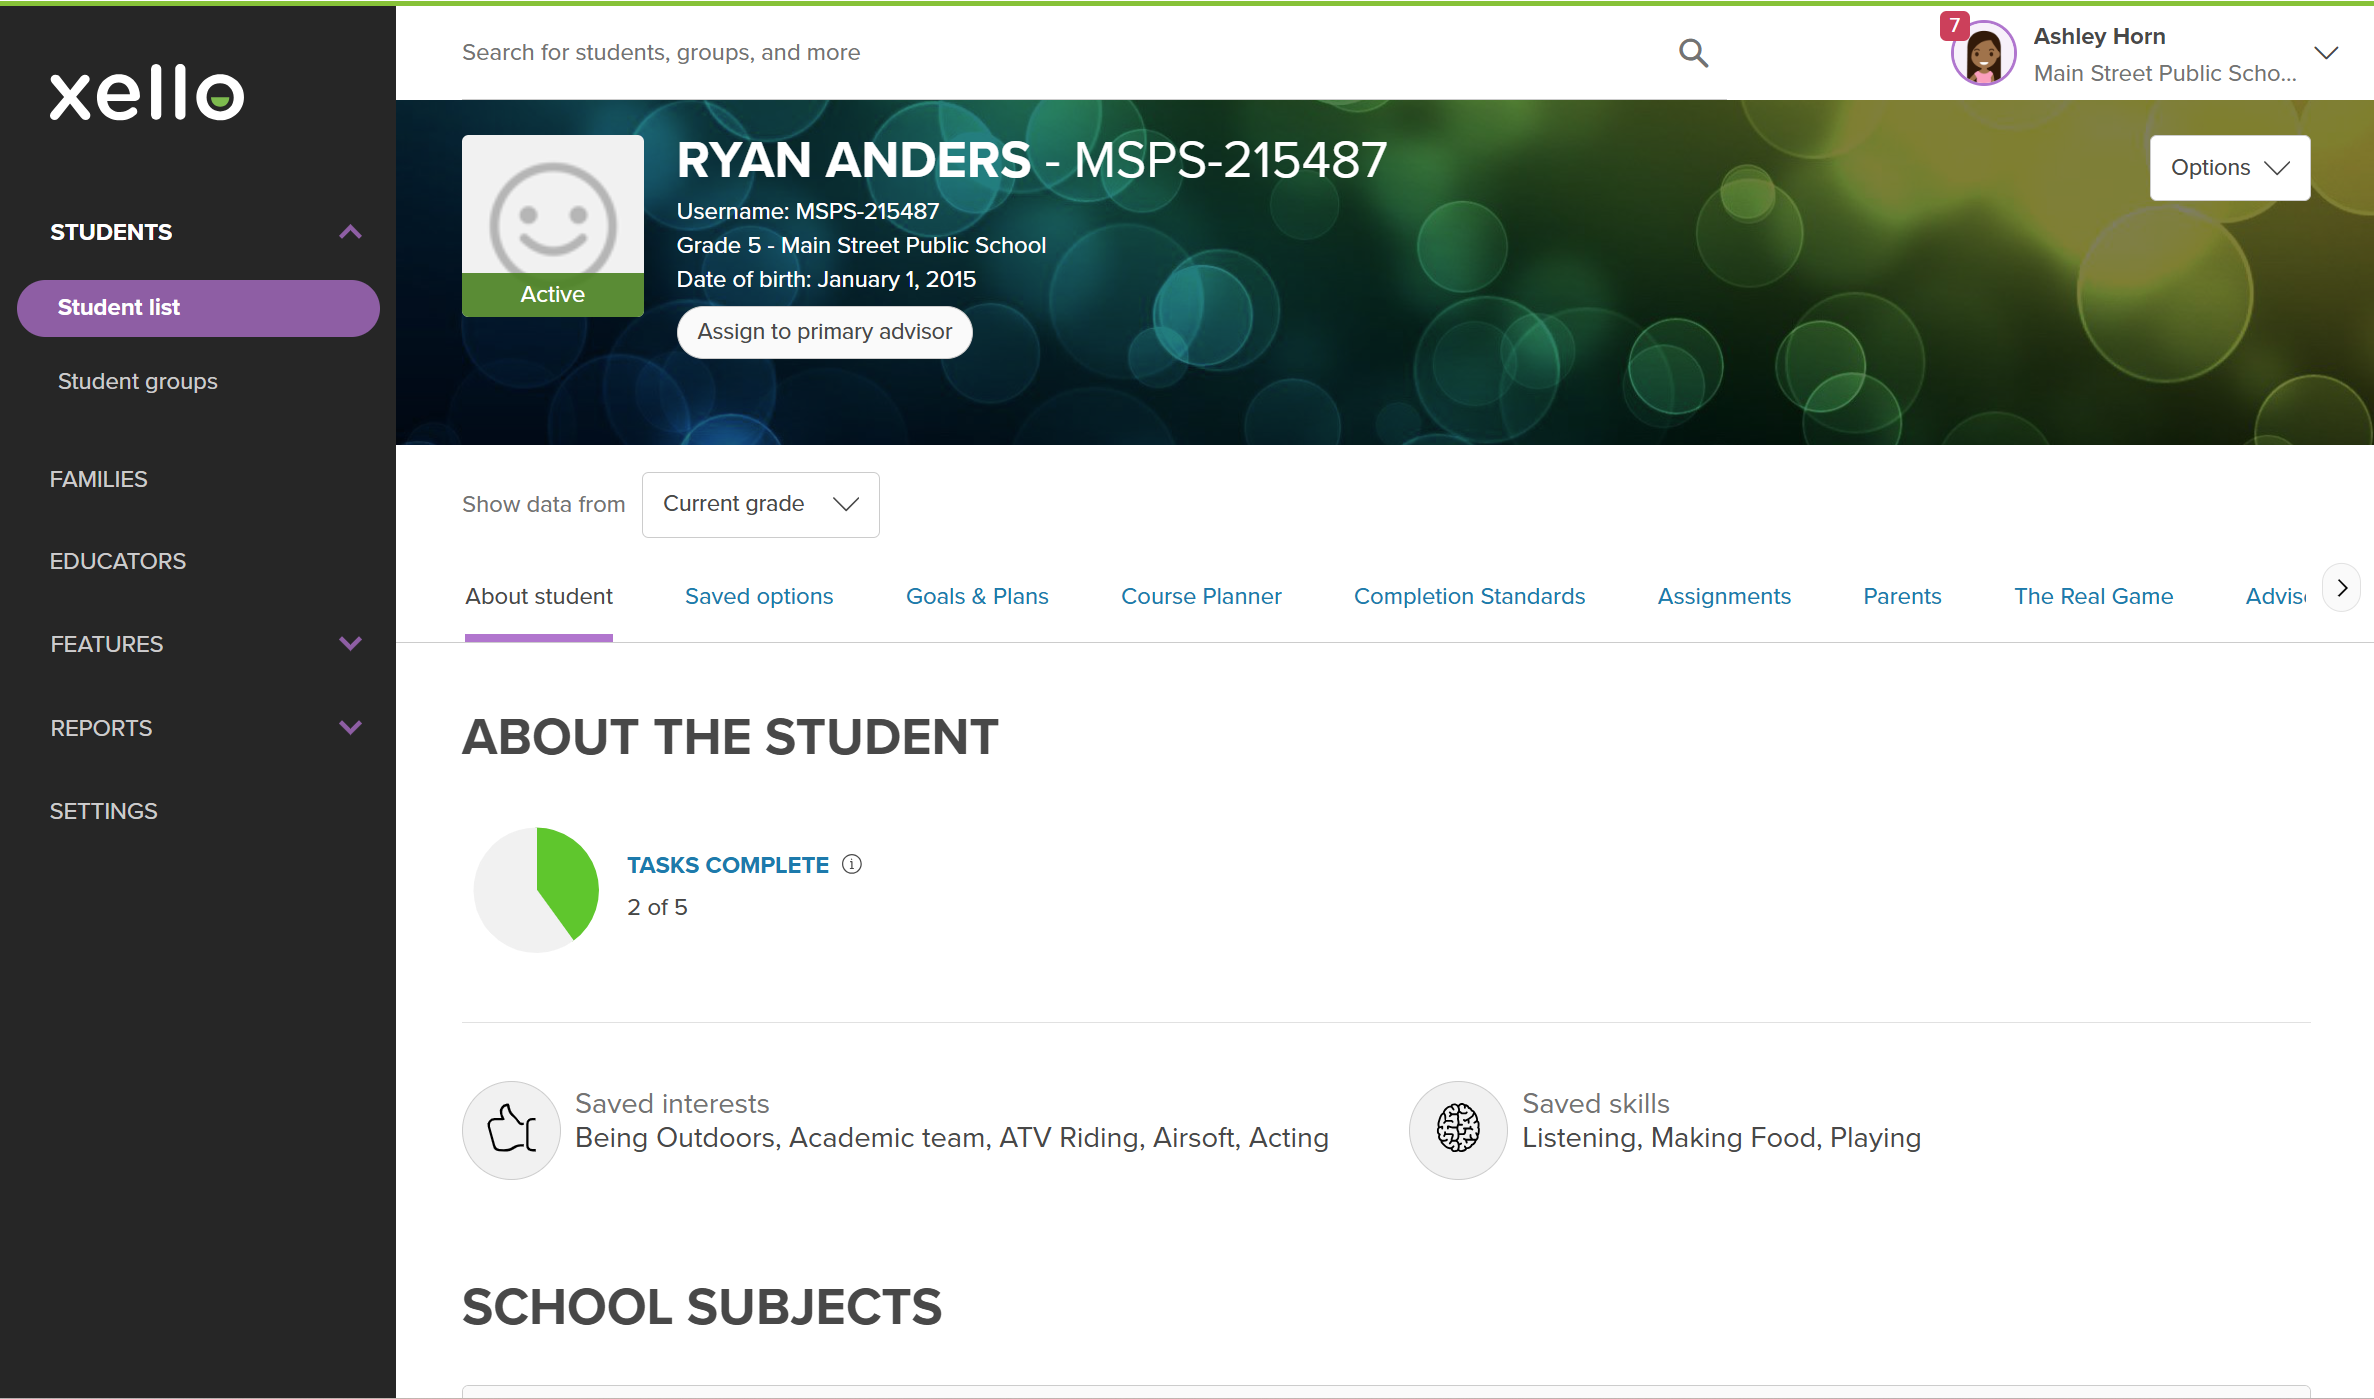 Click to enlarge
- Click the Financial Aid tab.
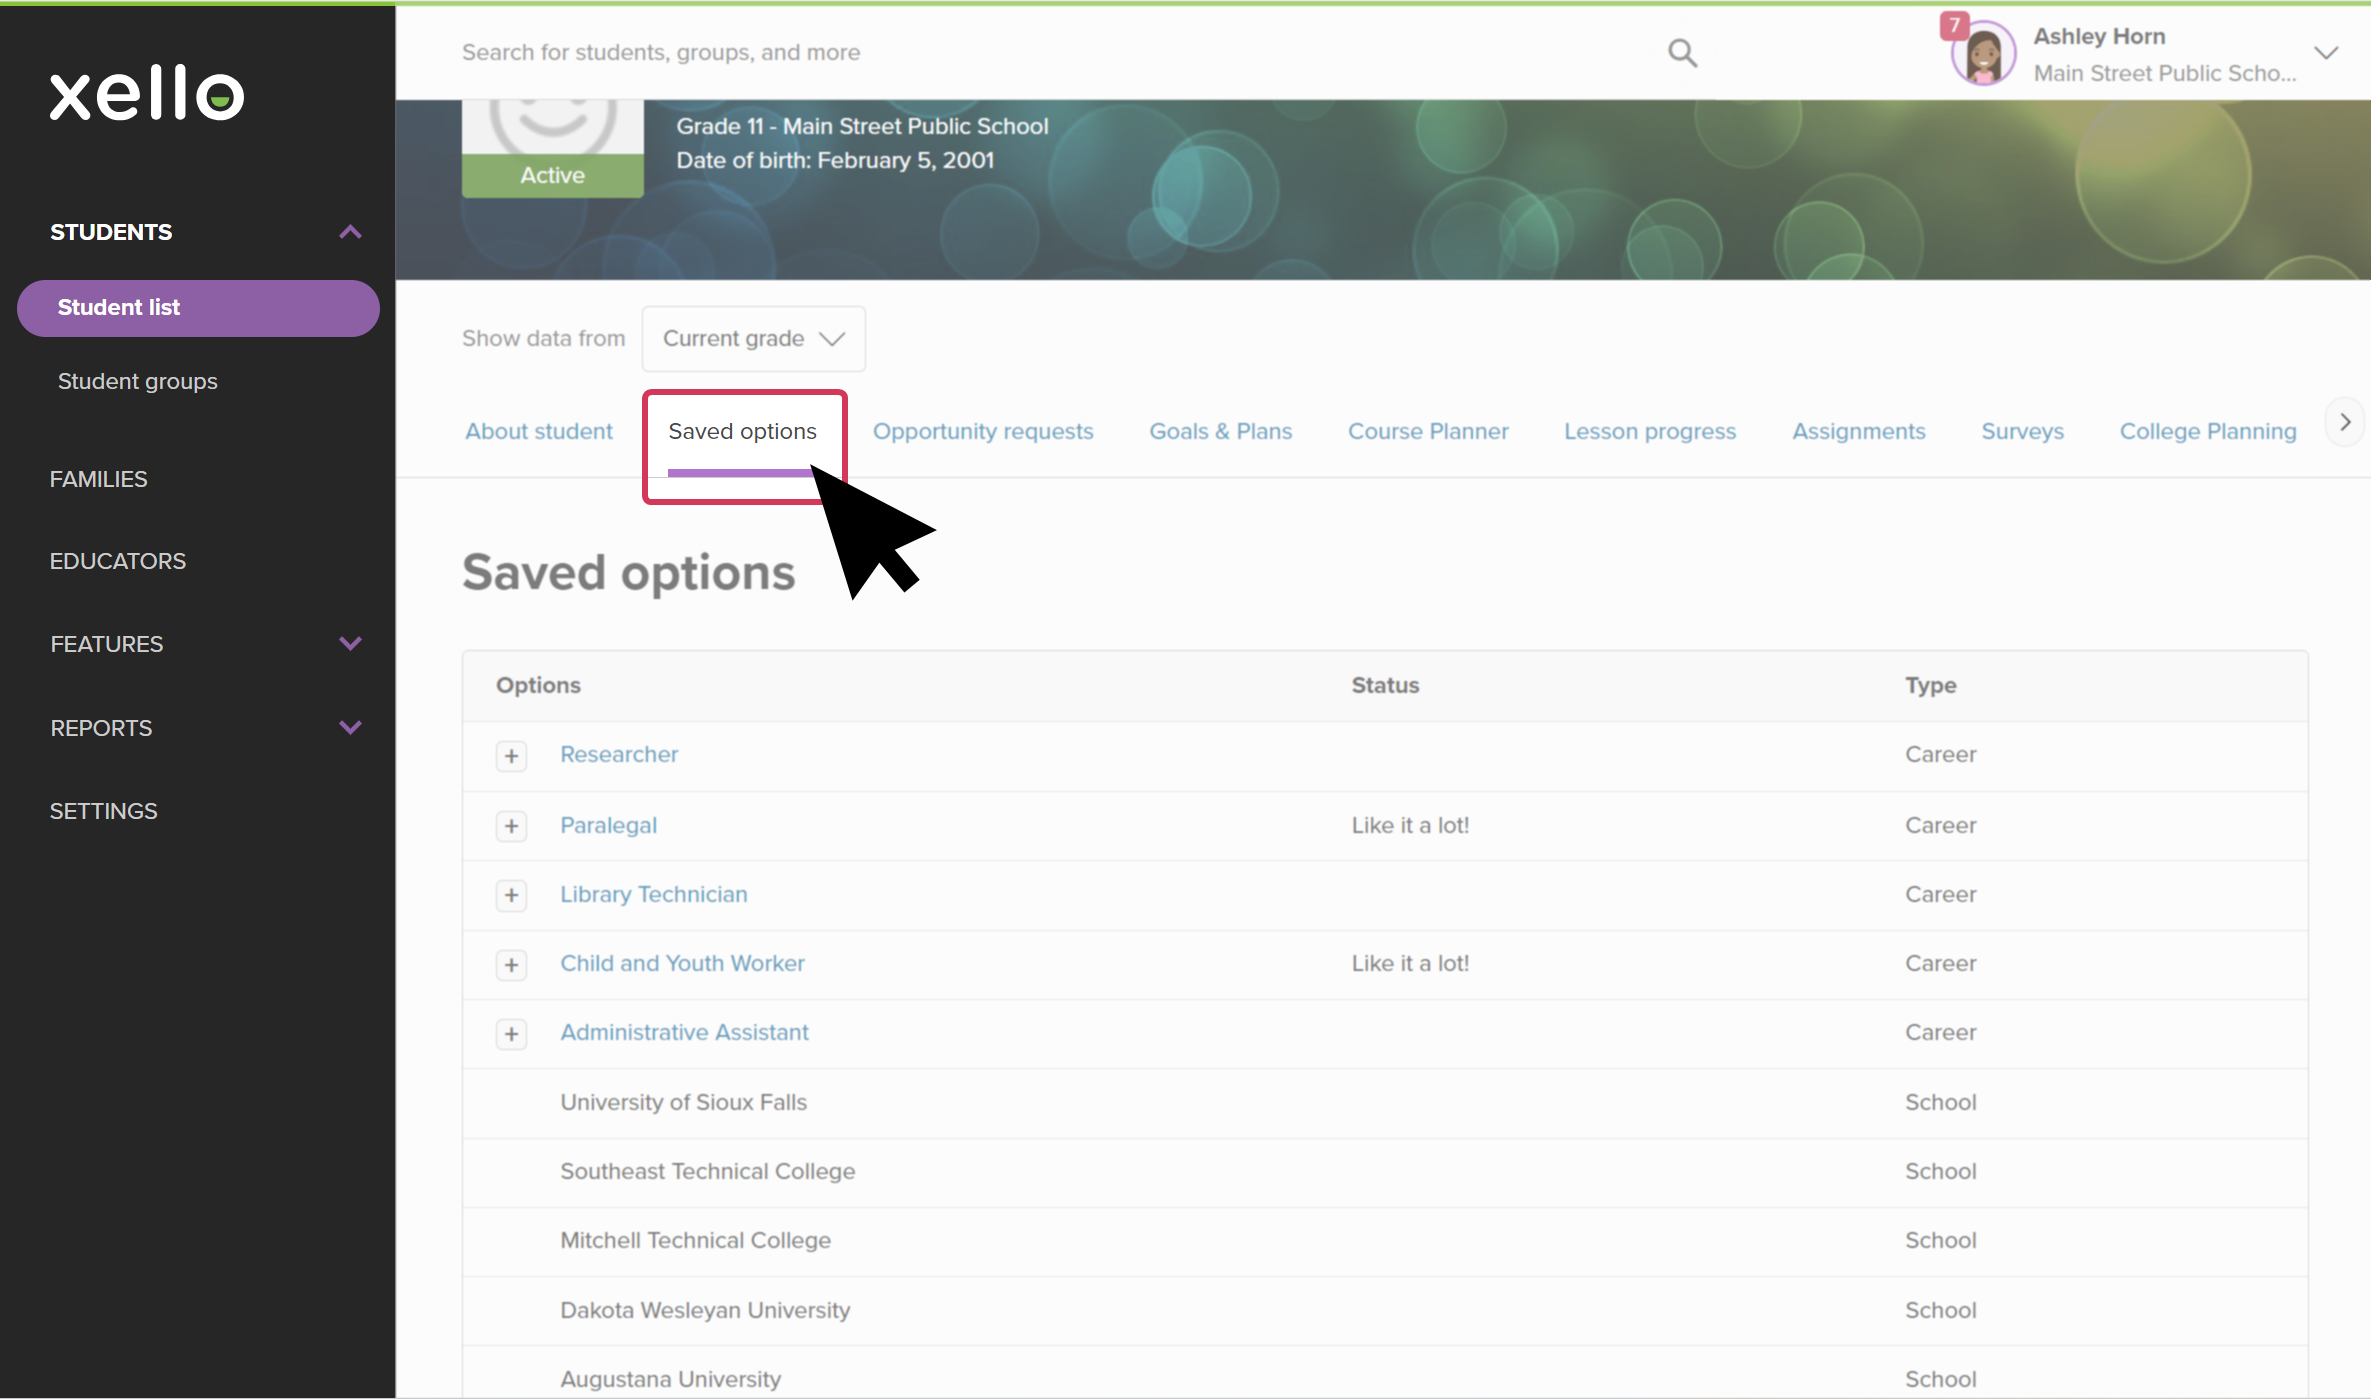 Click to enlarge
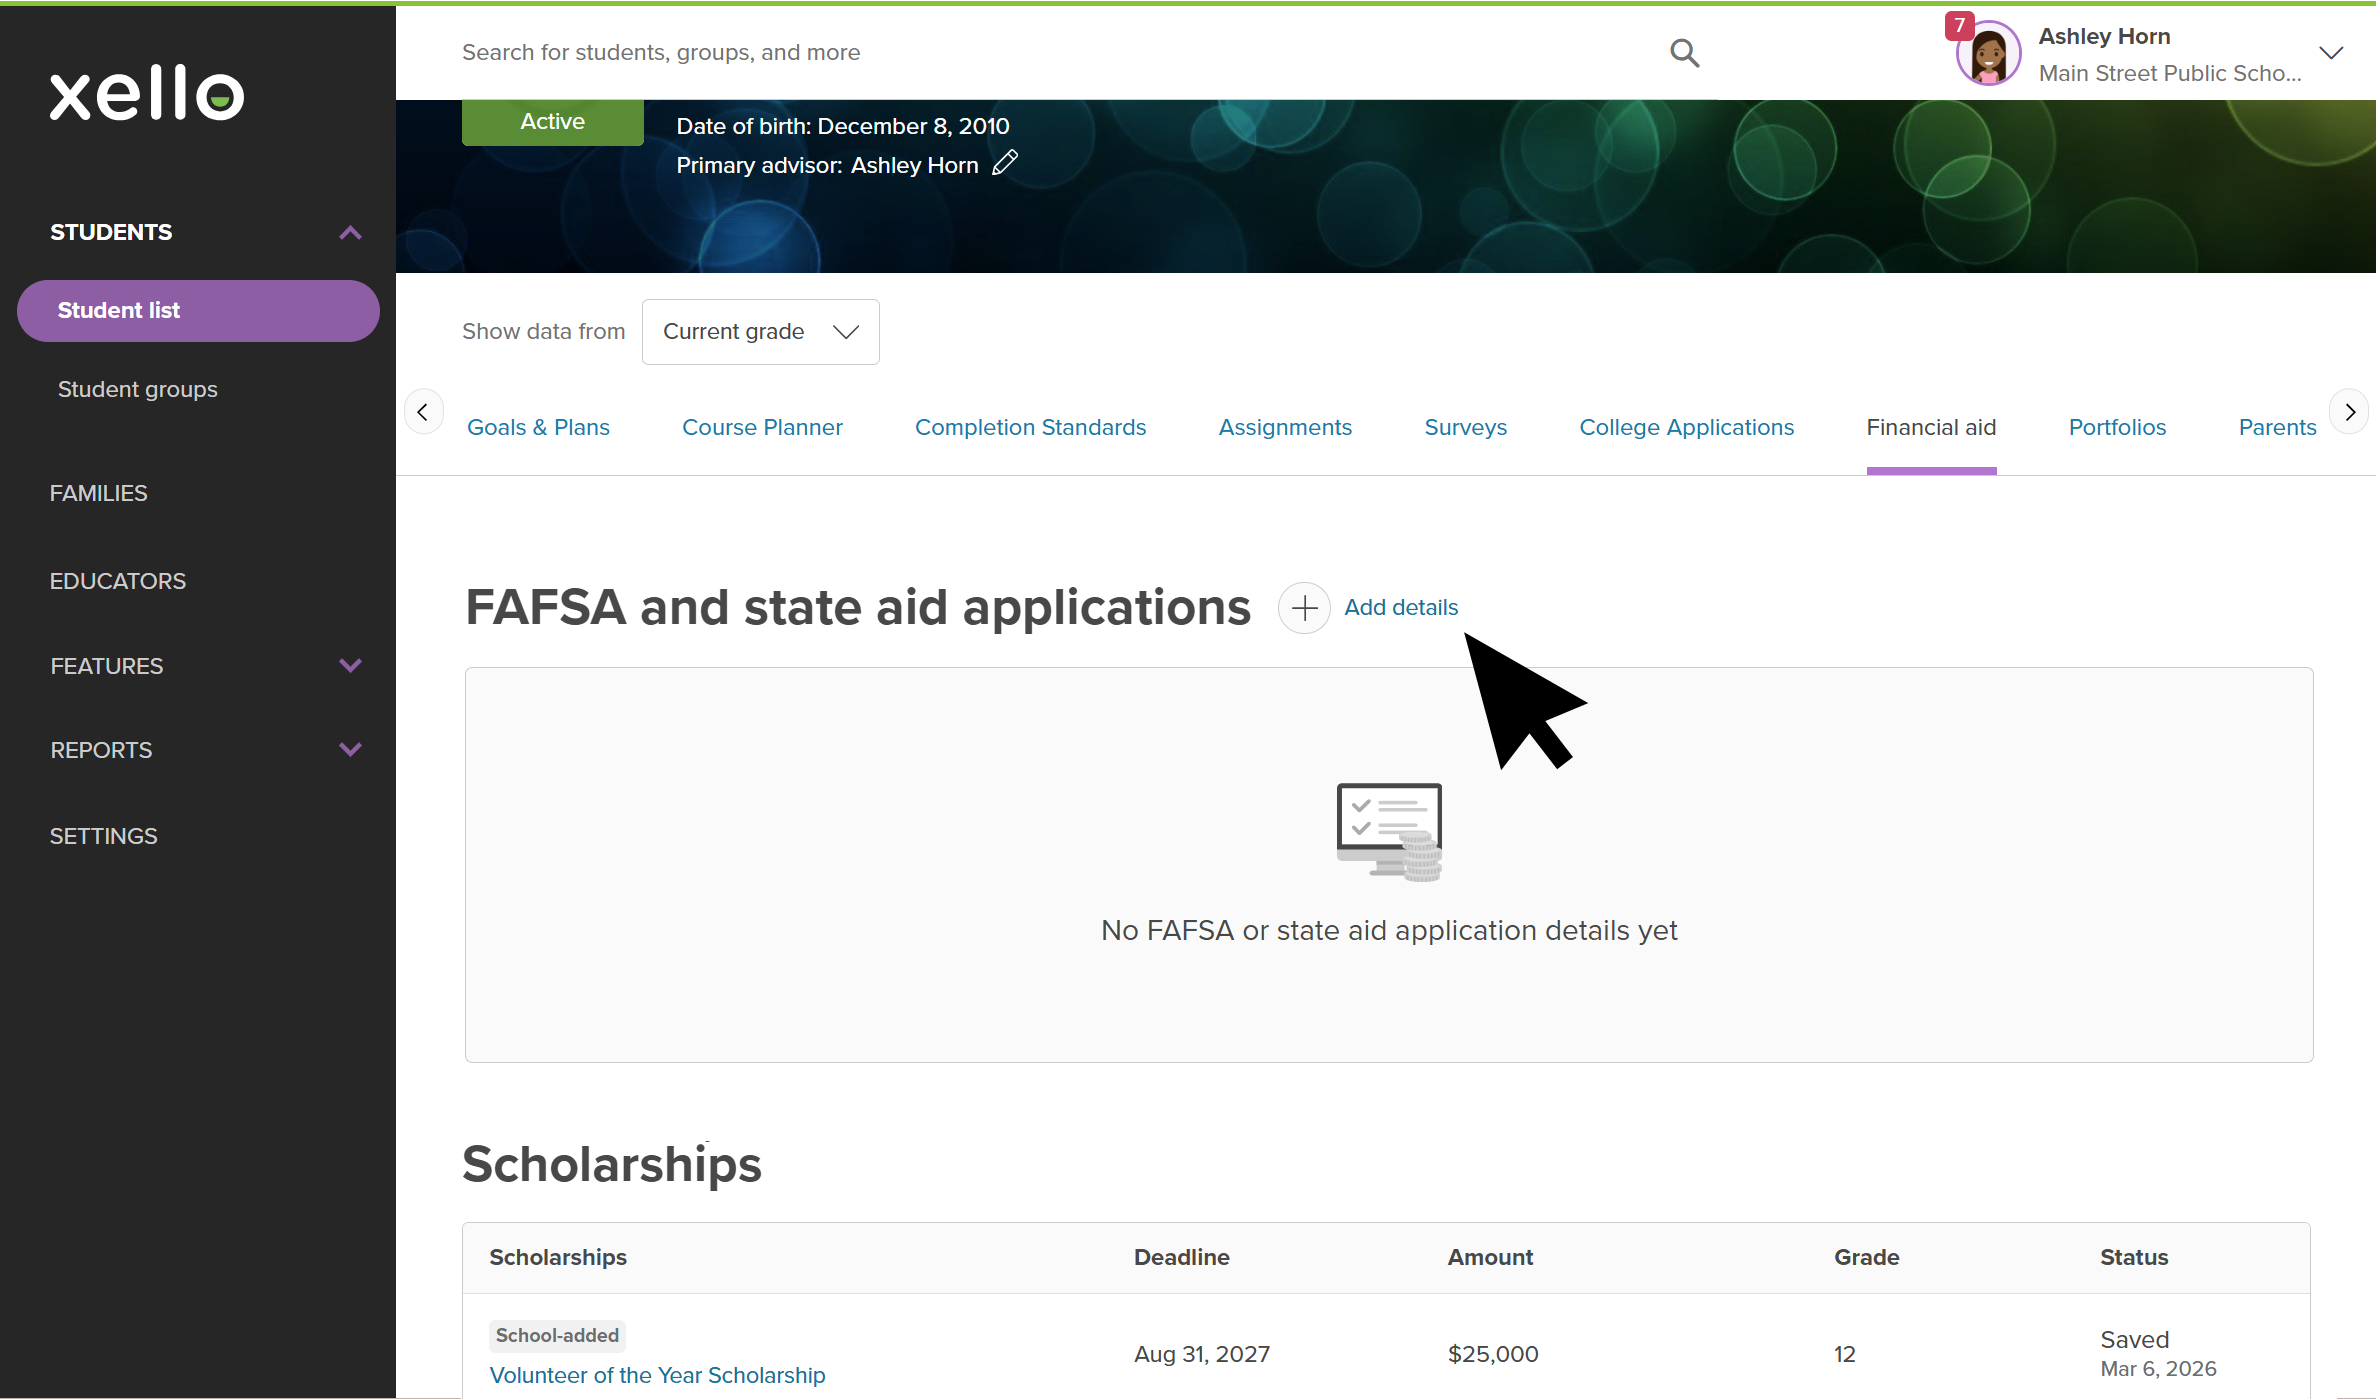
- In the FAFSA and state aid applications section, click Add details.
 Click to enlarge
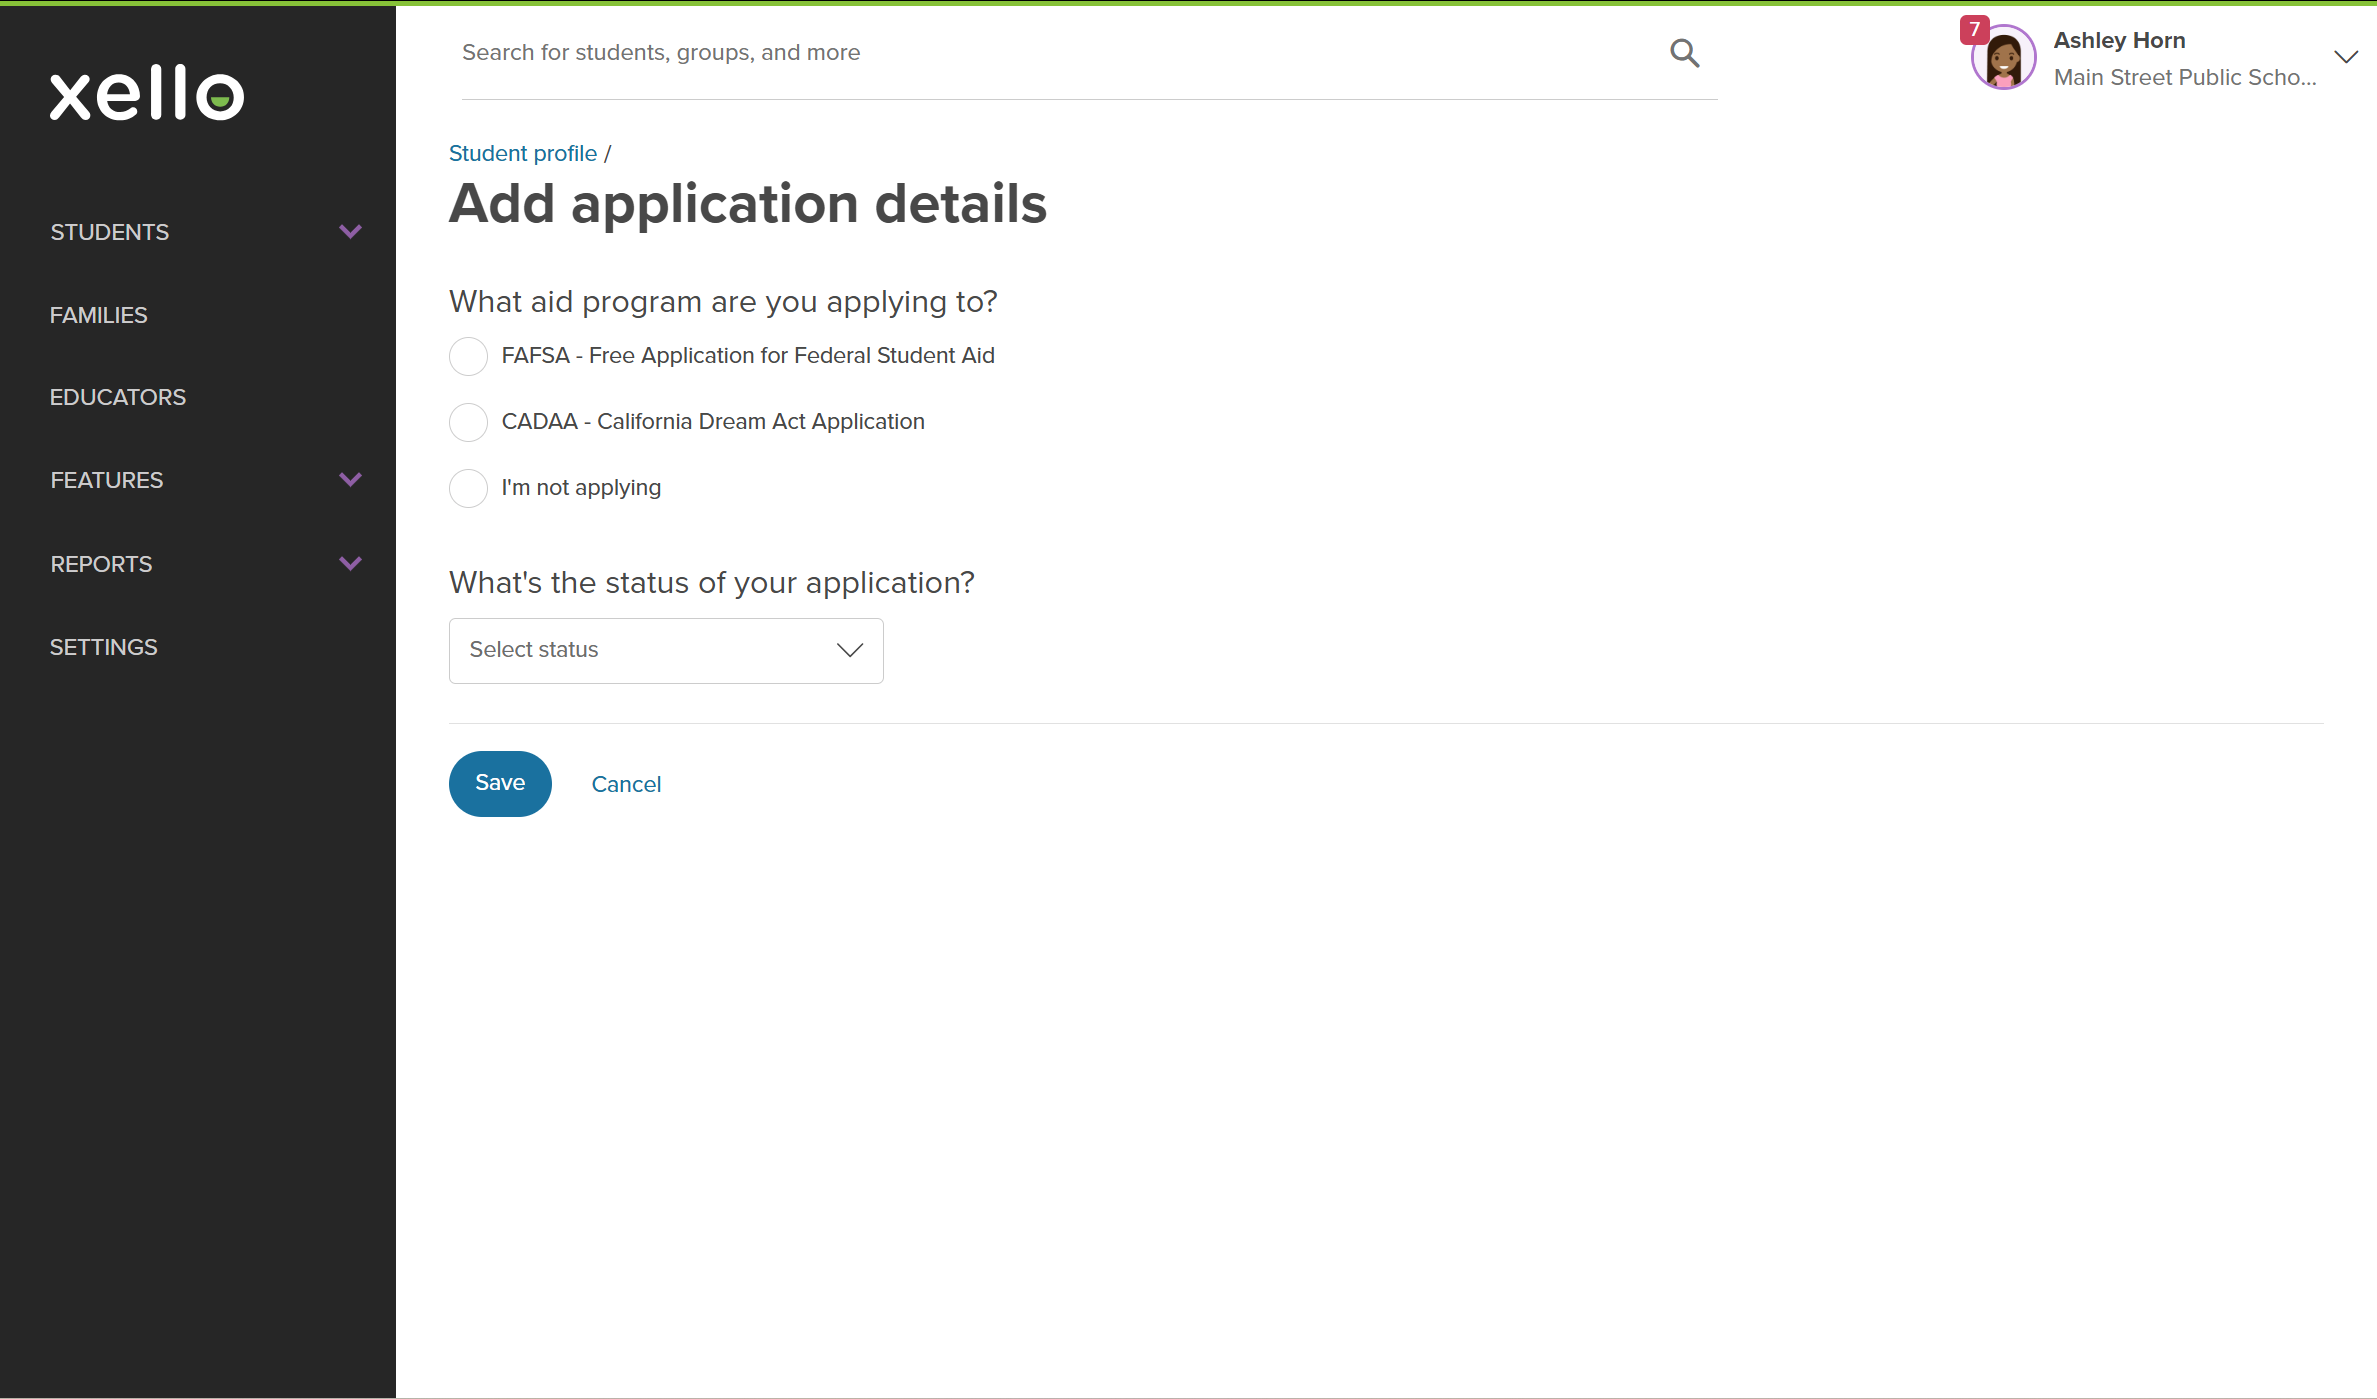
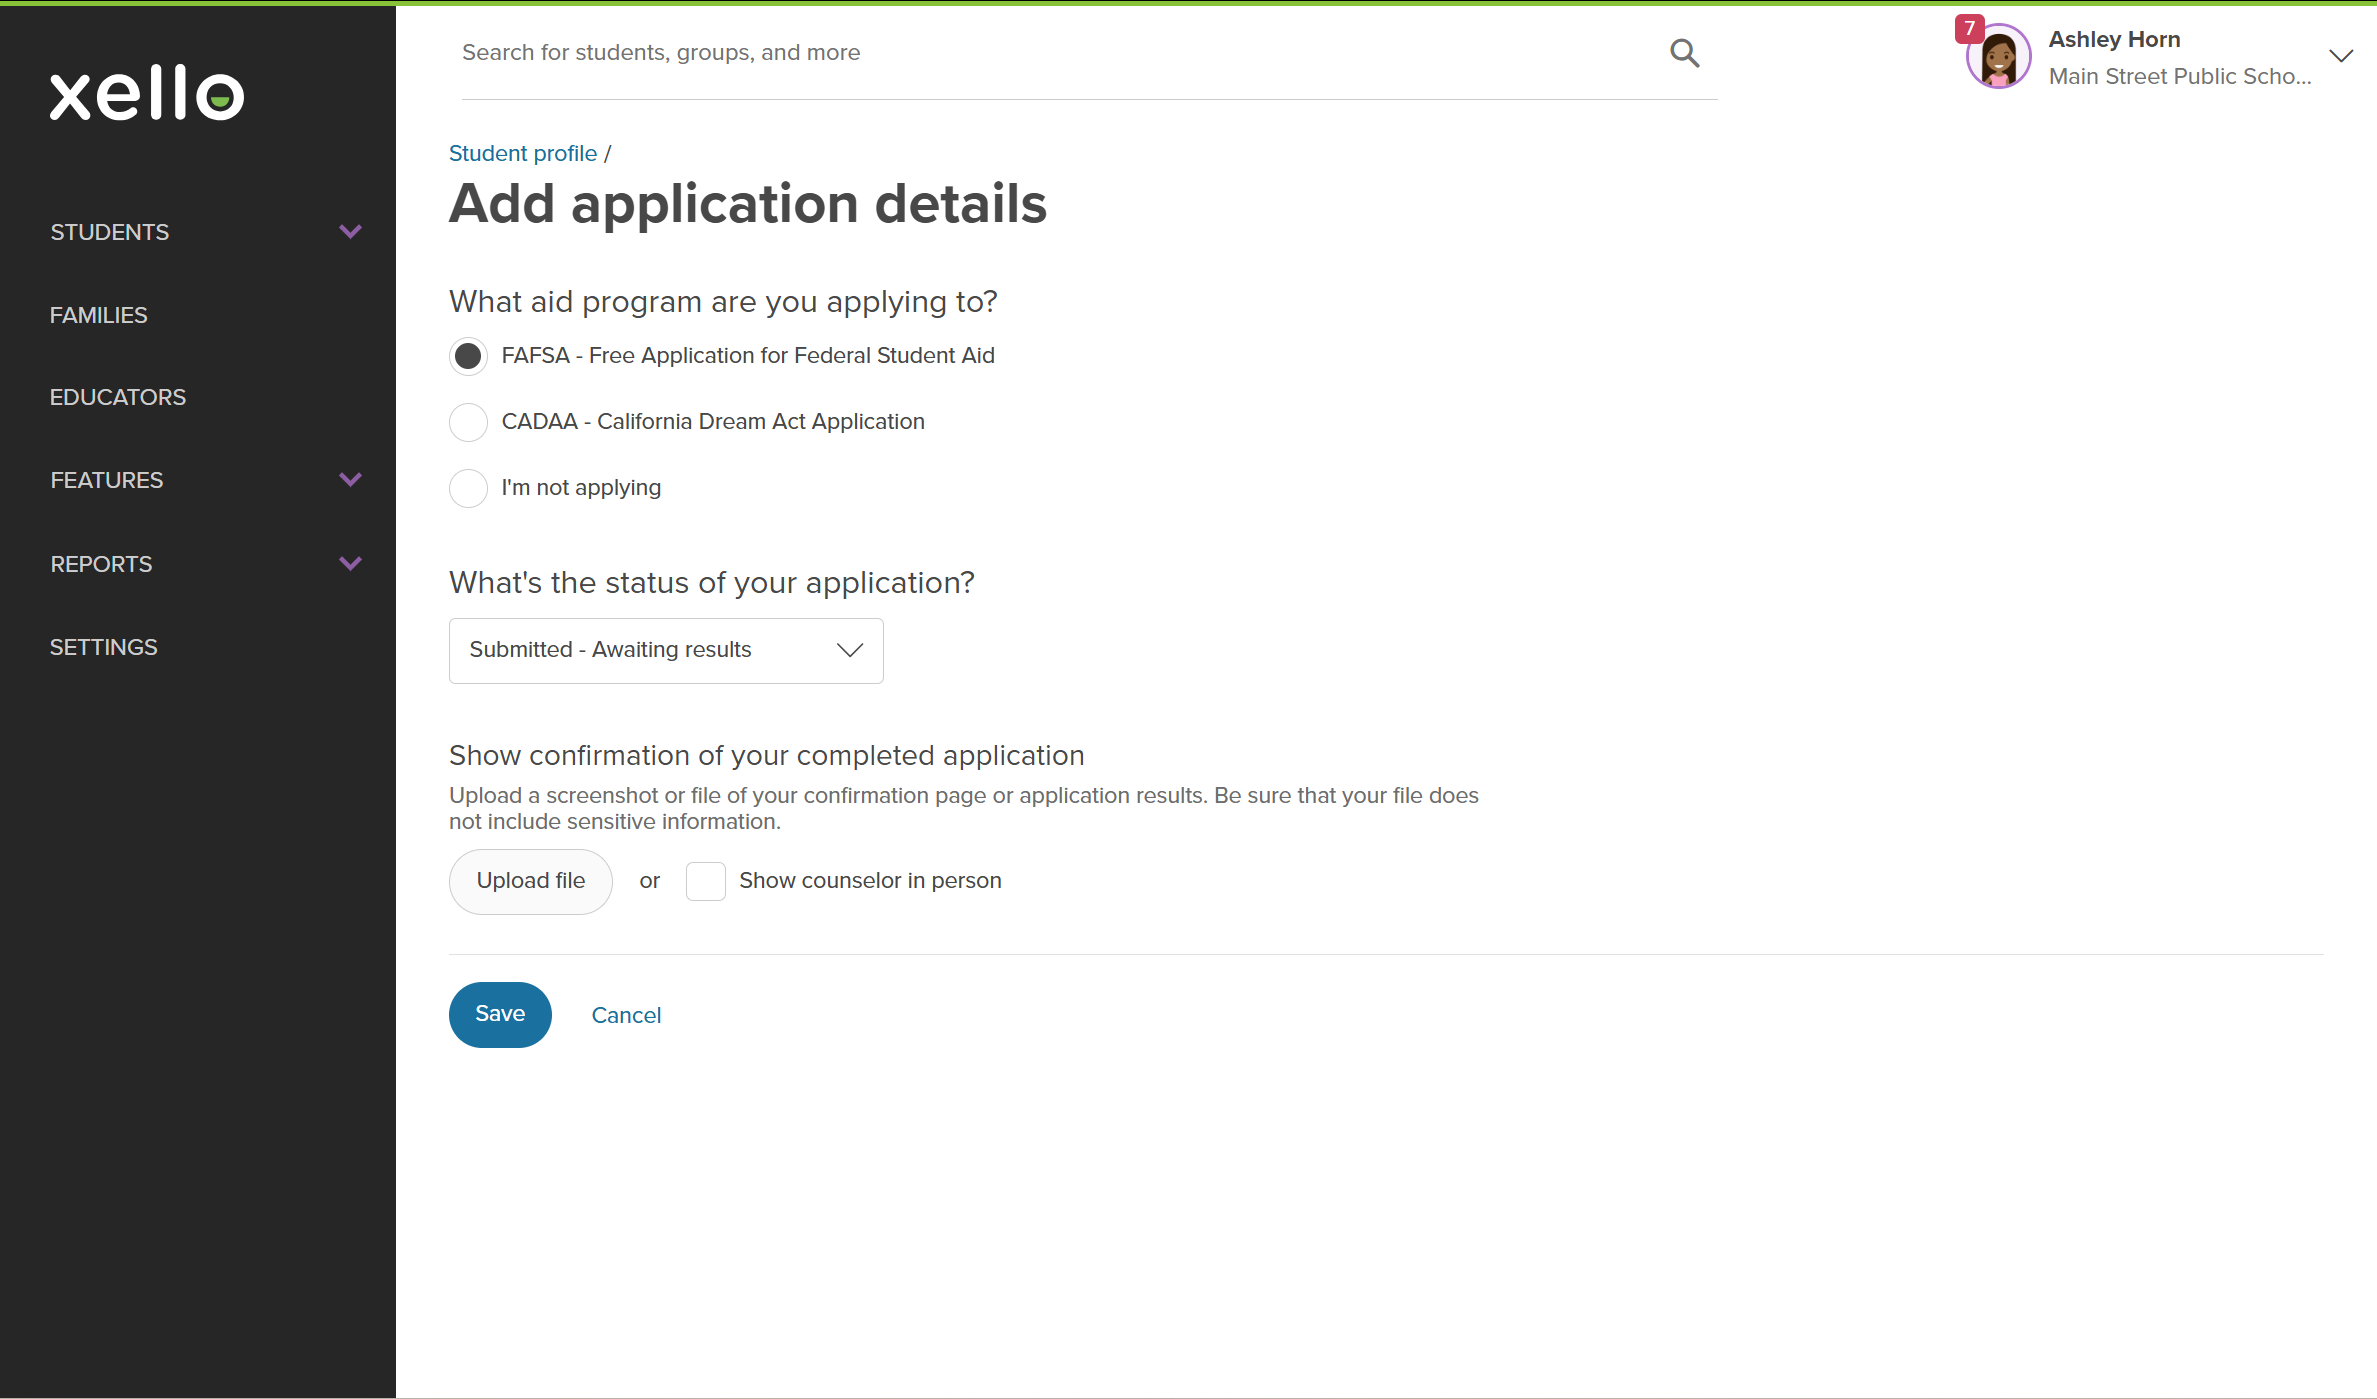
- Select whether the entry is for FAFSA, a state aid application (if available), or if the student is Not applying.
 Click to enlarge
- Select the current status of the application from the dropdown menu.
 Click to enlarge
- Where necessary, upload a screenshot or file of their confirmation or select In person if they showed physical confirmation.
 Click to enlarge
- Click Save.
- A success banner will display at the top of the screen.
- Students will see your addition on their College Planning page.
 Back to top
Edit financial aid application details
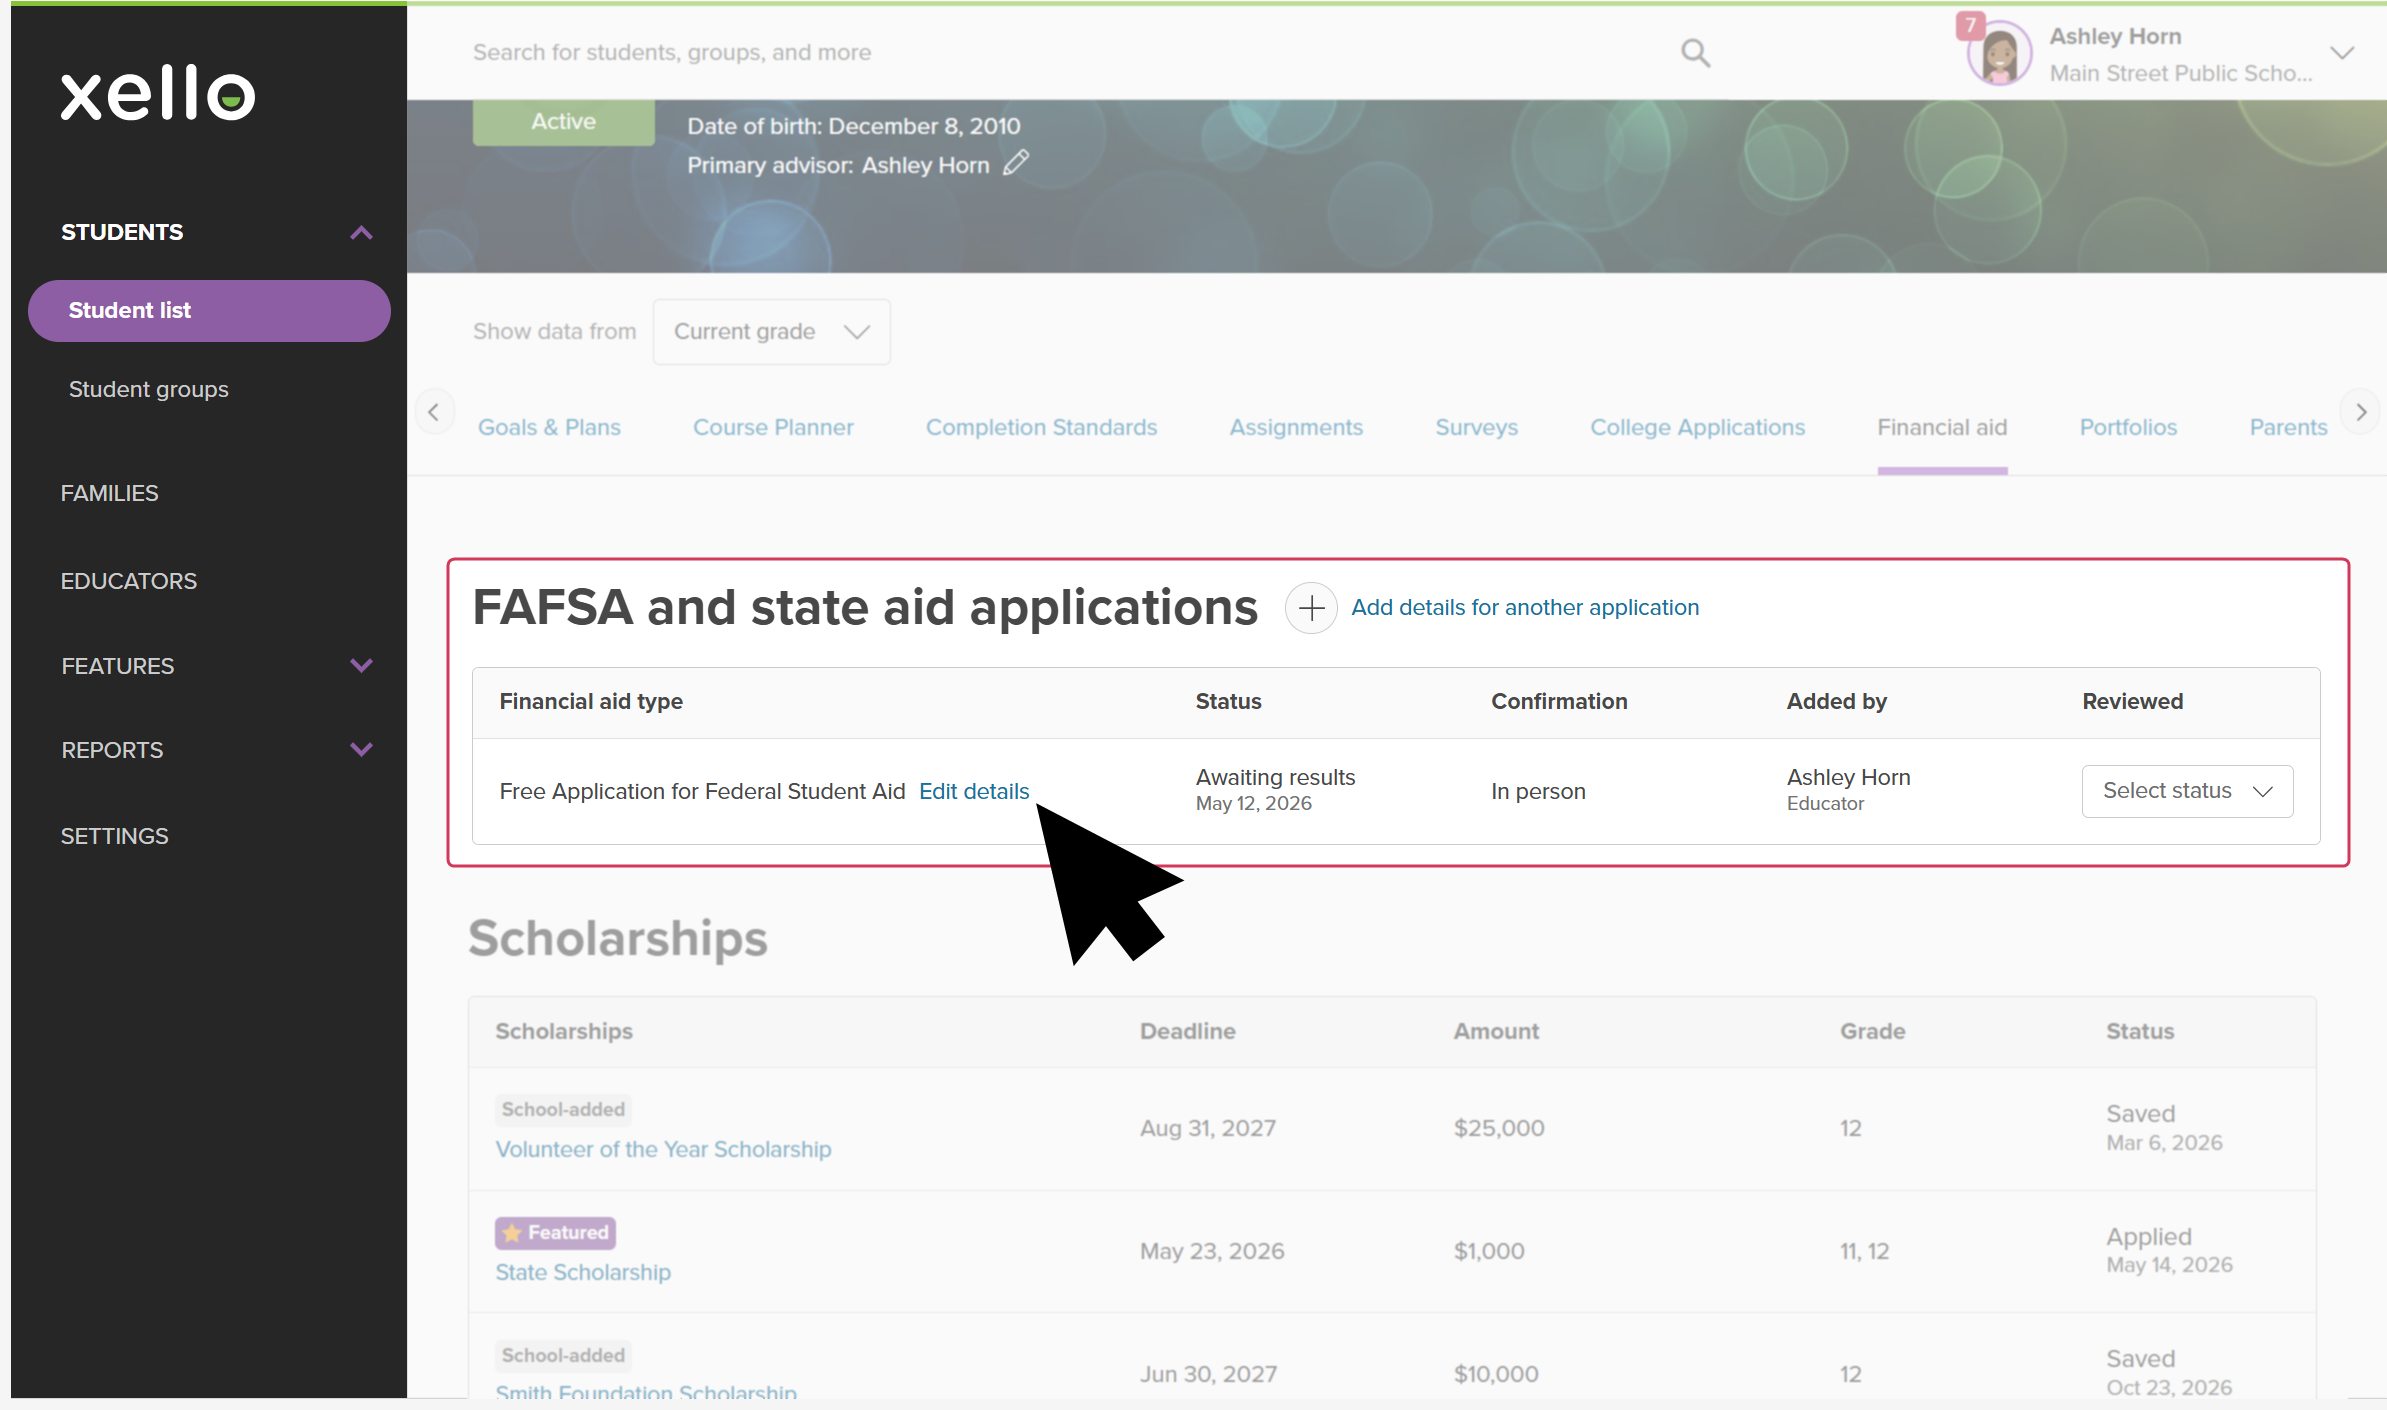
You can edit application details, update the status, or upload a new confirmation file for any entry created by you or the student.
How to edit application details:
- From the student's profile, click the Financial Aid tab.
Click to enlarge
- In the FAFSA and state aid applications section, click Edit next to the entry you'd like to update.
 Click to enlarge
- Make your changes to the status, option, or document upload, and click Save.
- A success banner will confirm your changes, and the entry's updated details will reflect across both educator and student views.
Review and verify application details
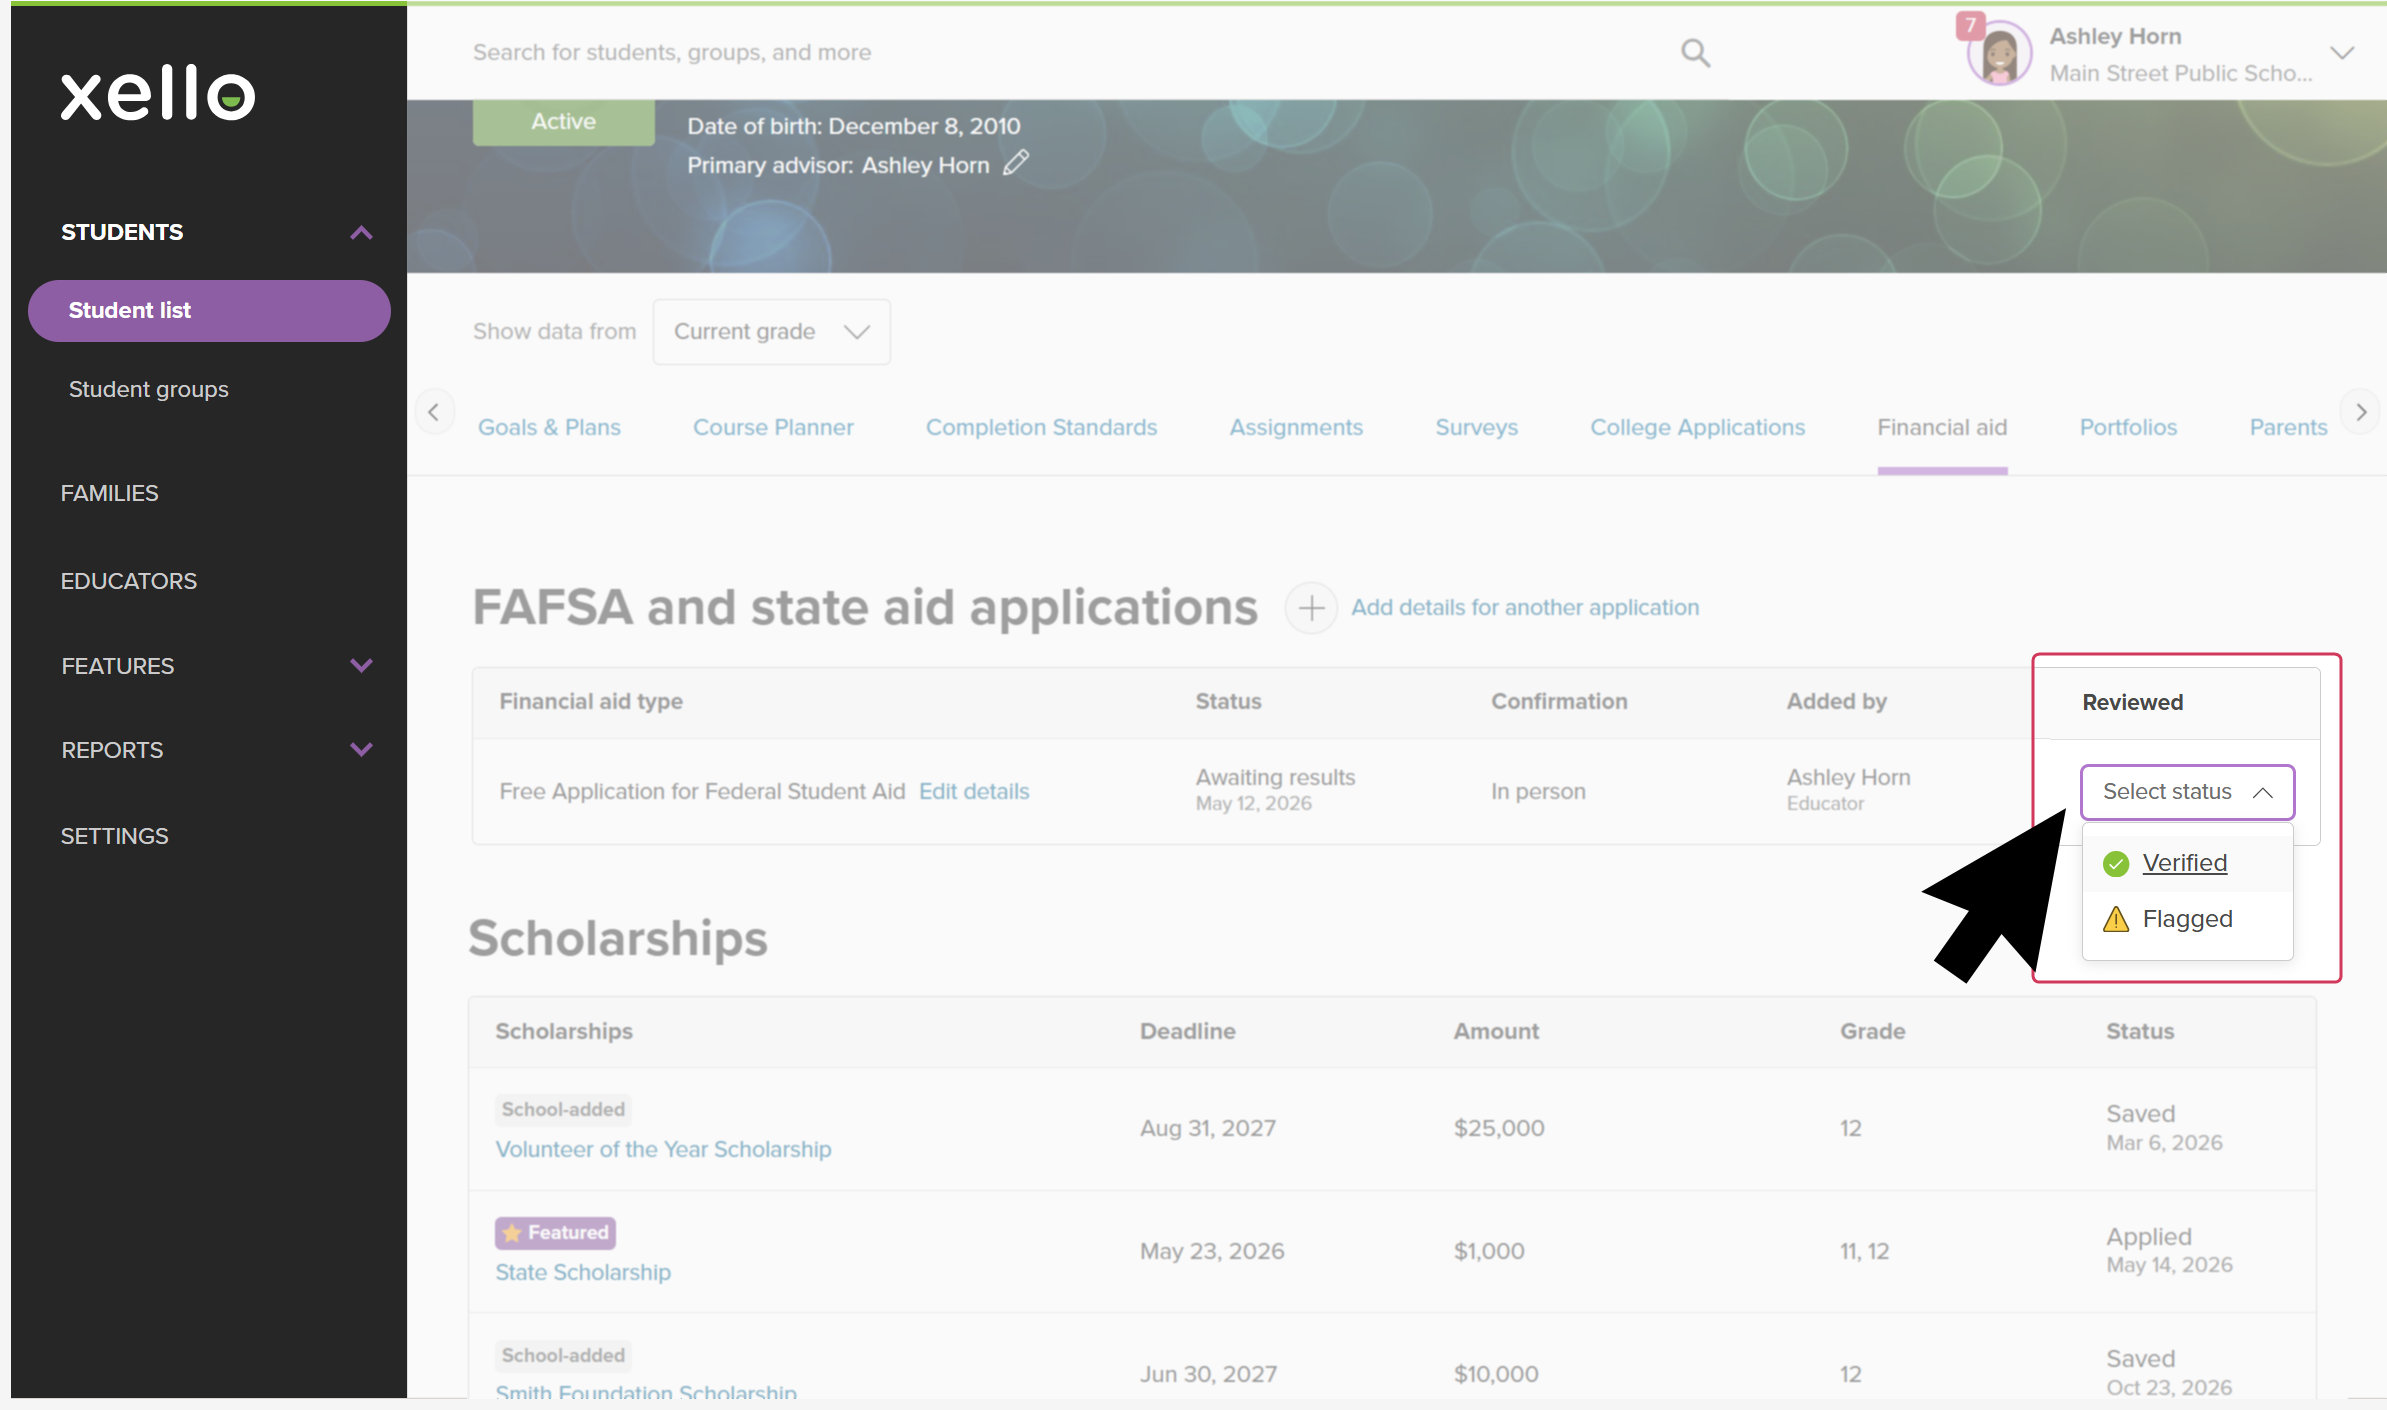
You can mark an entry as verified or flagged directly from the student's profile table without navigating to reports.
How to review and verify entries:
- From the student's profile, click the Financial Aid tab.
Click to enlarge
- In the FAFSA and state aid applications section, locate the Reviewed dropdown in the table row for that application.
- Select either Verified or Flagged.
 Click to enlarge
Delete financial aid application details
Educators can delete financial aid entries when necessary.
To delete FAFSA and state aid details:
- From the student's profile, click the Financial Aid tab.
Click to enlarge
- In the FAFSA and state aid applications section, click Edit next to the entry you'd like to update.
Click to enlarge
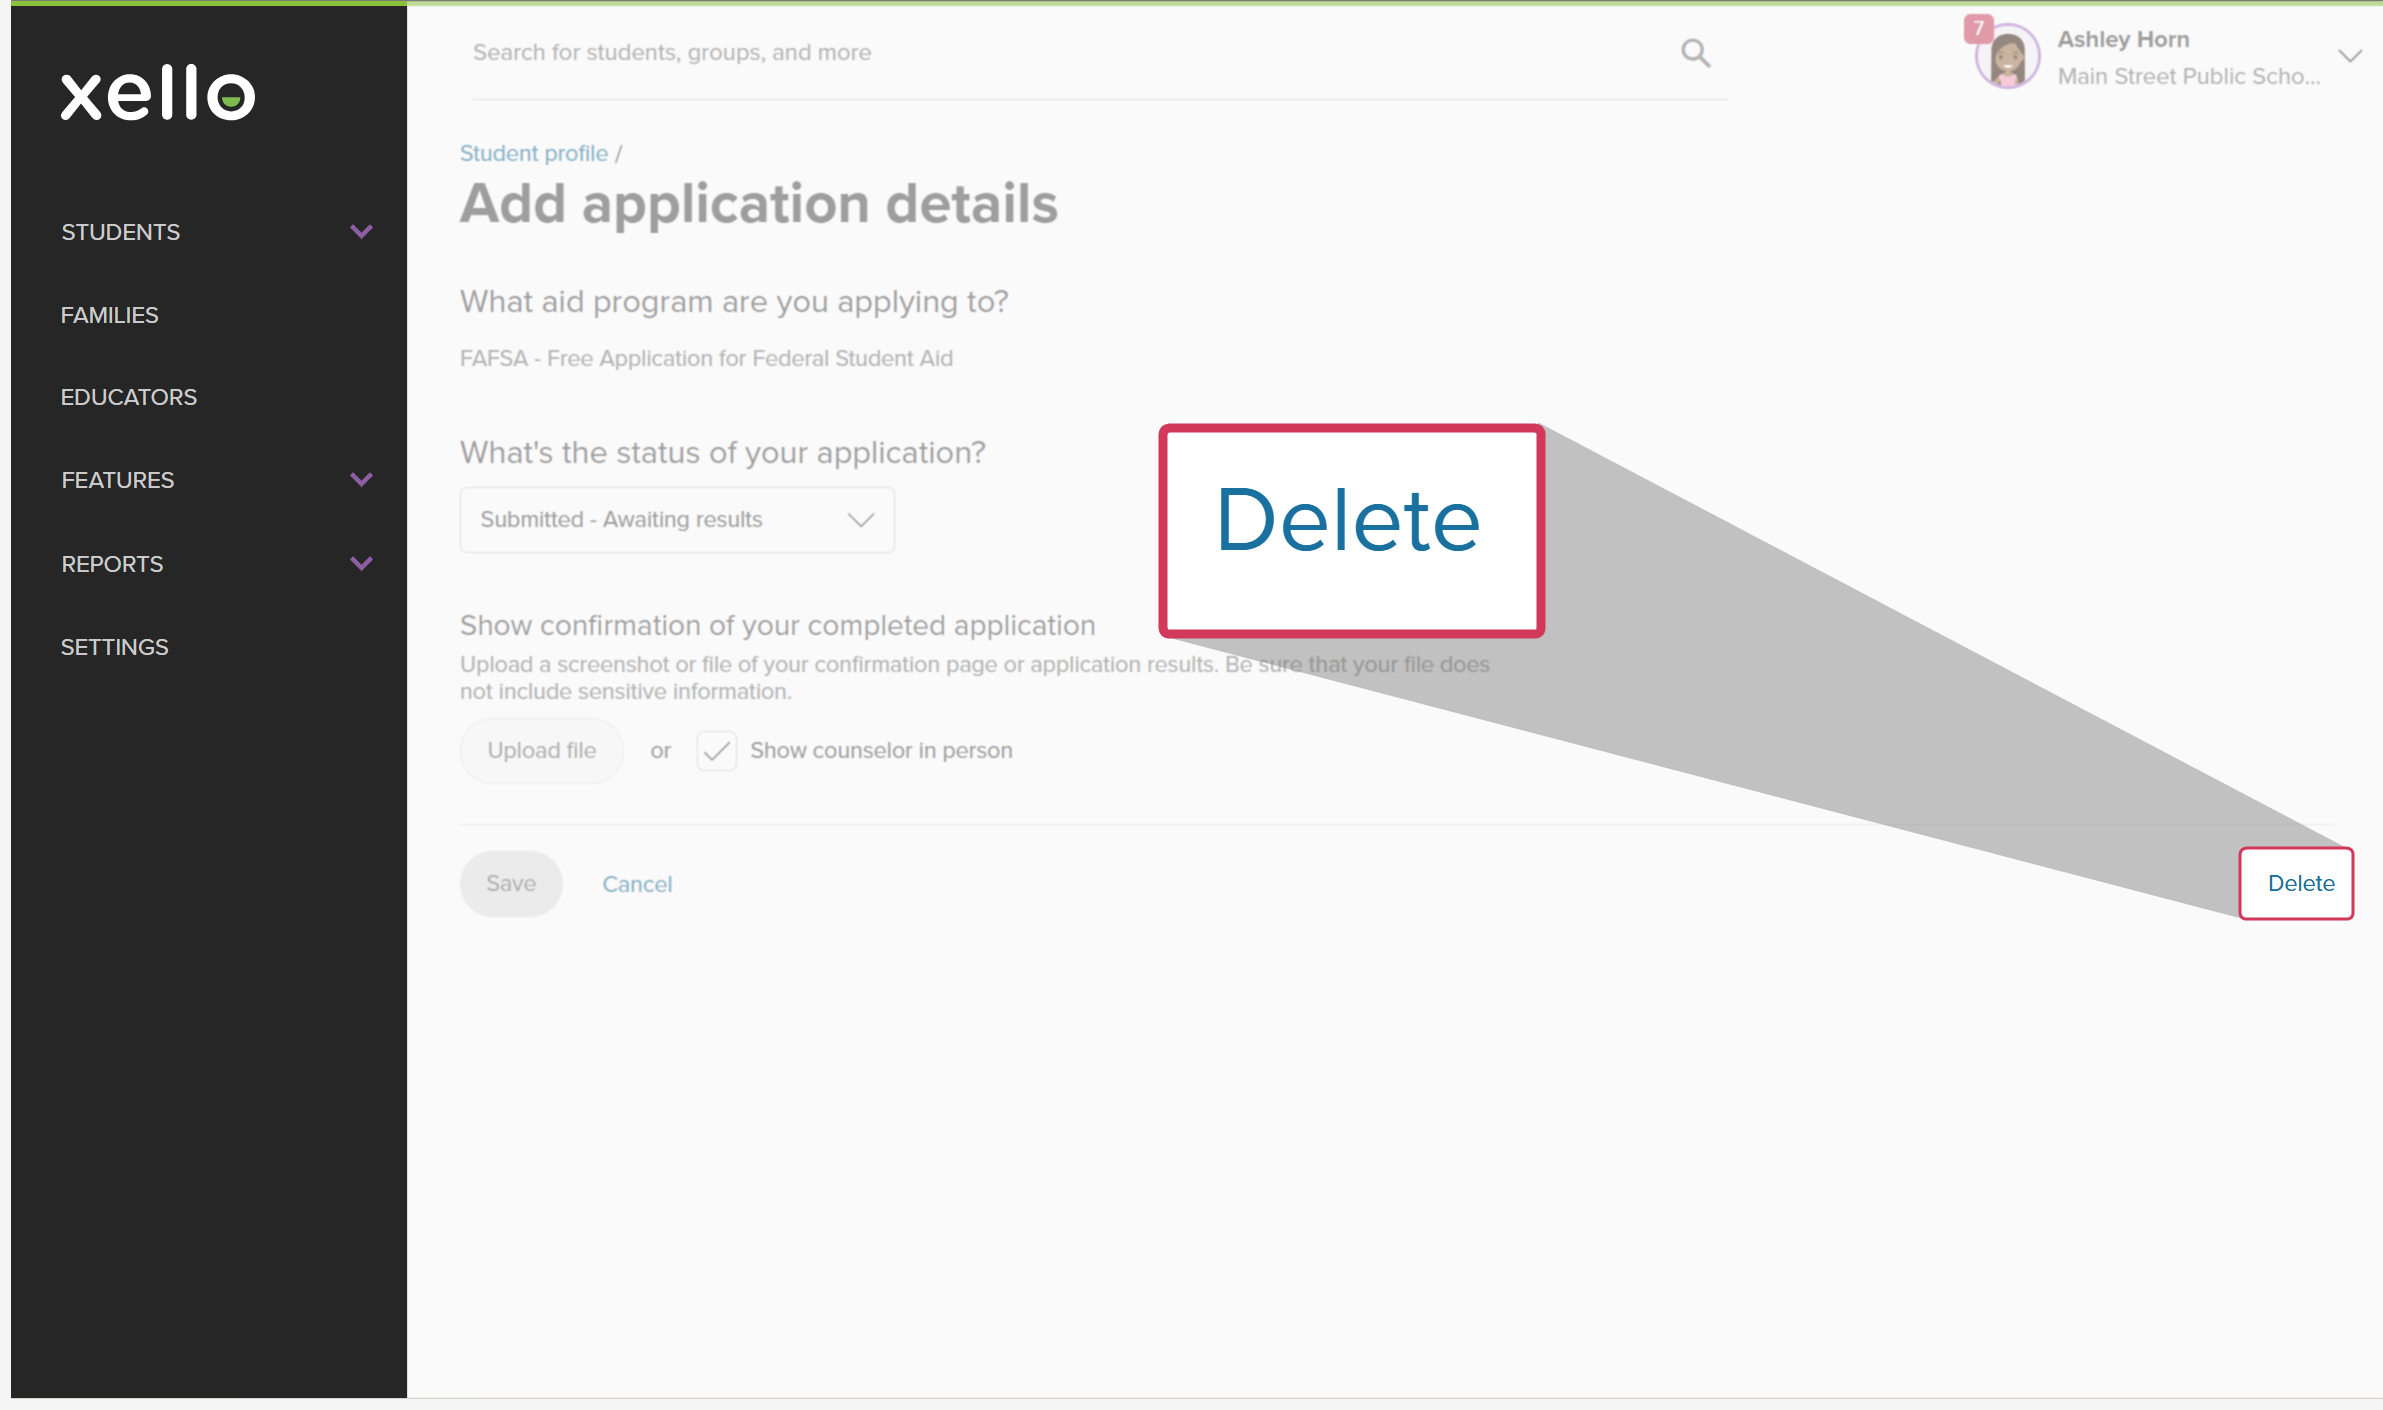
- At the bottom right, click Delete.
 Click to enlarge
- Confirm that you want to delete the entry in the modal window.
- A success banner will confirm the deletion, and the entry will no longer display in the student's profile.